Simulating Catheter Navigation through Anatomy
Overview
In this tutorial, we combine the anatomical models created in Creating an Anatomical Model with the catheter simulation from Creating and Testing a Catheter Model. The catheter generator script accepts a --slicer-scene argument that reads the saved anatomy scene and embeds the STL mesh files as static bodies in the Gazebo world. This allows the catheter to be navigated through a patient-specific anatomical environment and visualized simultaneously in Gazebo, RViz, and 3D Slicer.
Prerequisites: Complete both Creating an Anatomical Model and Creating and Testing a Catheter Model before starting this tutorial. You will need the anatomy scene file saved at ~/Documents/anatomy_scene/.
Part 1: Regenerate the Catheter Package with Anatomy
Step 1: Generate the Catheter Package with the Anatomy Scene
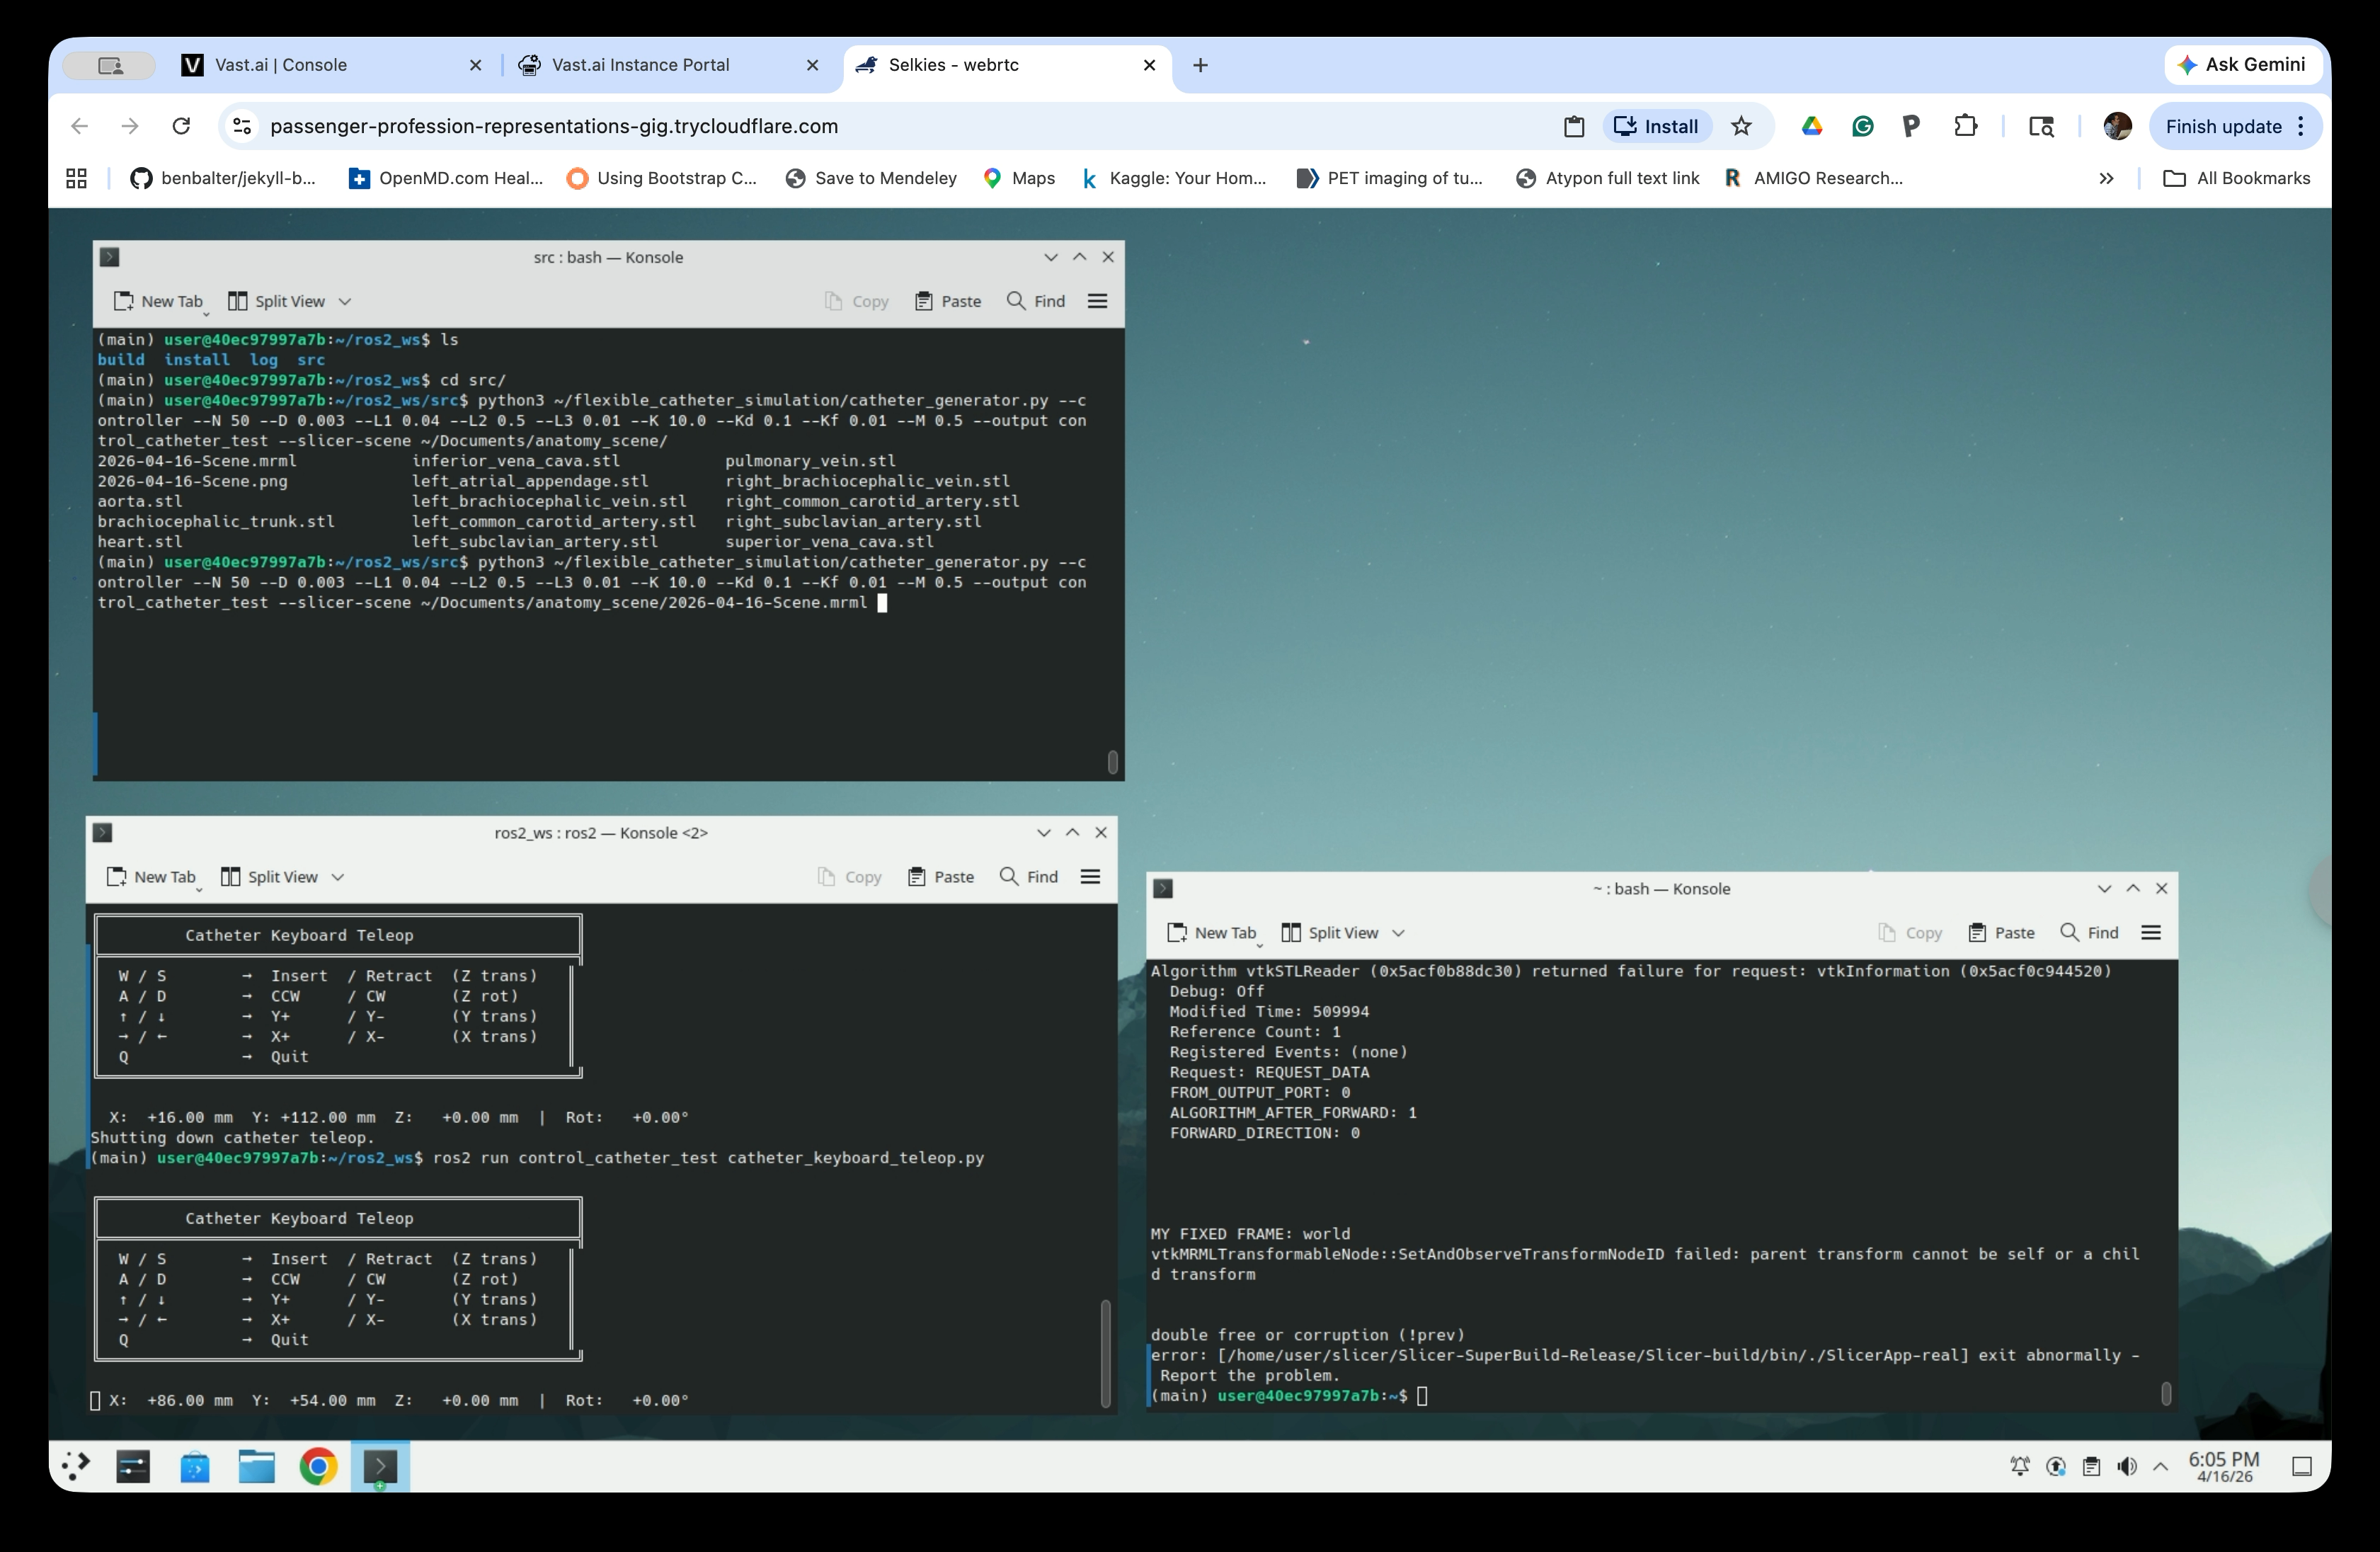
Navigate to the ROS2 workspace source directory and run the catheter generator with the --slicer-scene flag pointing to the anatomy scene saved in the previous tutorial:
ls ~/Documents/anatomy_scene # Check the MRML file name
cd ~/ros2_ws/src
python3 ~/flexible_catheter_simulation/catheter_generator.py \
    --controller \
    --N 50 --D 0.003 --L1 0.04 --L2 0.5 --L3 0.01 \
    --K 10.0 --Kd 0.1 --Kf 0.01 --M 0.5 \
    --output control_catheter_test \
    --slicer-scene ~/Documents/anatomy_scene/2026-04-16-Scene.mrml # Replace the MRML file name with the one found above
The --slicer-scene argument reads the anatomy scene file and includes the STL meshes (heart, aorta, vessels, etc.) as static entities in the Gazebo world. The script prints the list of anatomy files it found and includes them as anatomy_link_* bodies in the generated package.
The generated package now contains both the catheter URDF and anatomy mesh files, with each anatomical structure added as a static link.
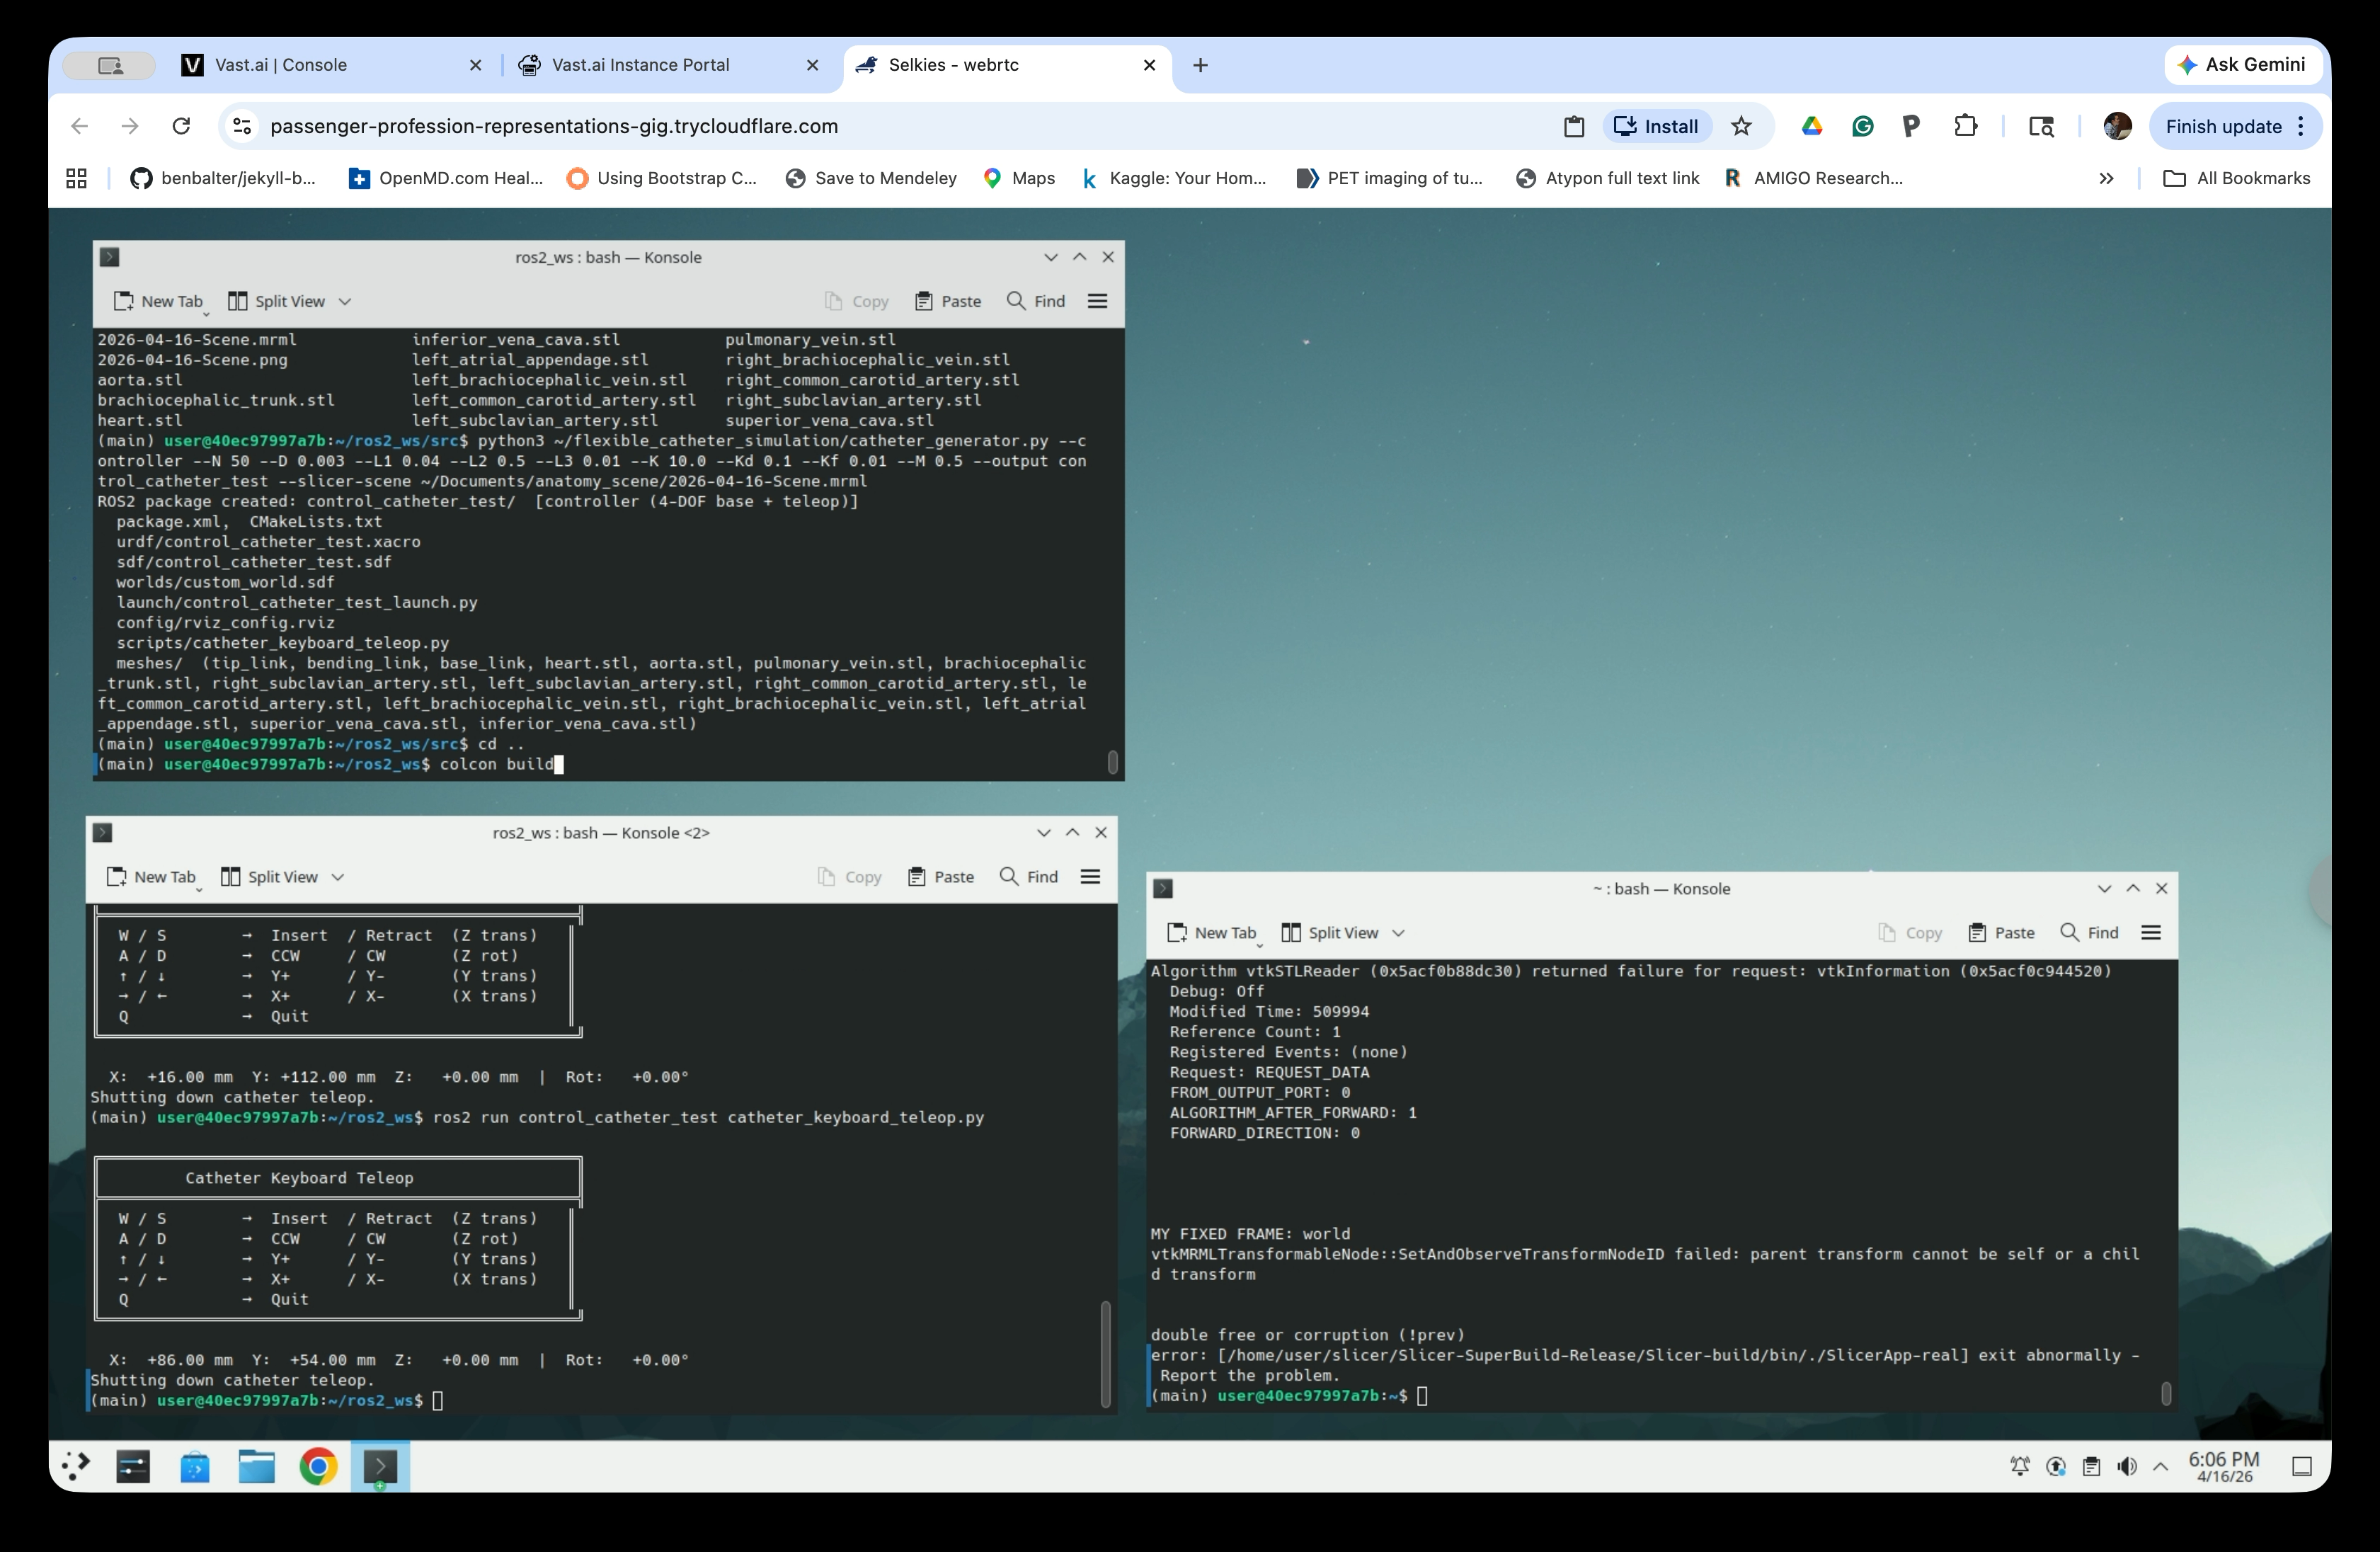
Step 2: Build the Workspace
cd ..
colcon build
Wait for the build to complete, then launch the simulation (see below).
Part 2: Launch the Simulation with Anatomy
Step 3: Launch the Catheter Simulation
Source the workspace and launch:
source install/setup.bash
ros2 launch control_catheter_test control_catheter_test_launch.py
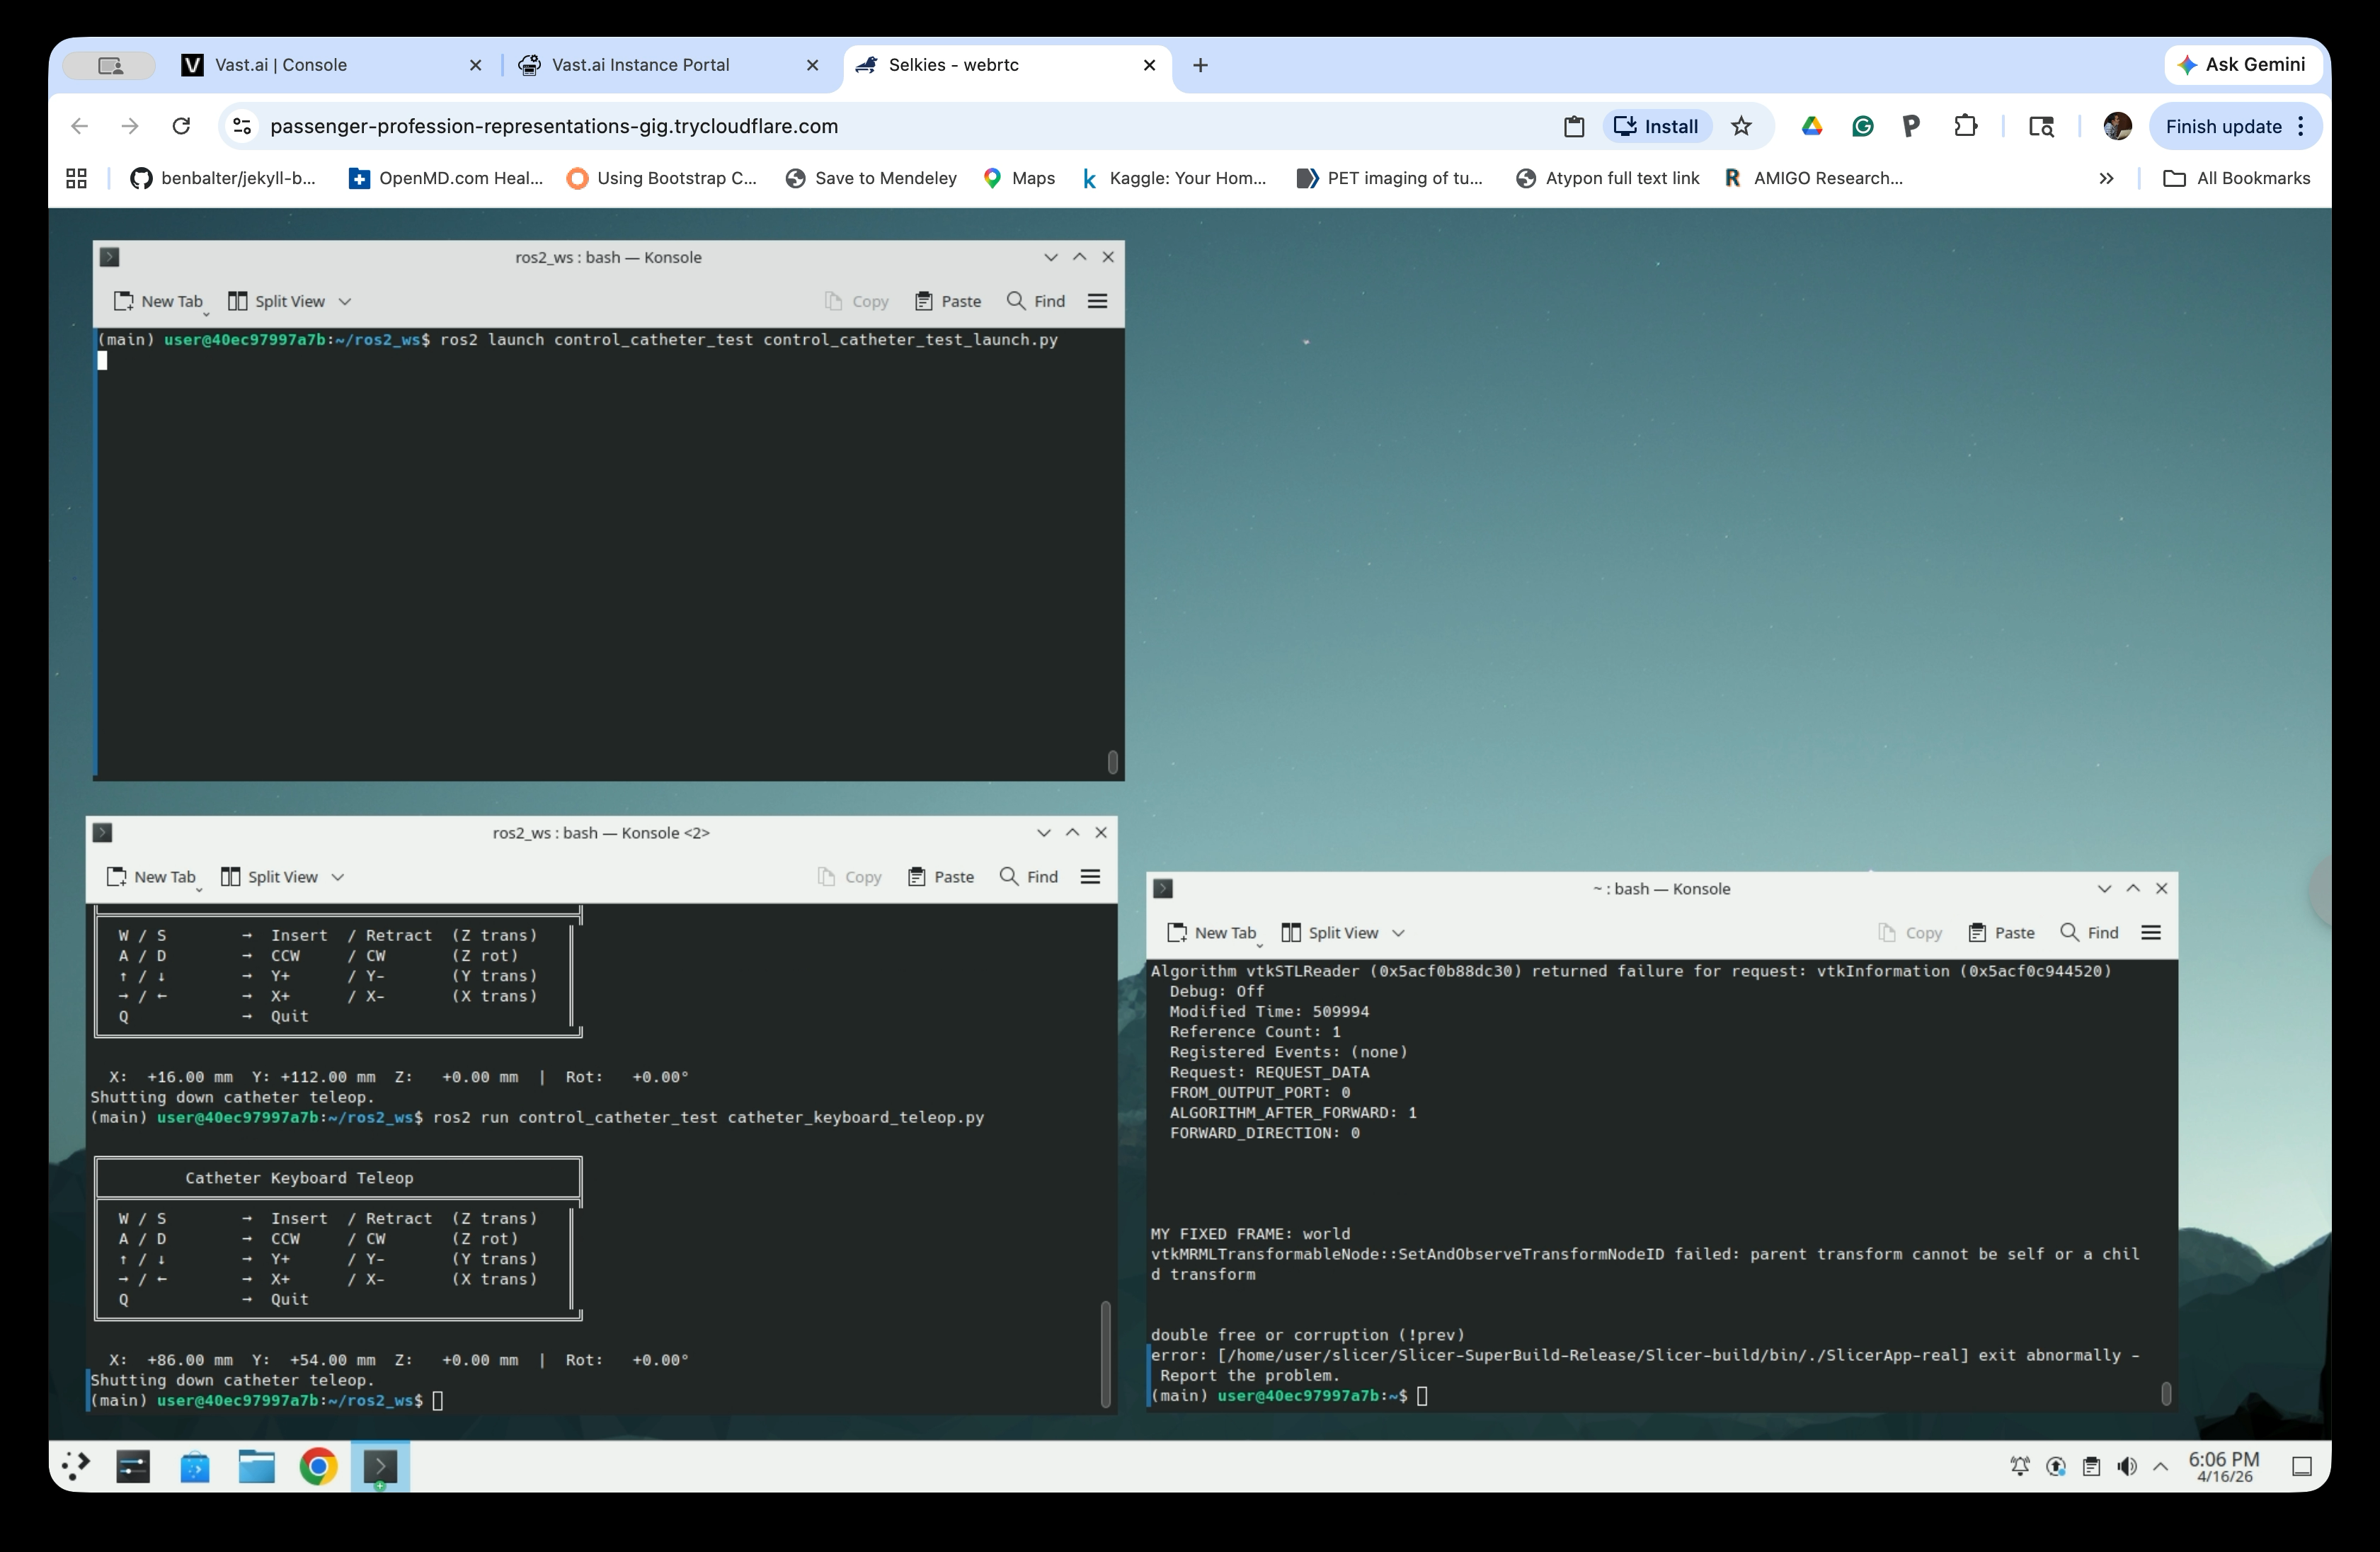
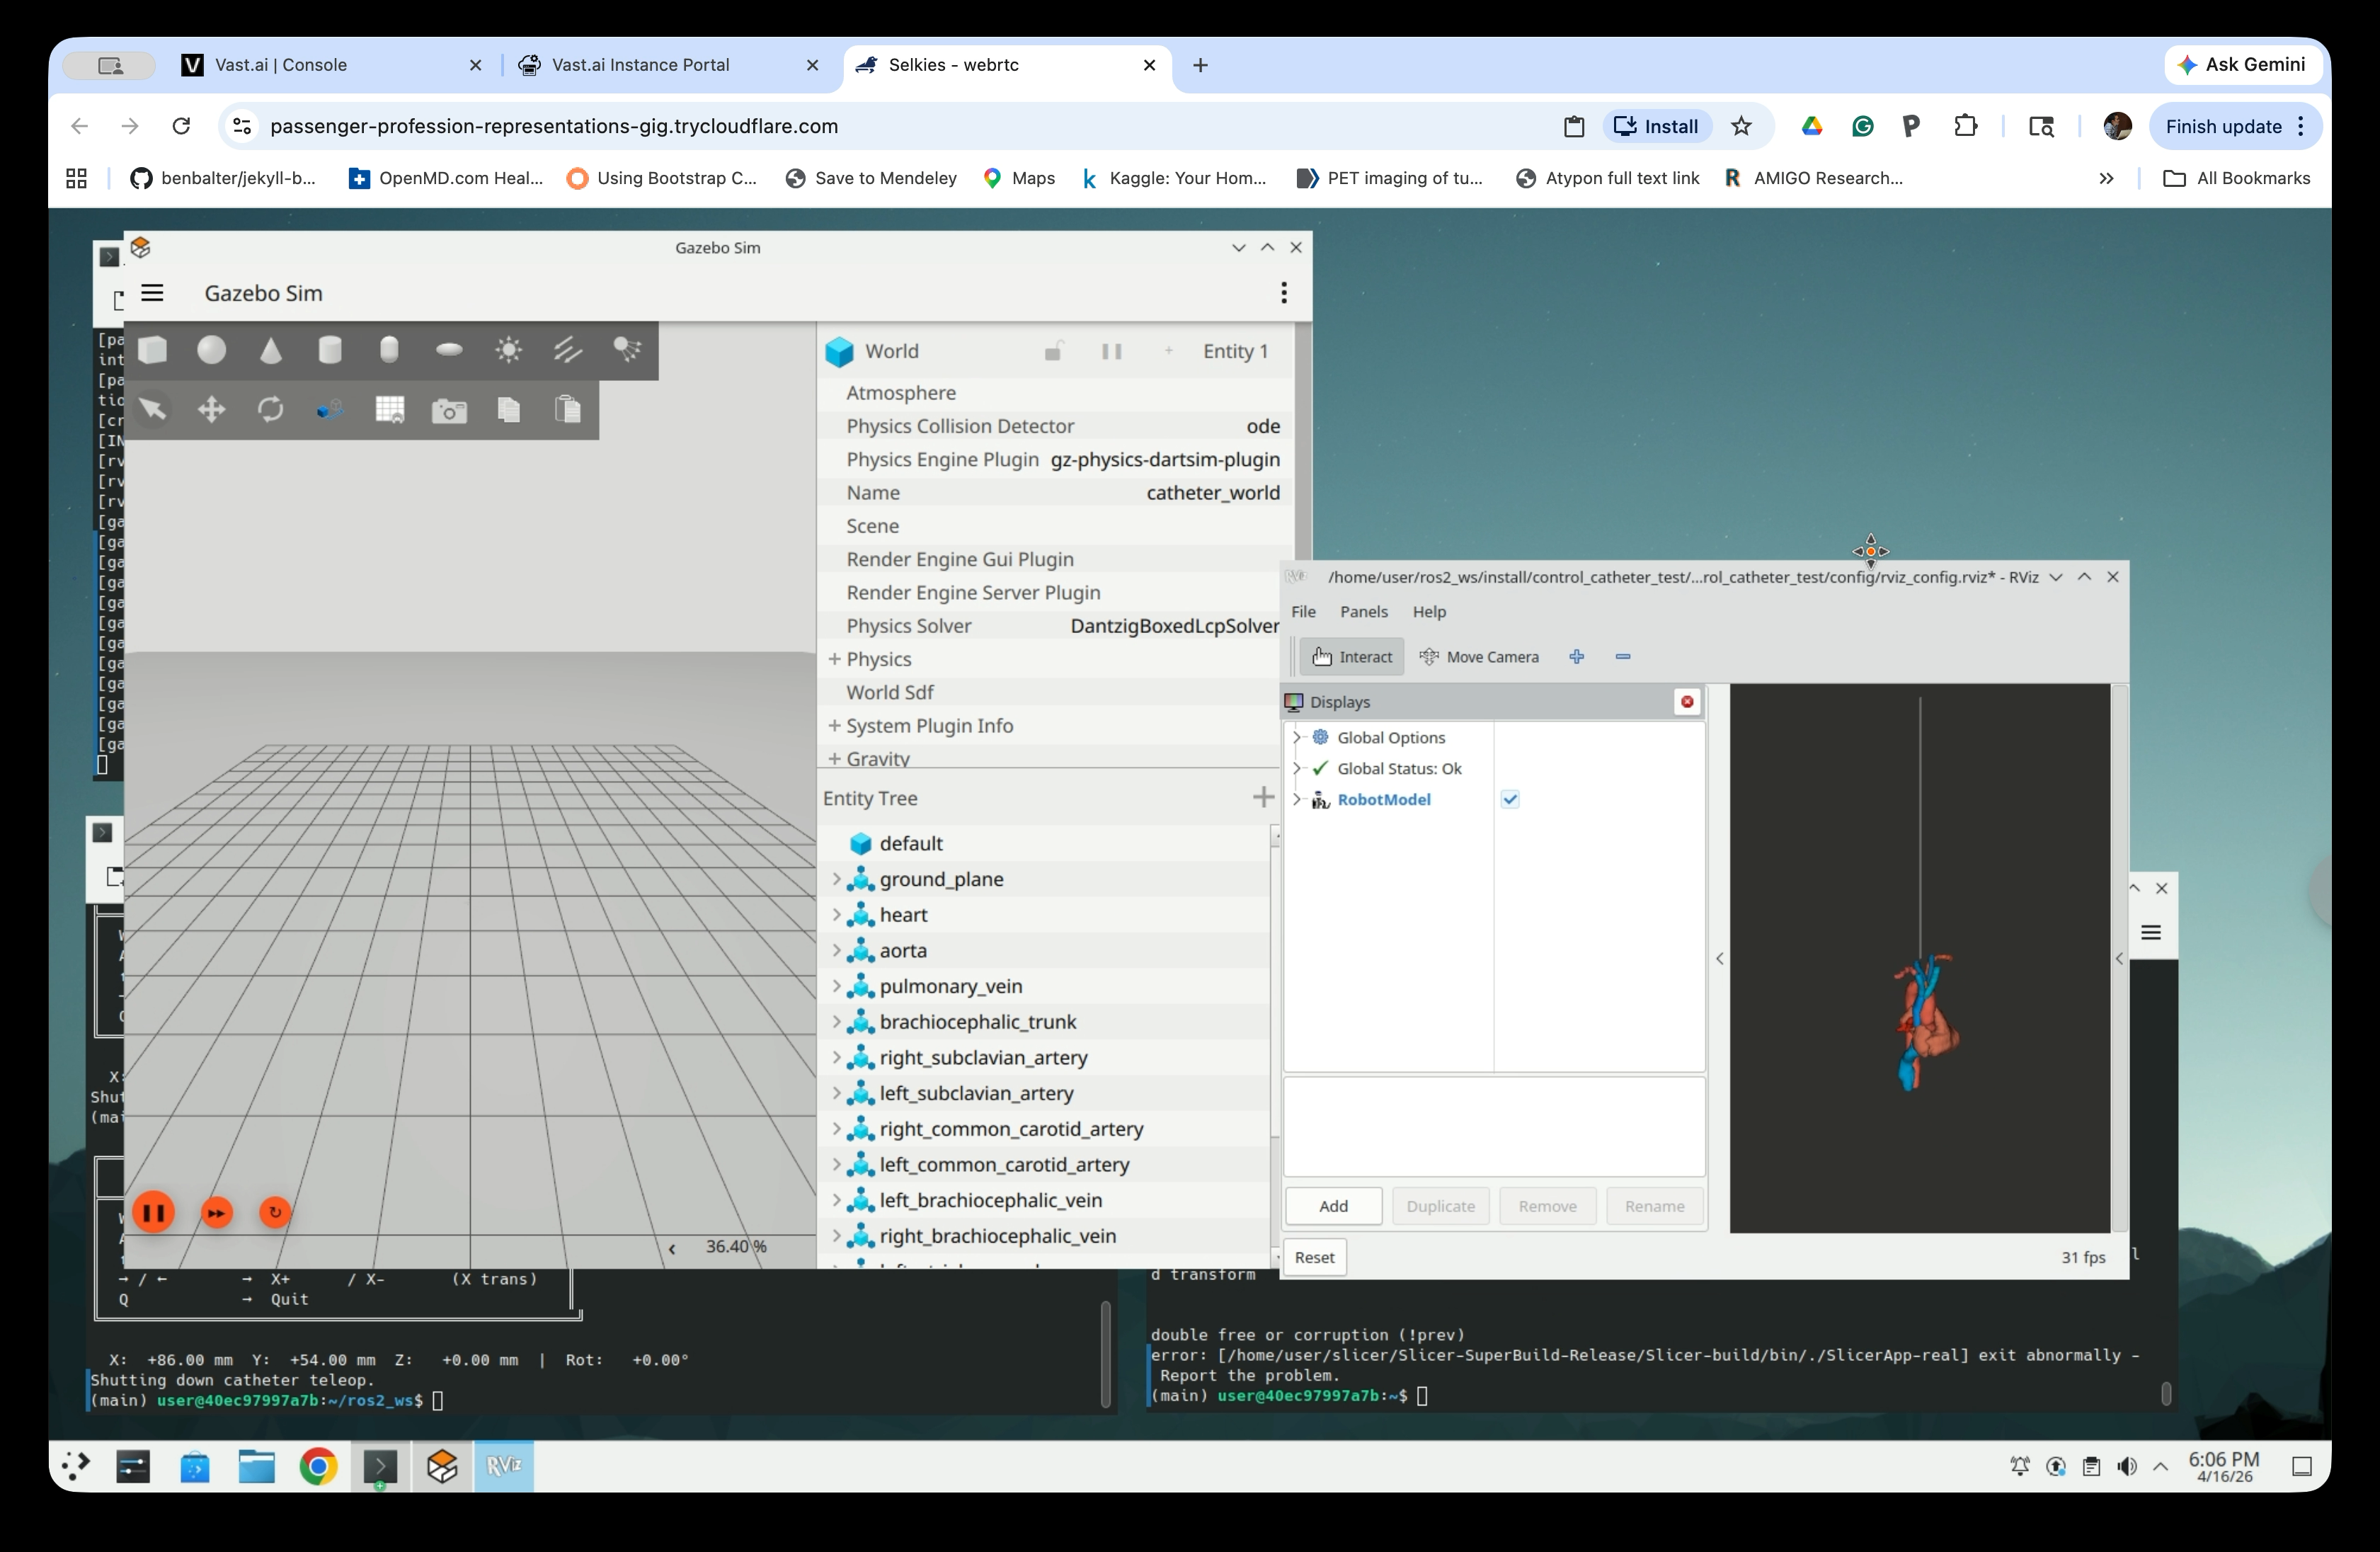
Gazebo Sim and RViz will open. The Gazebo Entity Tree now lists all the anatomical structures alongside the catheter (heart, aorta, pulmonary_vein, brachocephalic_trunk, right_subclavian_artery, etc.). RViz shows the full anatomy rendered in 3D.
Step 4: Explore the Views
Zoom into the Gazebo viewport to see the catheter (thin line) positioned near the anatomical models.
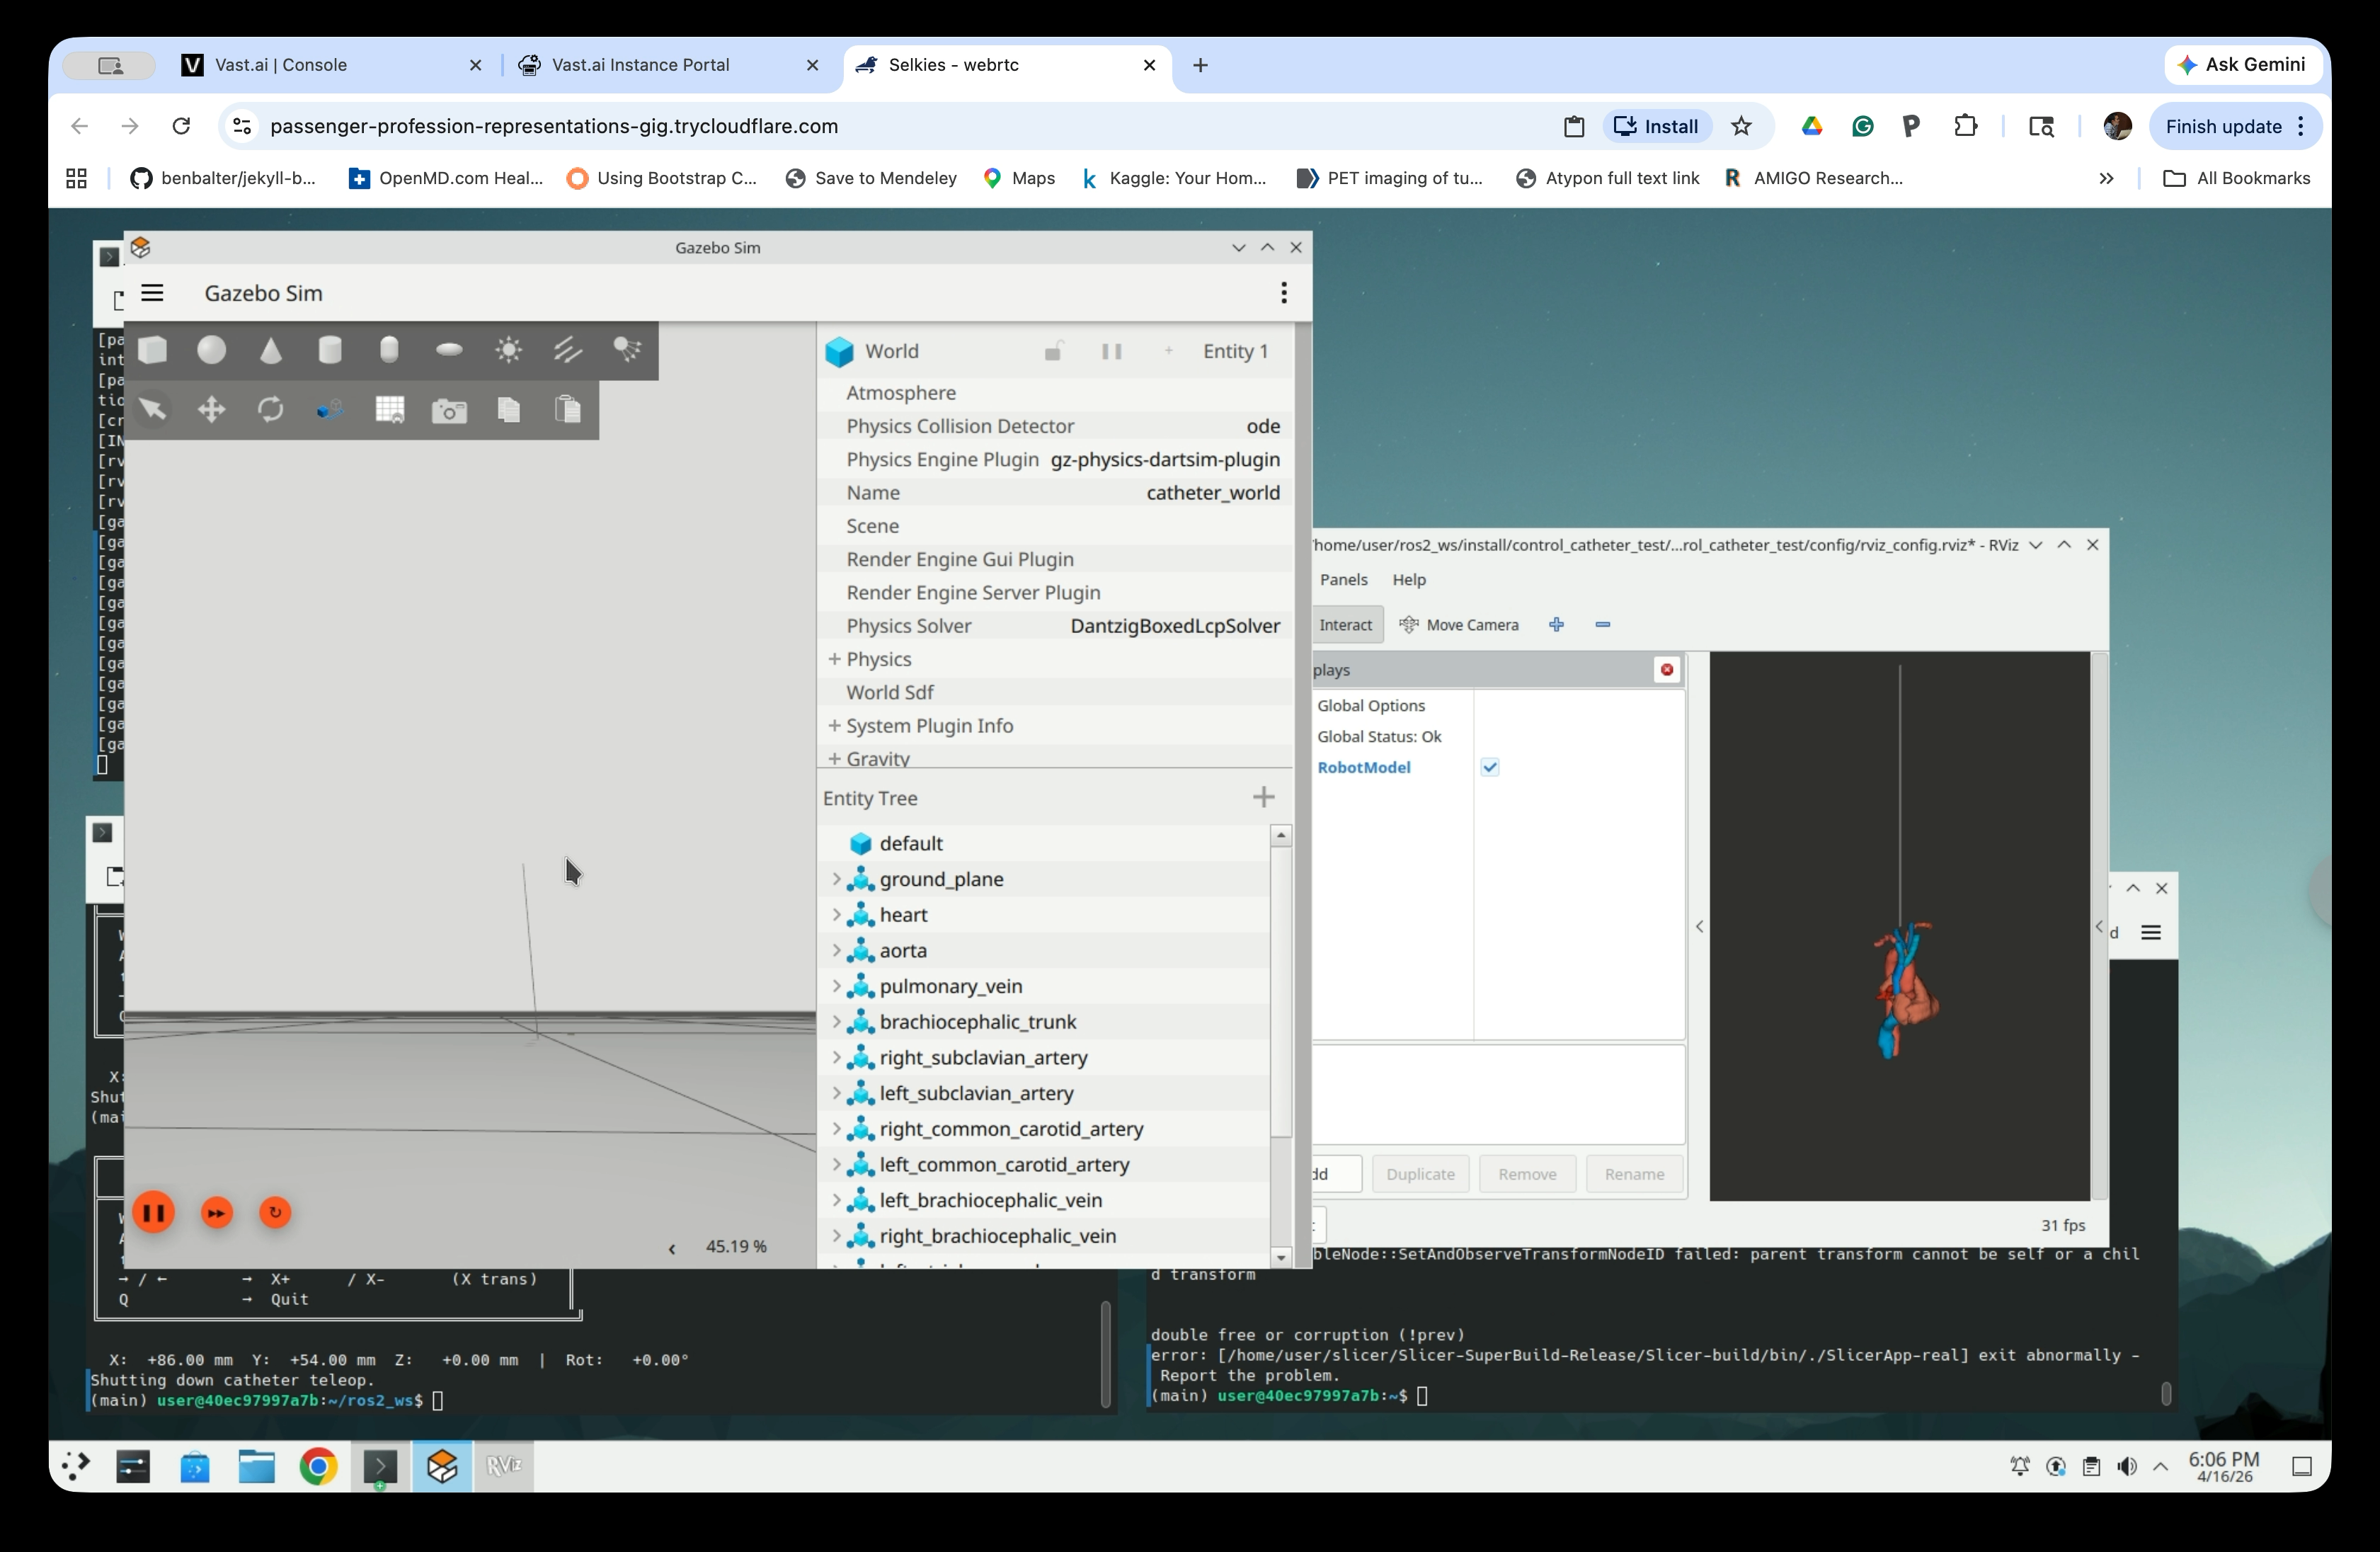
Continue zooming to see the catheter and anatomy detail. The catheter starts above the anatomy at its default spawn position.

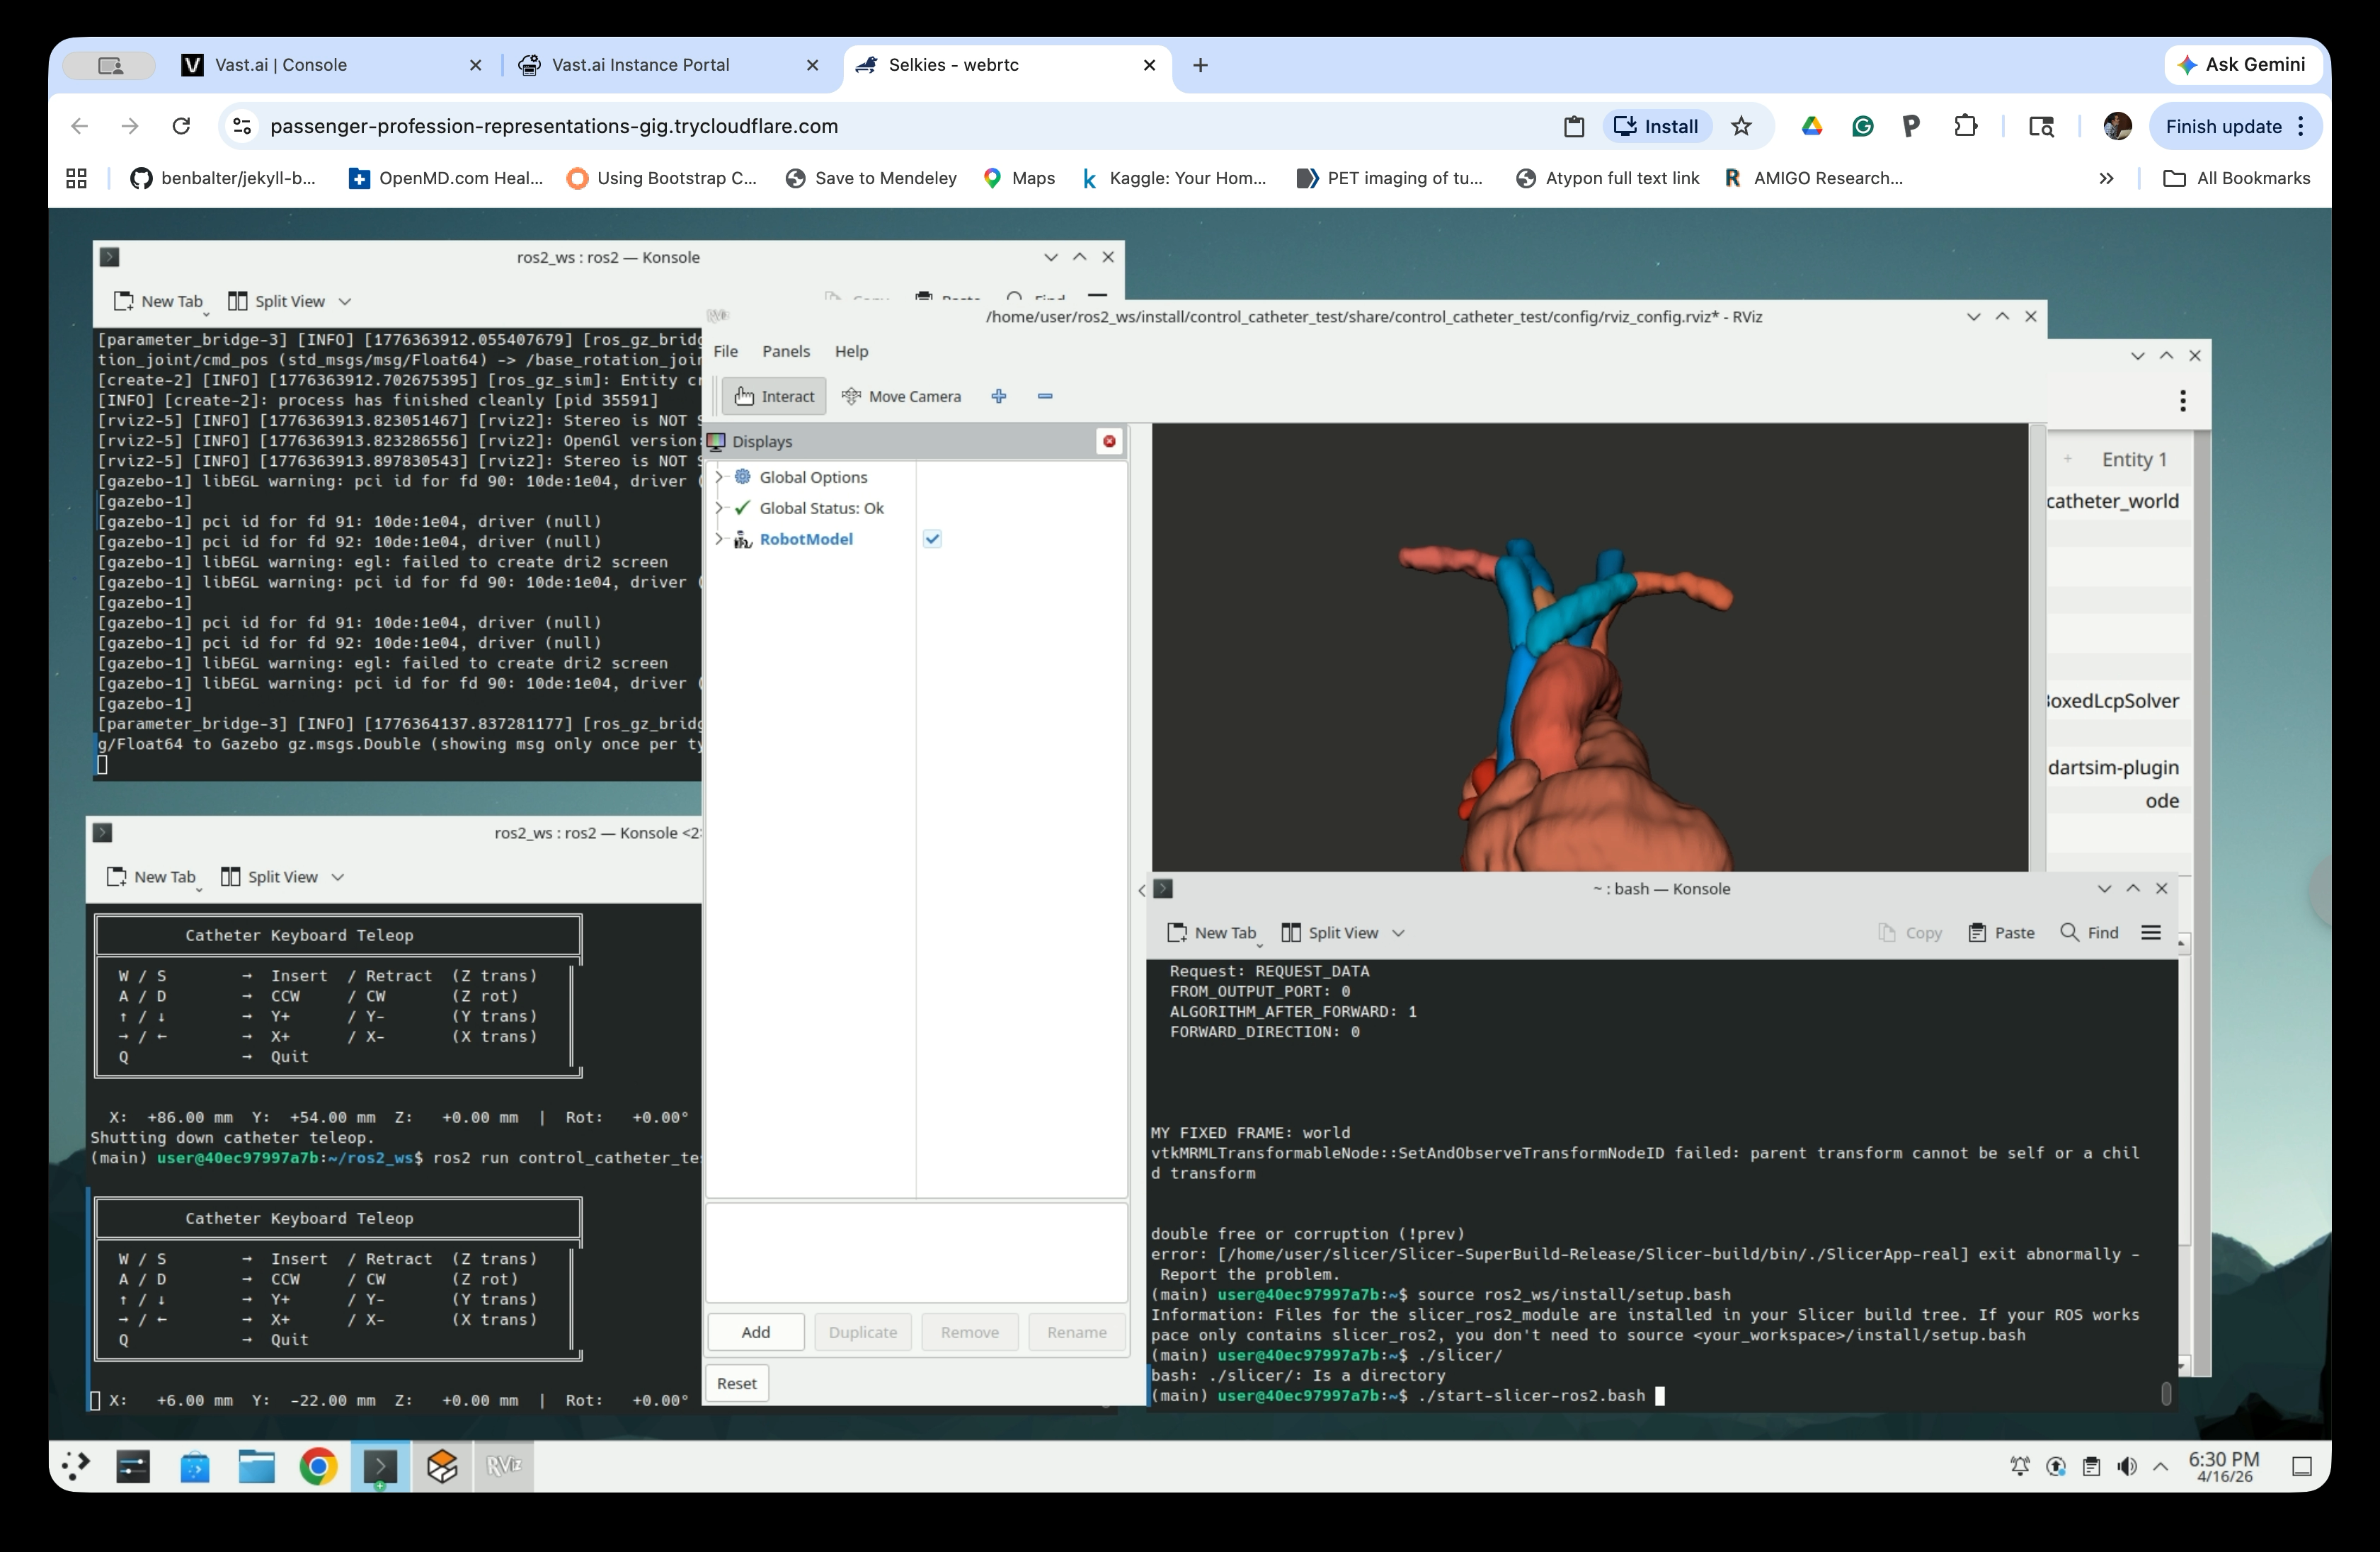
In RViz, the anatomy is rendered as colored surface models with the catheter visible as a thin line entering from below. In Gazebo, the anatomy may be hidden under the ground (z=0) and invisible until bringing the view point below the ground.
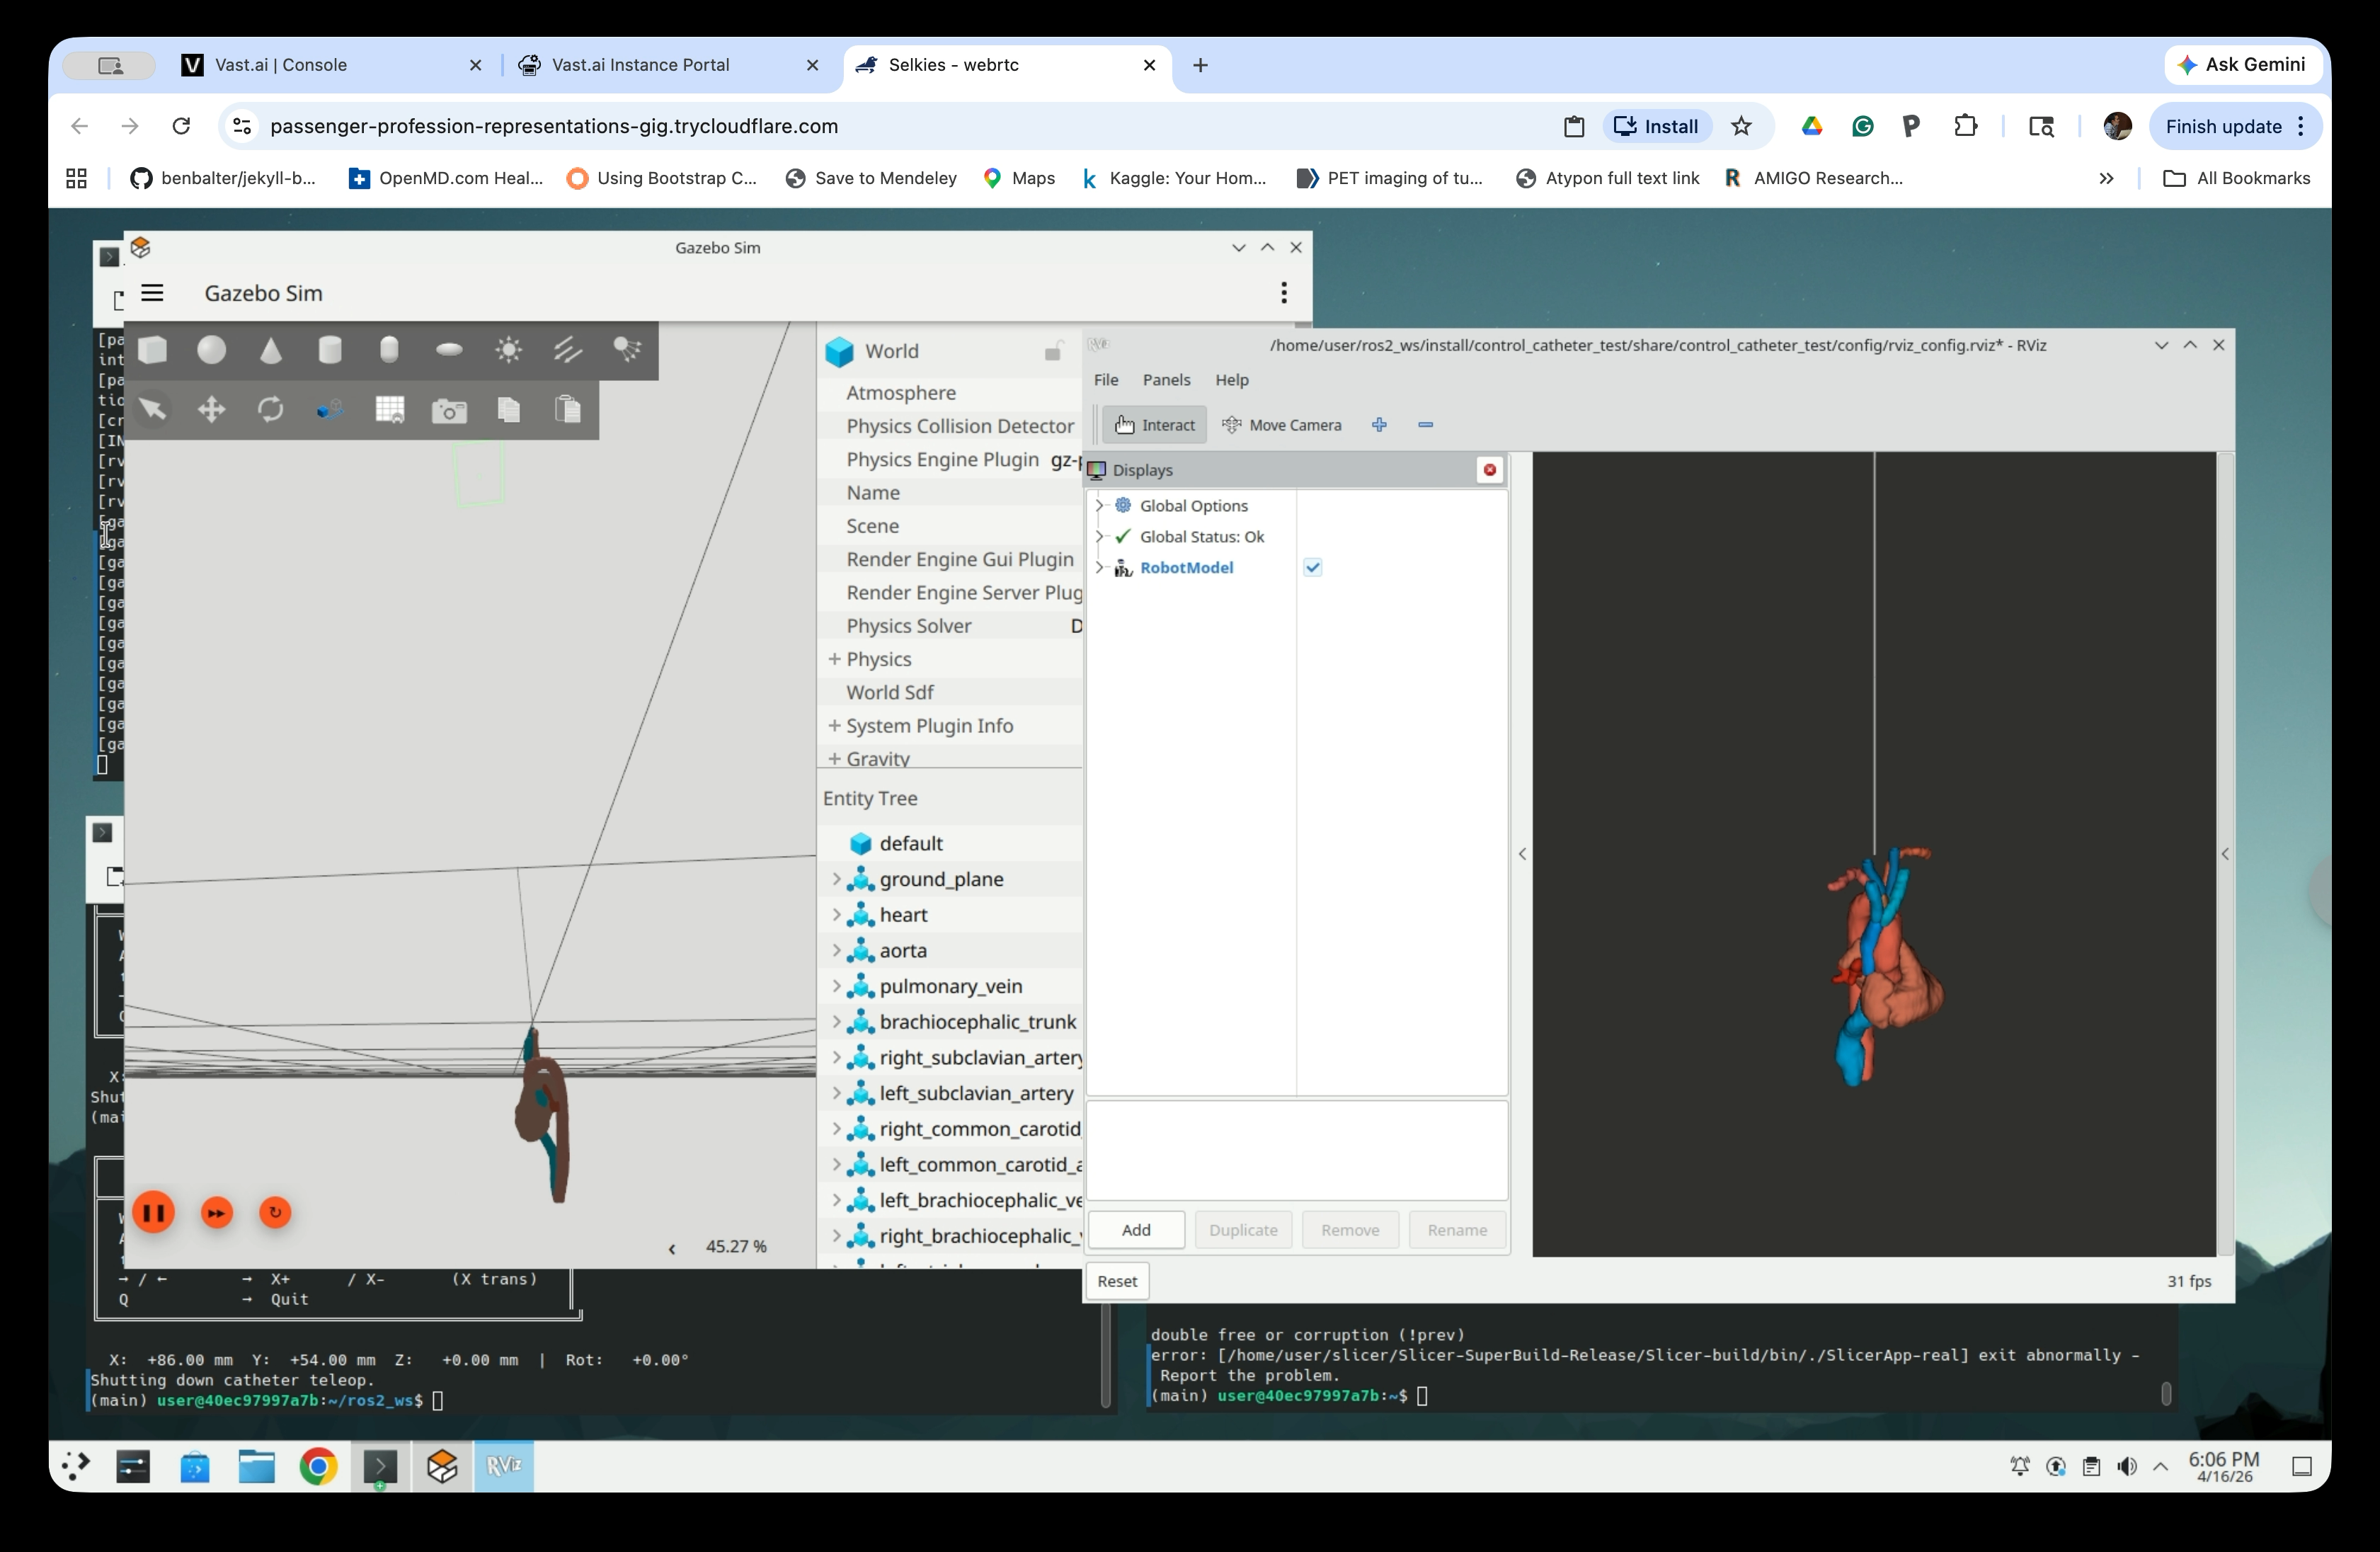
Part 3: Position the Catheter Below the Anatomy
The catheter spawns at the world origin by default, which may place it inside or above the anatomy. Use the initial_z launch argument to shift the catheter’s starting position downward so it begins below the anatomy for a realistic insertion simulation.
Step 5: Relaunch with an Initial Z Offset
Stop the current simulation (Ctrl+C in the launch terminal), then relaunch with the offset:
ros2 launch control_catheter_test control_catheter_test_launch.py initial_z:=-0.9
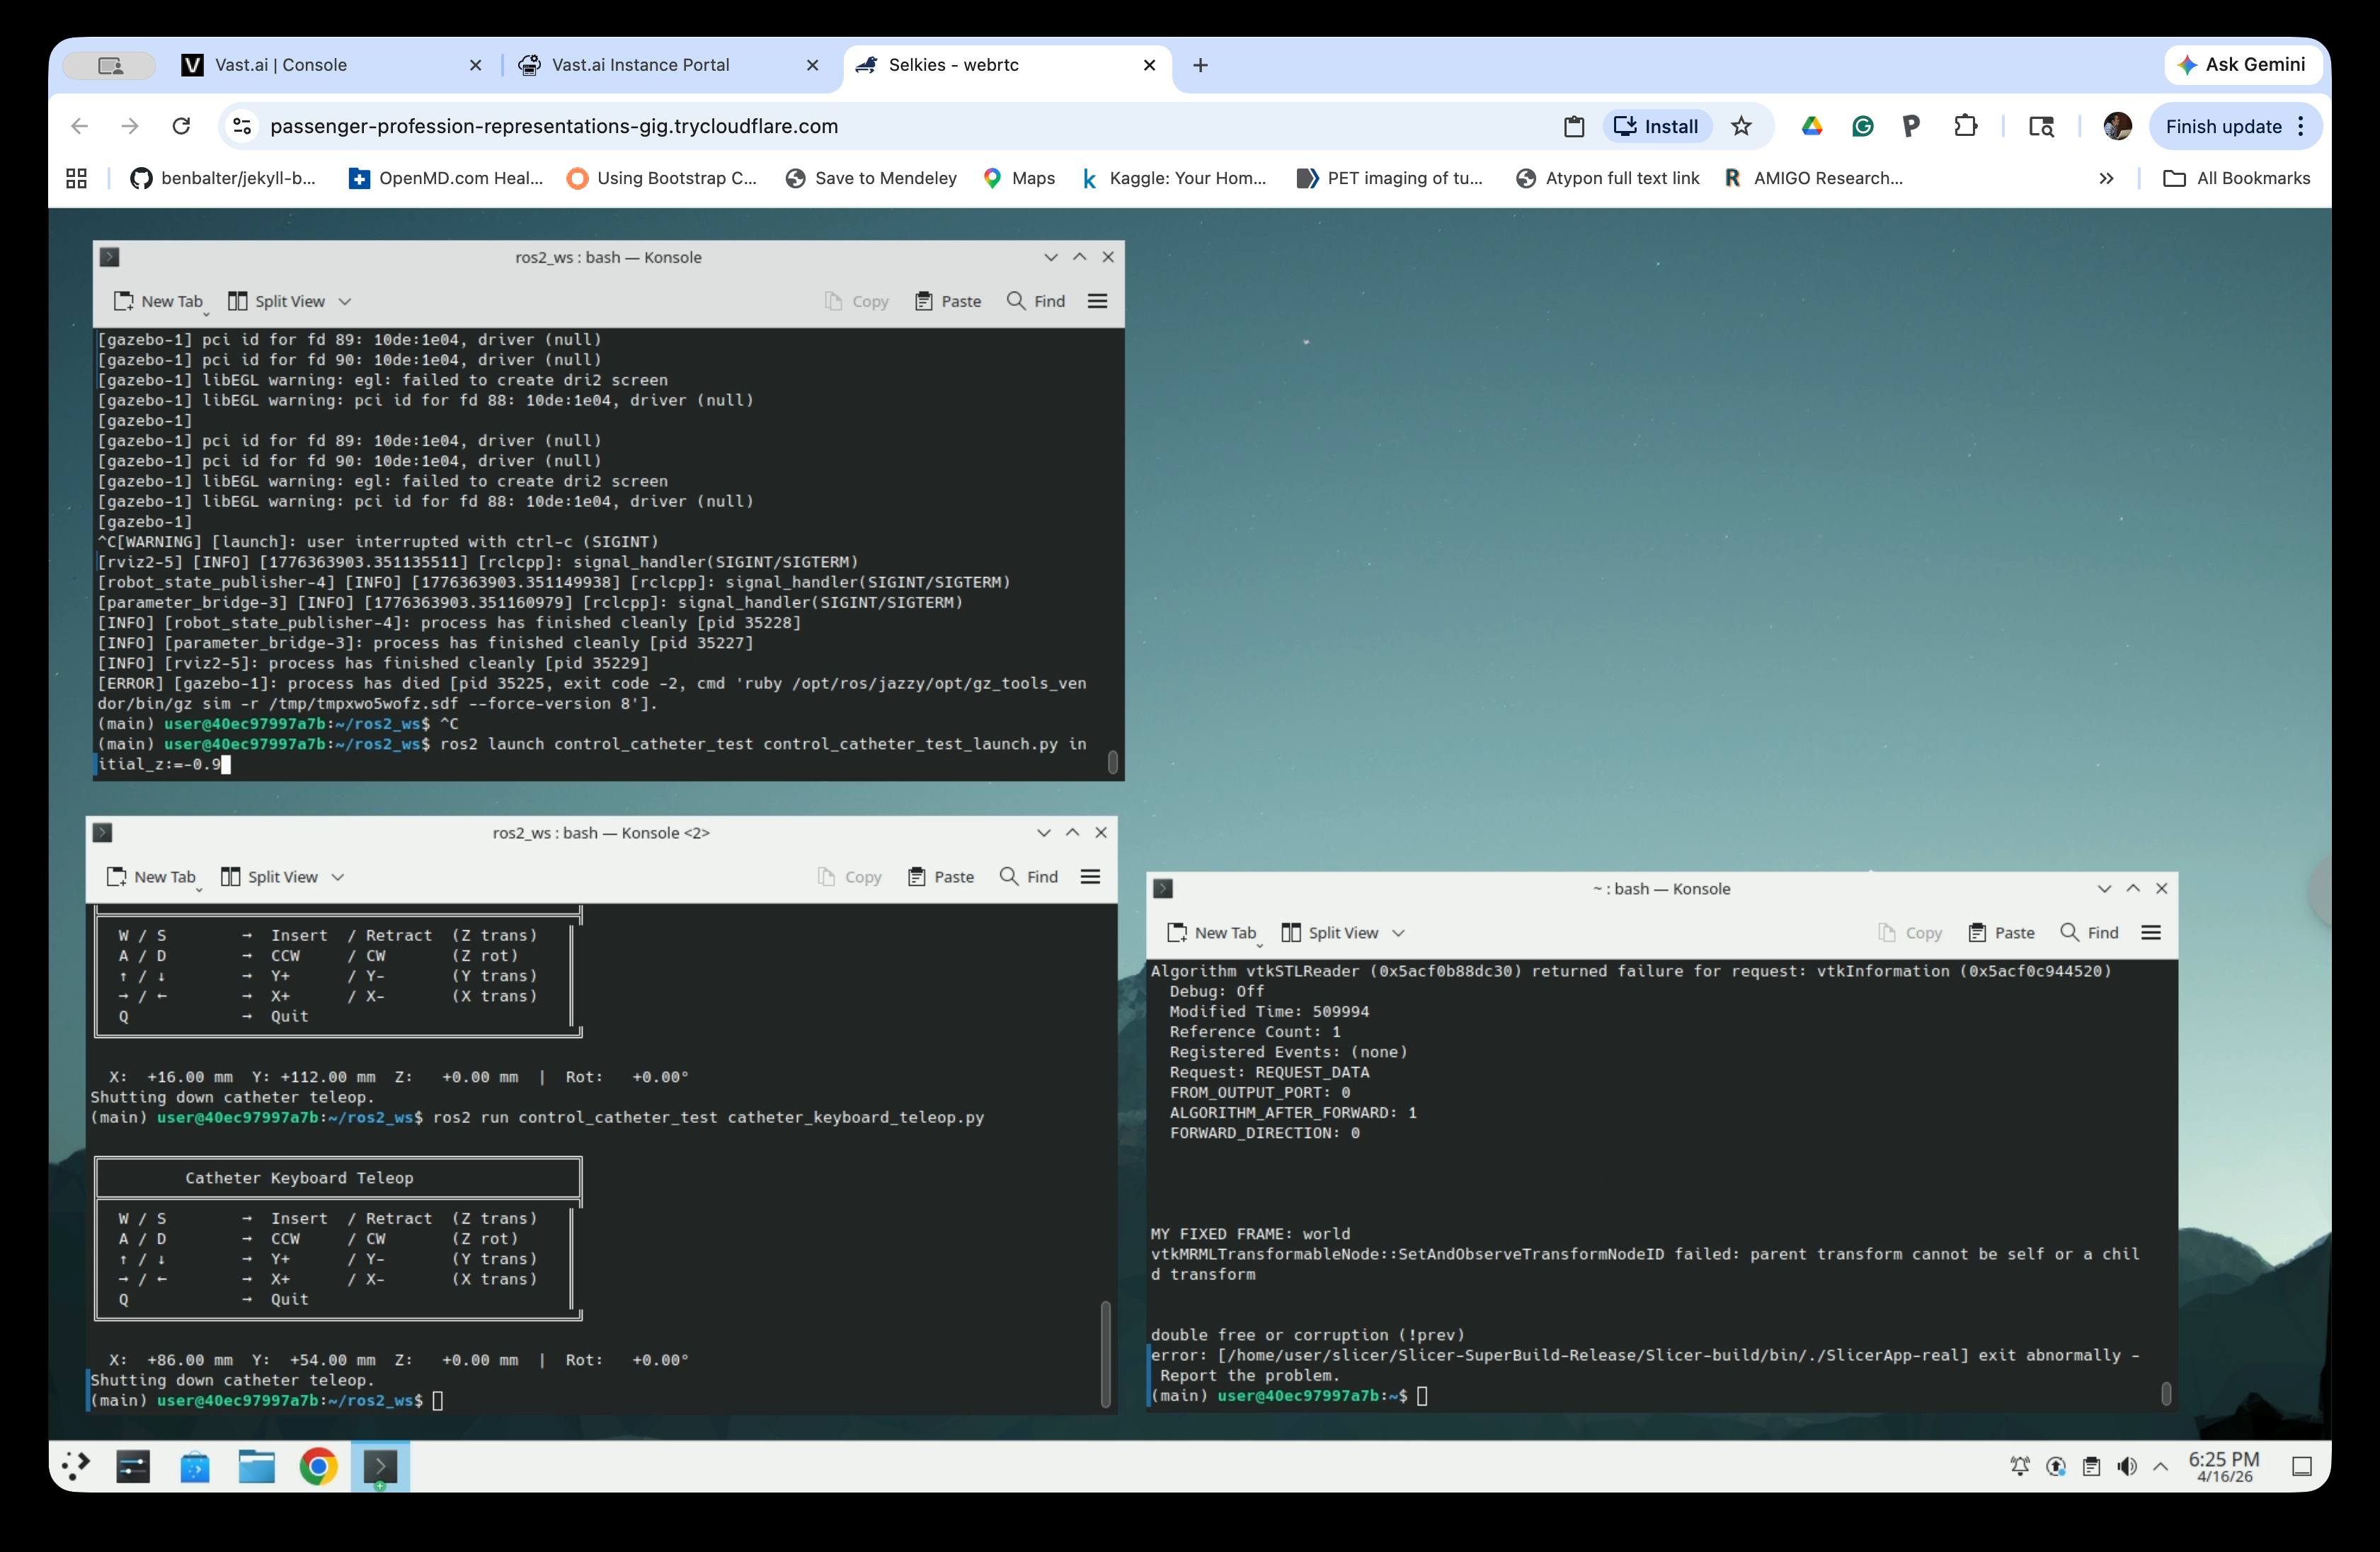
Step 6: Launch the Teleop Controller
In the second terminal, launch the keyboard teleop:
ros2 run control_catheter_test catheter_keyboard_teleop.py
Step 7: Navigate the Catheter into the Anatomy
Use the keyboard controls to insert and steer the catheter:
W / S   → Insert / Retract  (Z trans)
A / D   → CCW    / CW       (Z rot)
↑ / ↓   → Y+     / Y-       (Y trans)
← / →   → X+     / X-       (X trans)
Q       → Quit
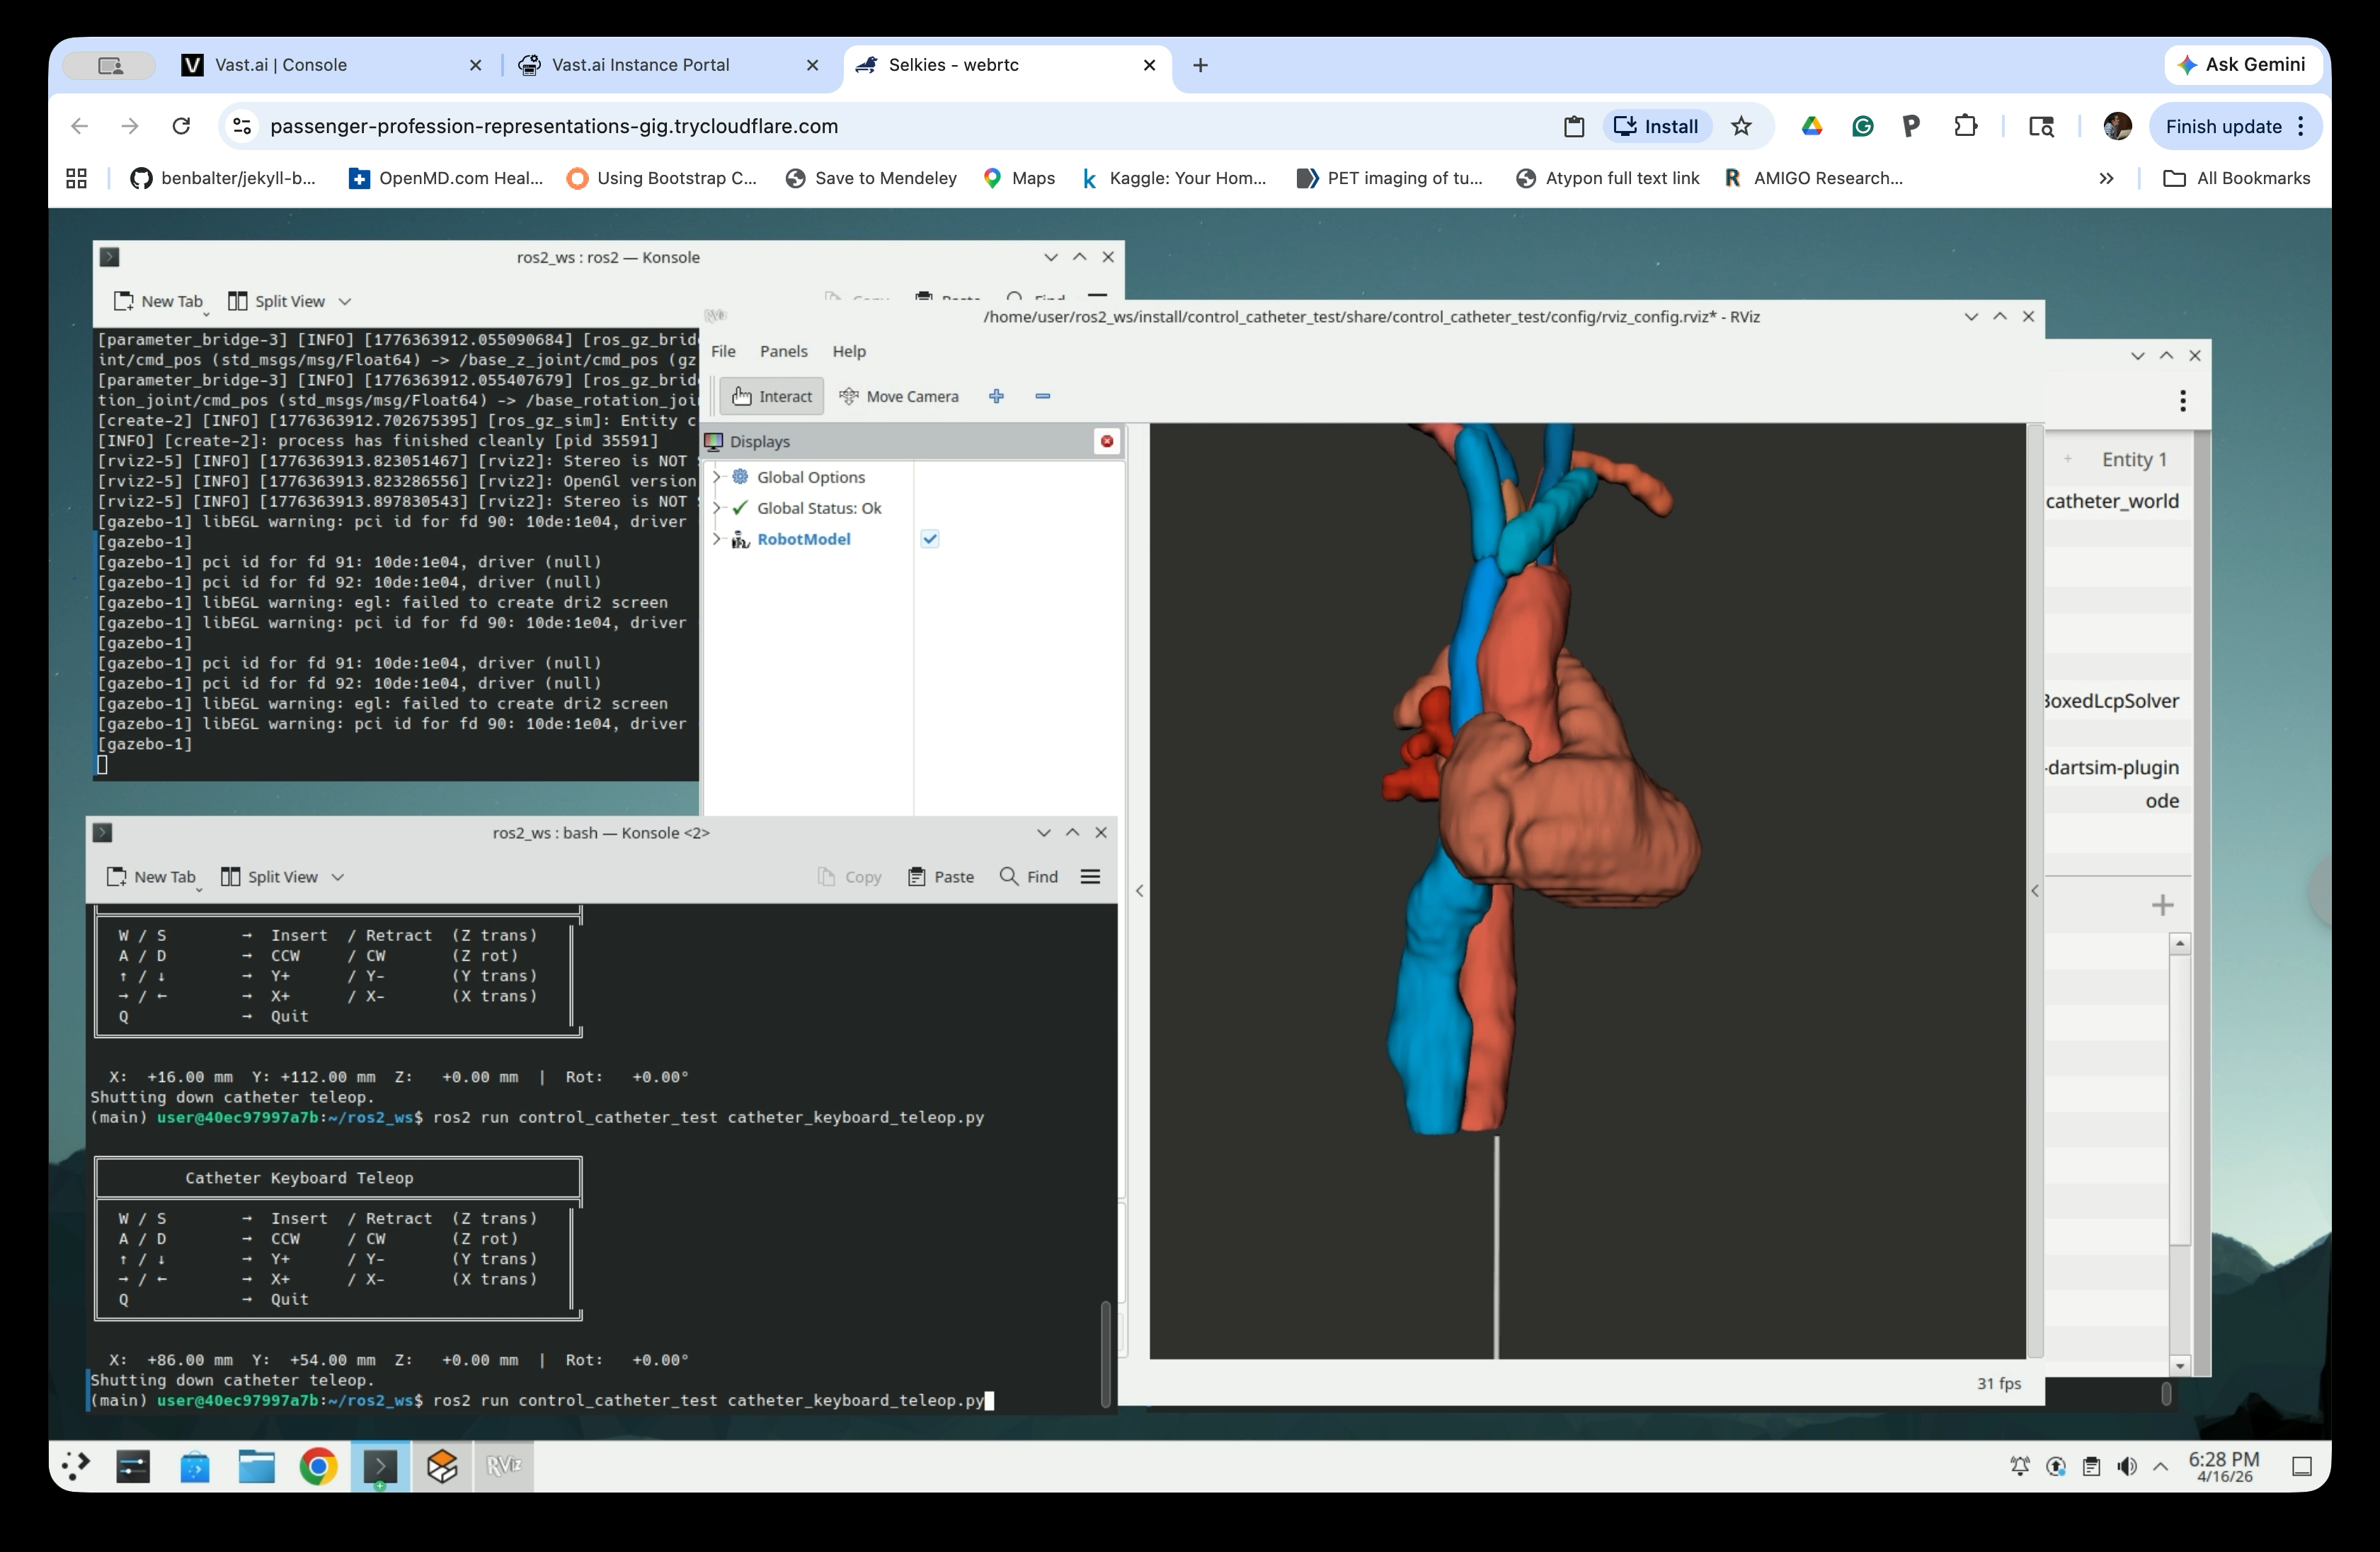
Use ↑, ↓, ←, → keys to align the catheter to the aorta entry (the red large vessel). Once it is aligned, press W repeatedly to advance the catheter upward into the anatomy. The RViz view will show the catheter bending and advancing through the anatomical structures in real time.

Part 4: Visualize in 3D Slicer
Step 8: Source the Workspace and Start Slicer
Open a new terminal, source ~/ros2_ws/install/setup.bash, and start 3D Slicer:
source ~/ros2_ws/install/setup.bash
ros2 launch slicer_ros2_module slicer.launch.py
Wait for Slicer to fully launch.
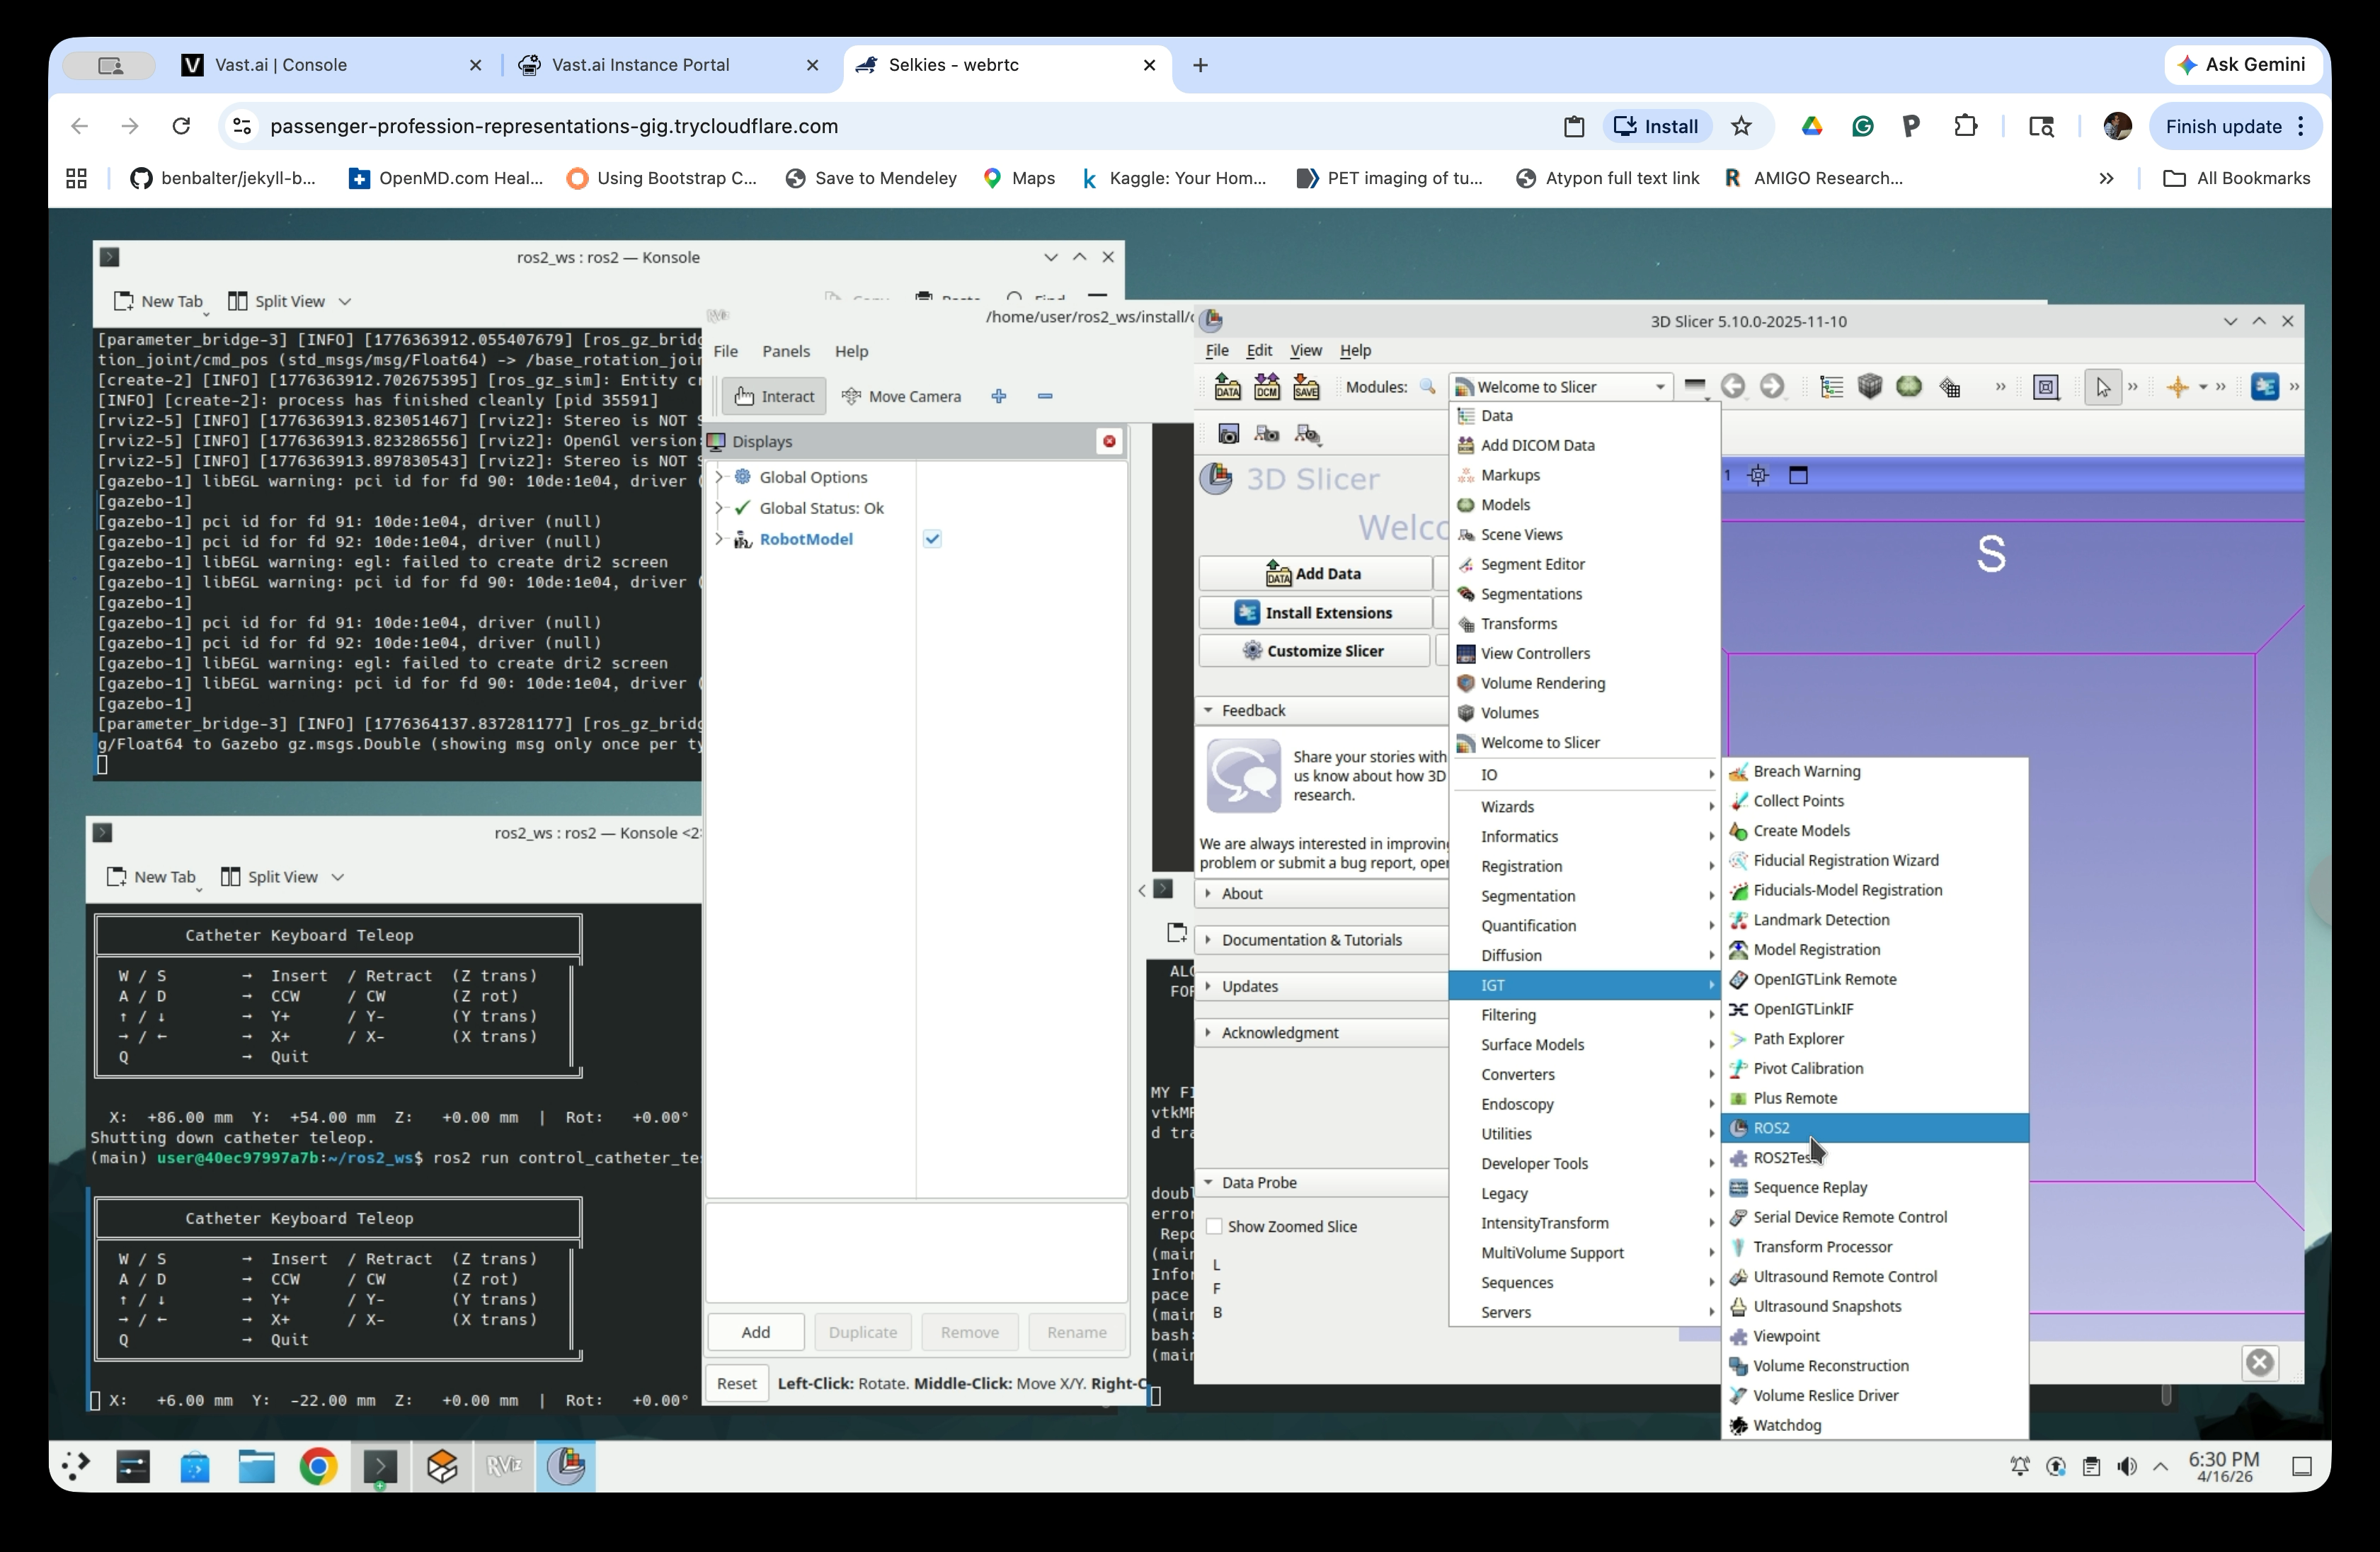
Step 9: Open the ROS2 Module
In 3D Slicer, go to Modules → IGT → ROS2.
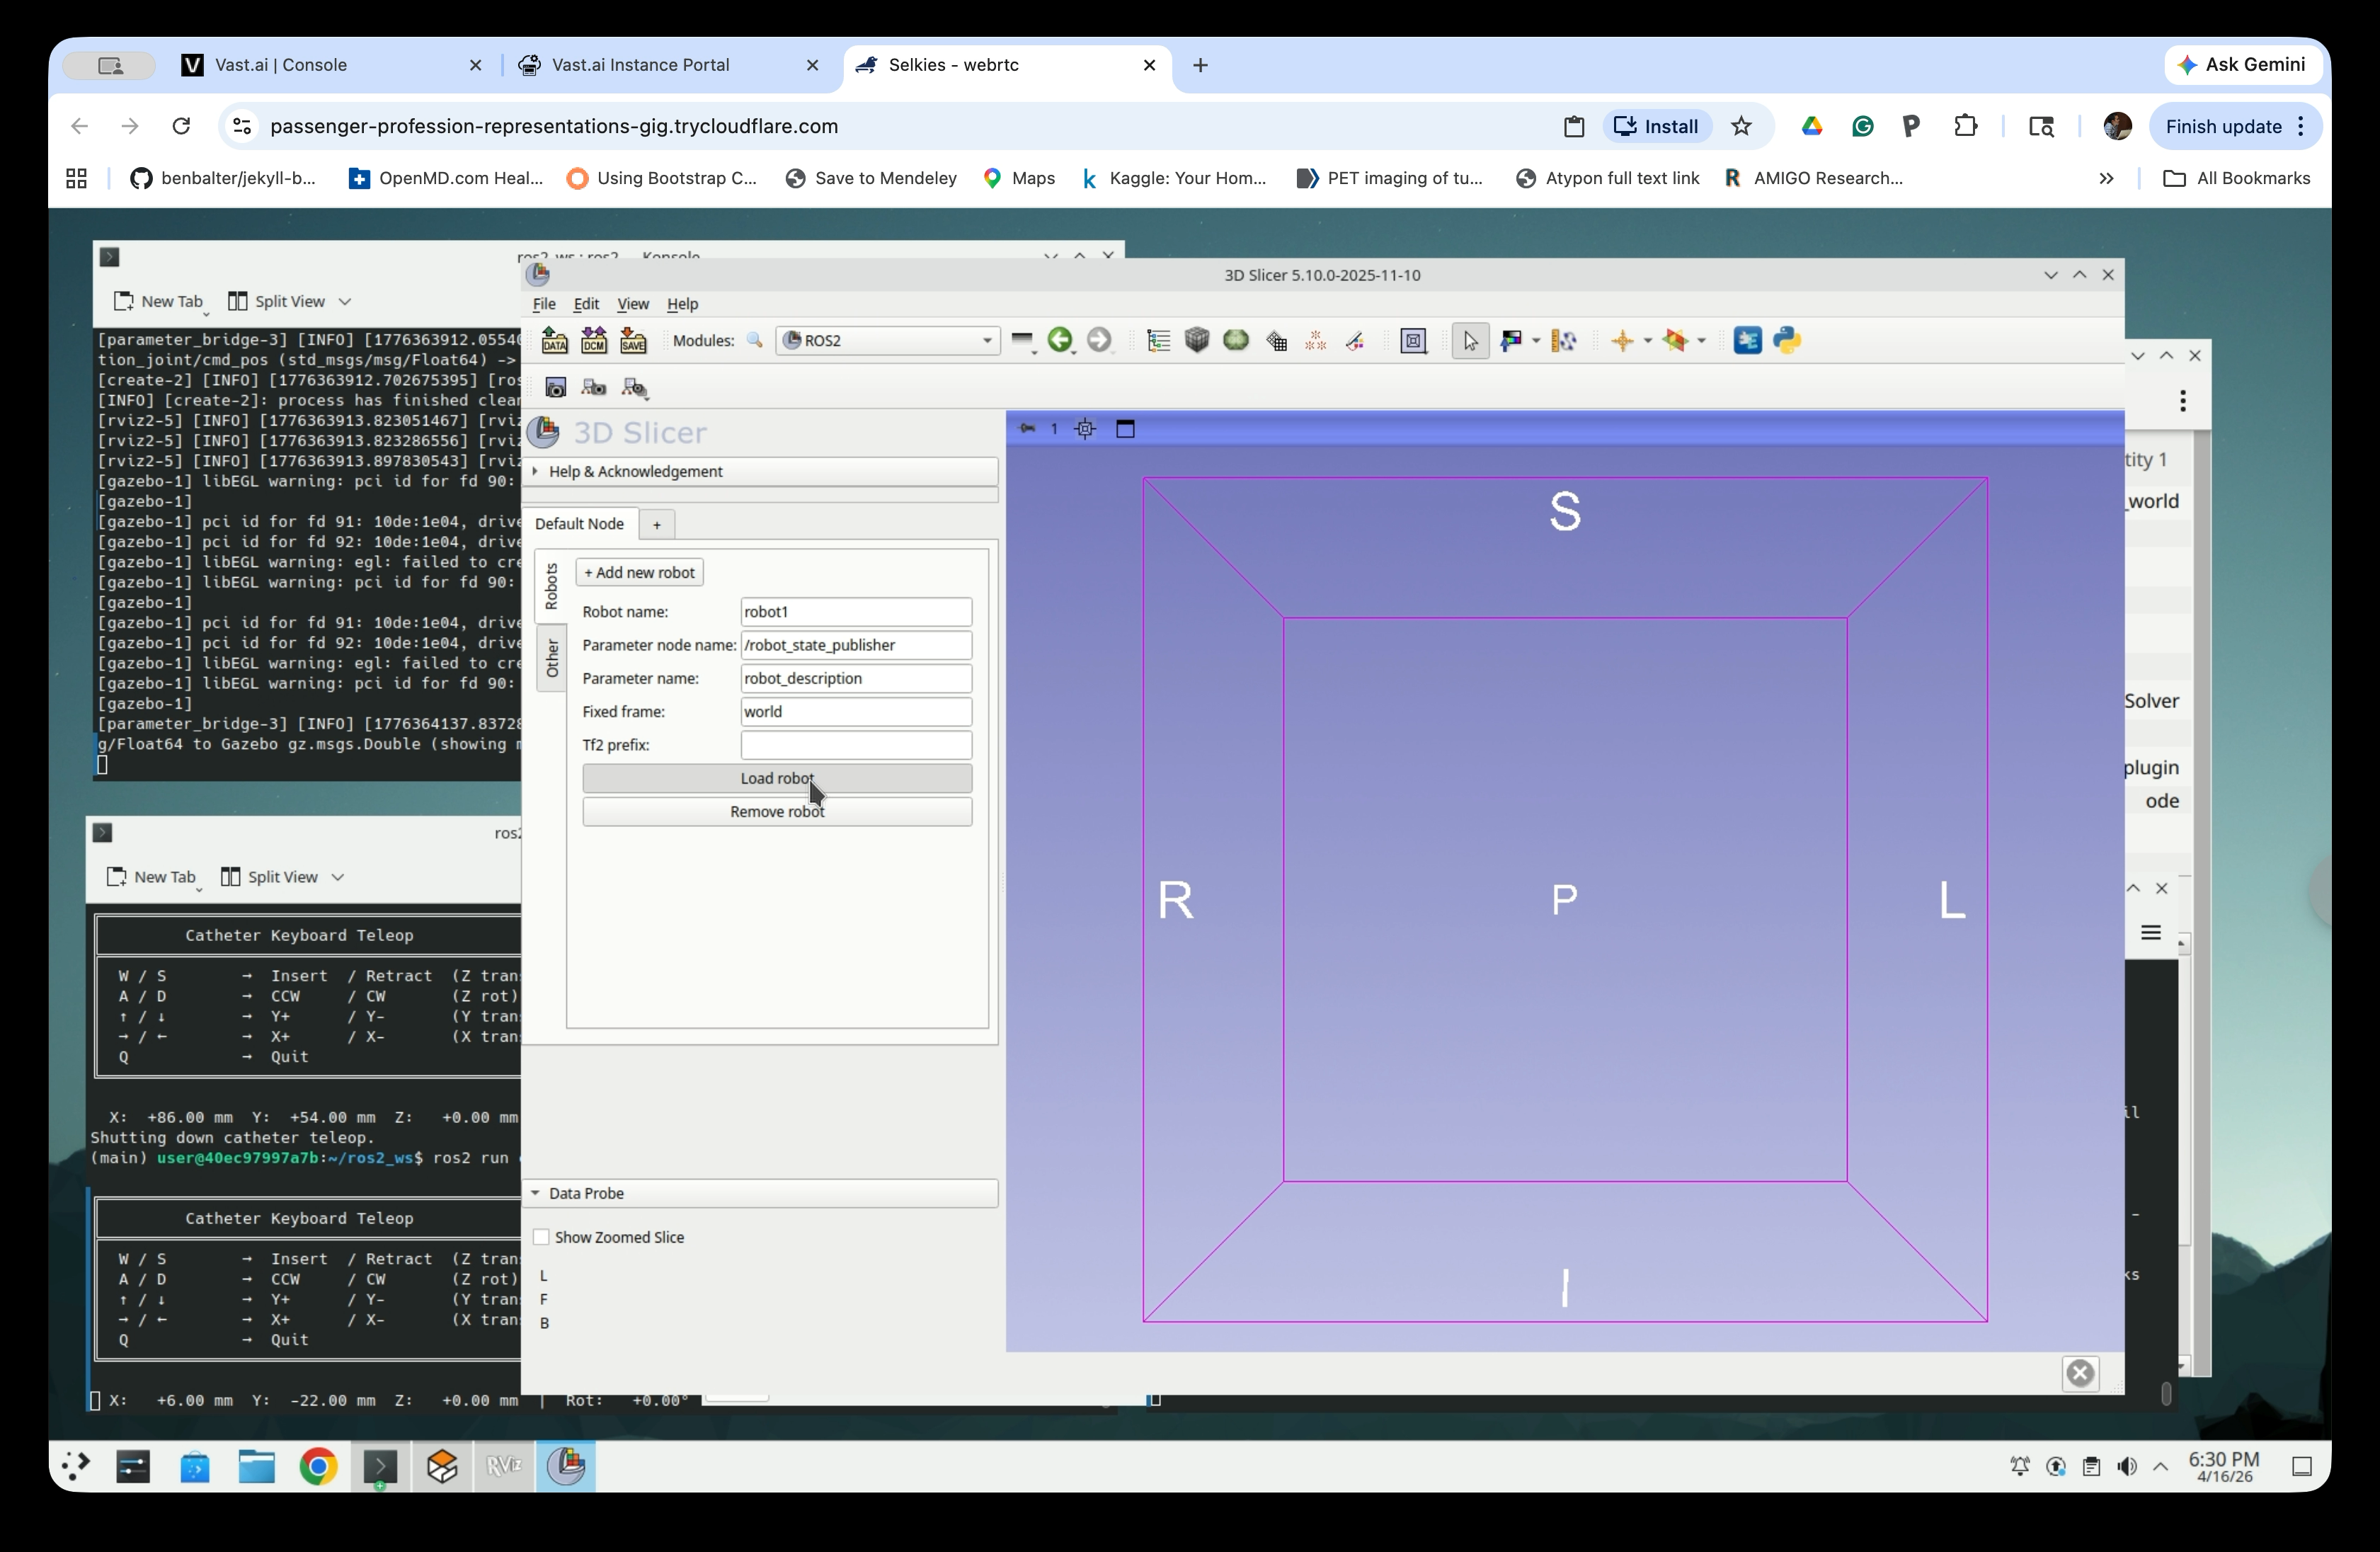
Step 10: Add and Load the Robot
Click + Add new robot and fill in the connection fields:
- Robot name:
robot1 - Parameter node name:
/robot_state_publisher - Parameter name:
robot_description - Fixed frame:
world - Tf2 prefix: (leave empty)
Then click Load robot.

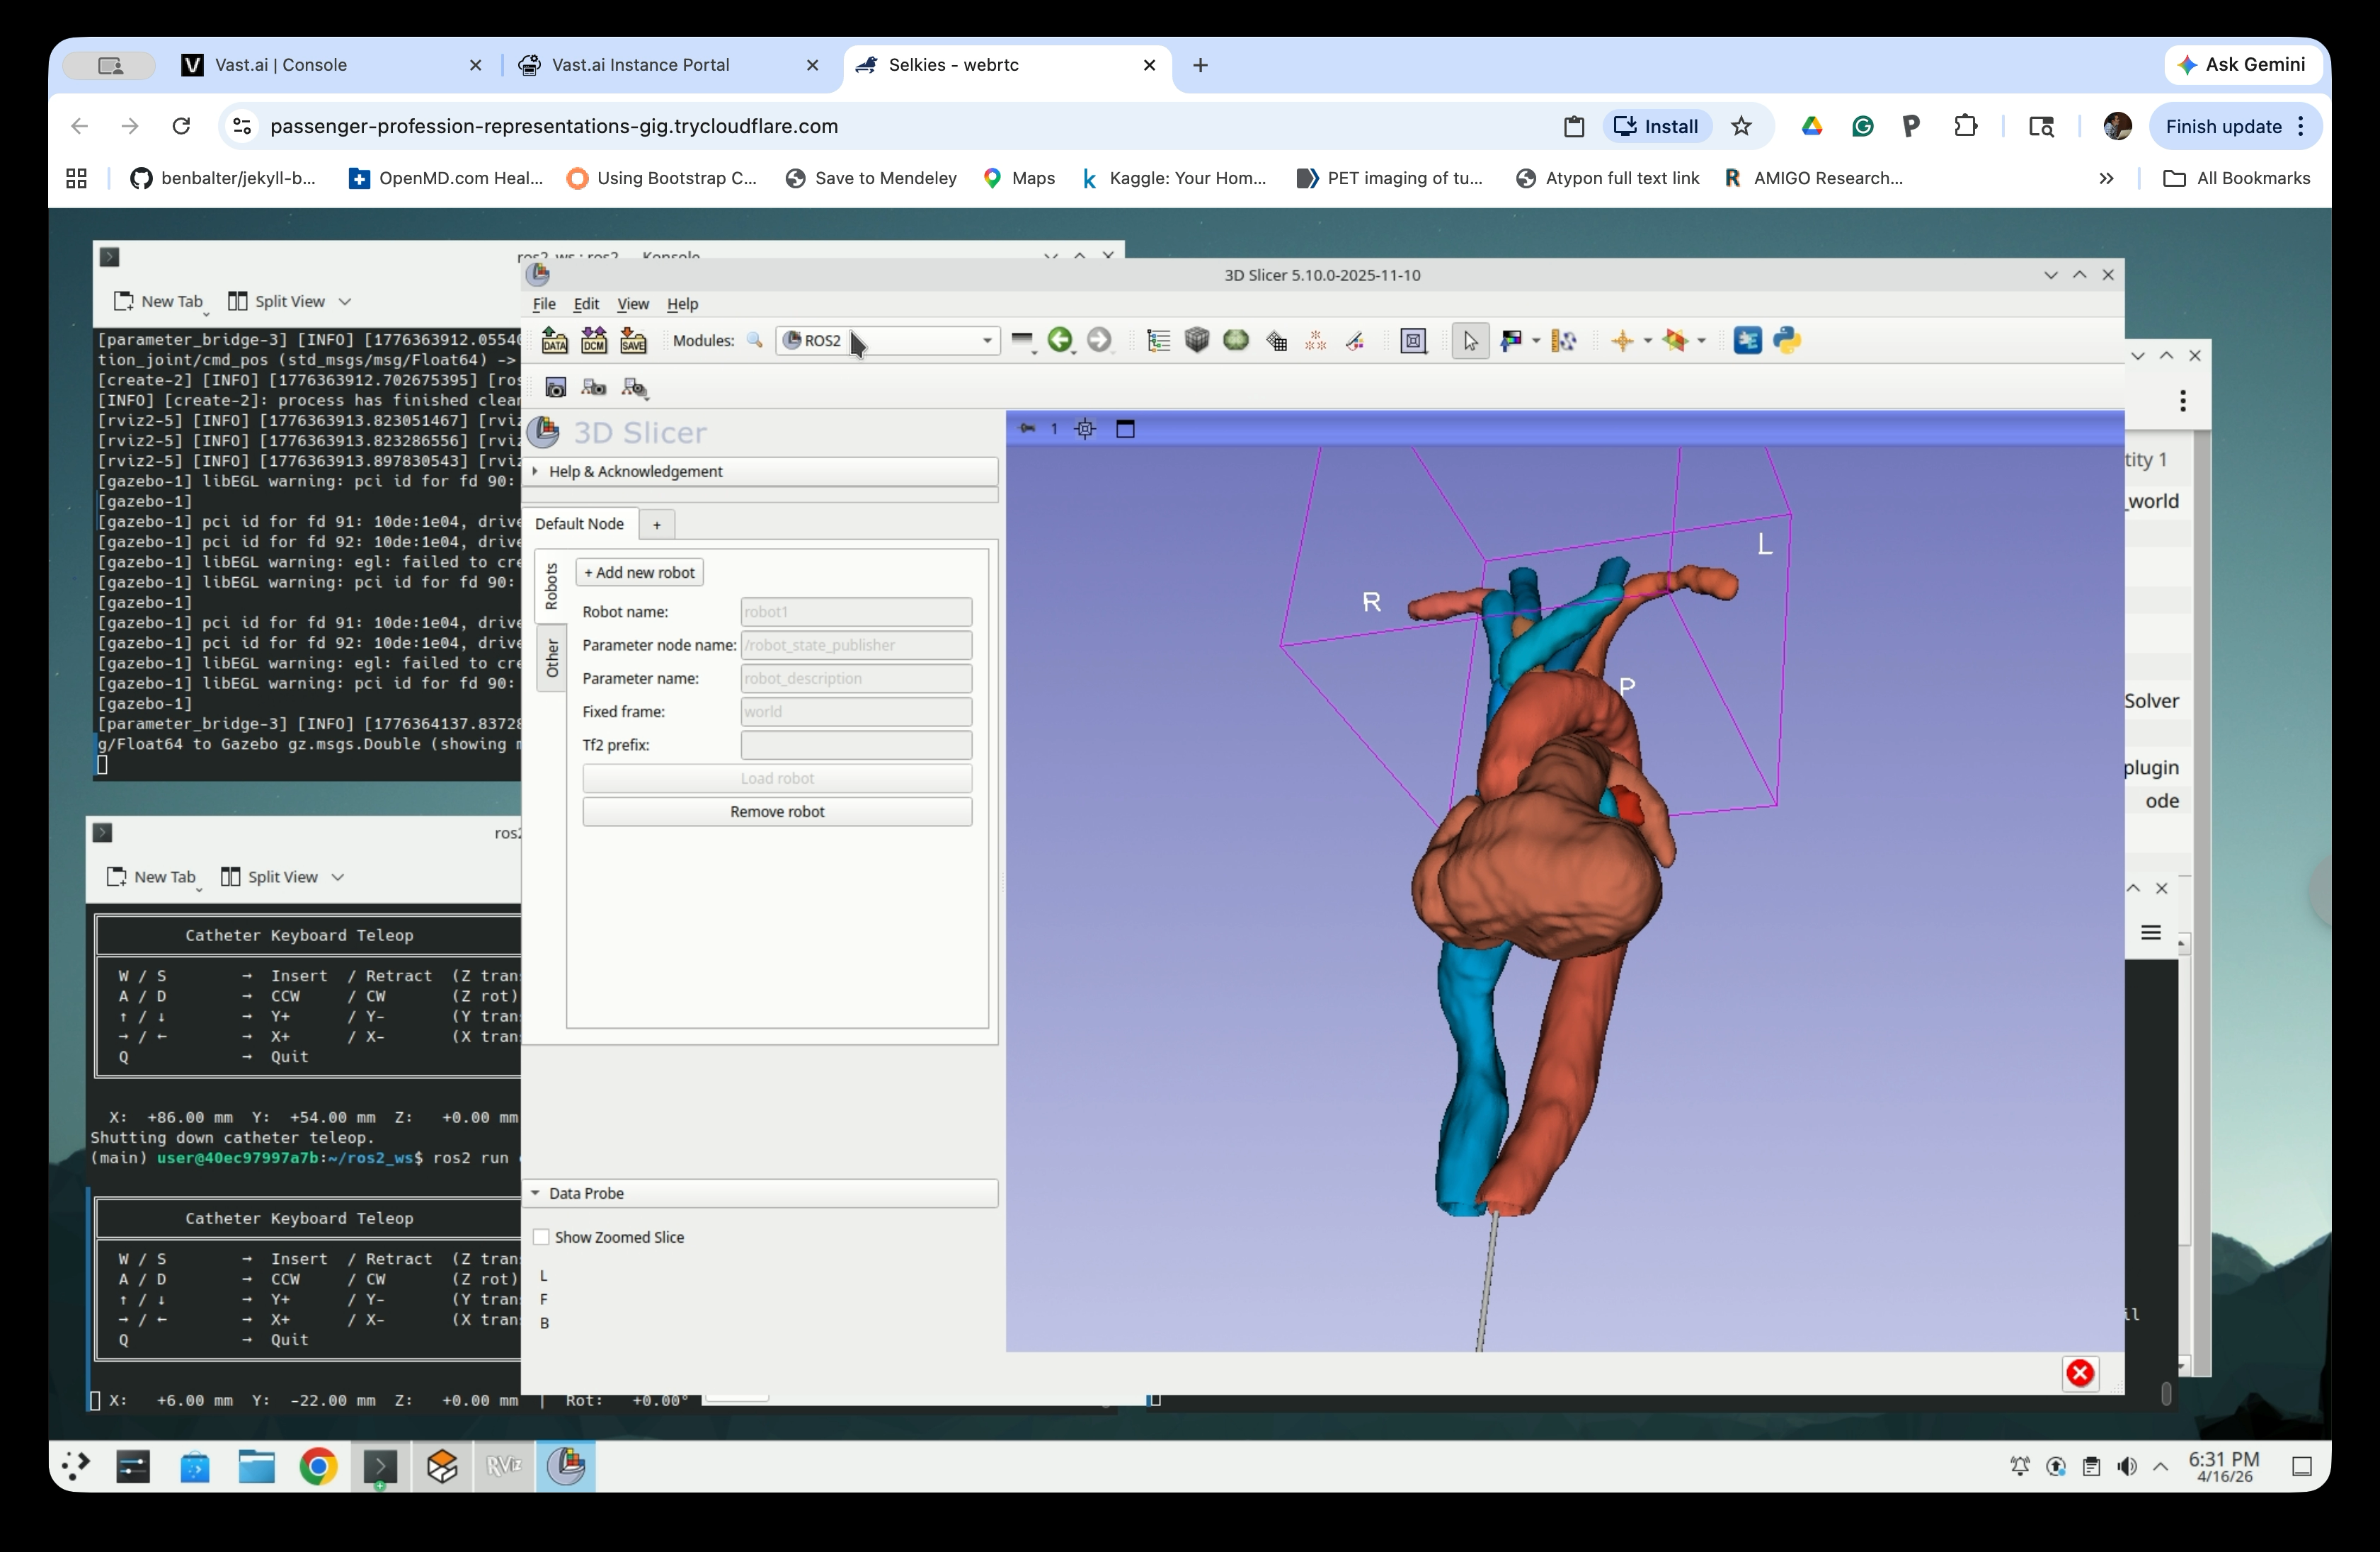
After loading, the form fields become grayed out and the Slicer 3D view displays both the anatomical models and the catheter robot model together.
Step 11: Adjust the View Angle
Rotate the 3D view to get a good perspective on the catheter inside the anatomy. You can see the heart, aorta, and other vessels rendered as solid surface models, with the catheter model running through the aorta.
Part 5: Manage Model Visibility and Opacity
Step 12: Open the Models Module
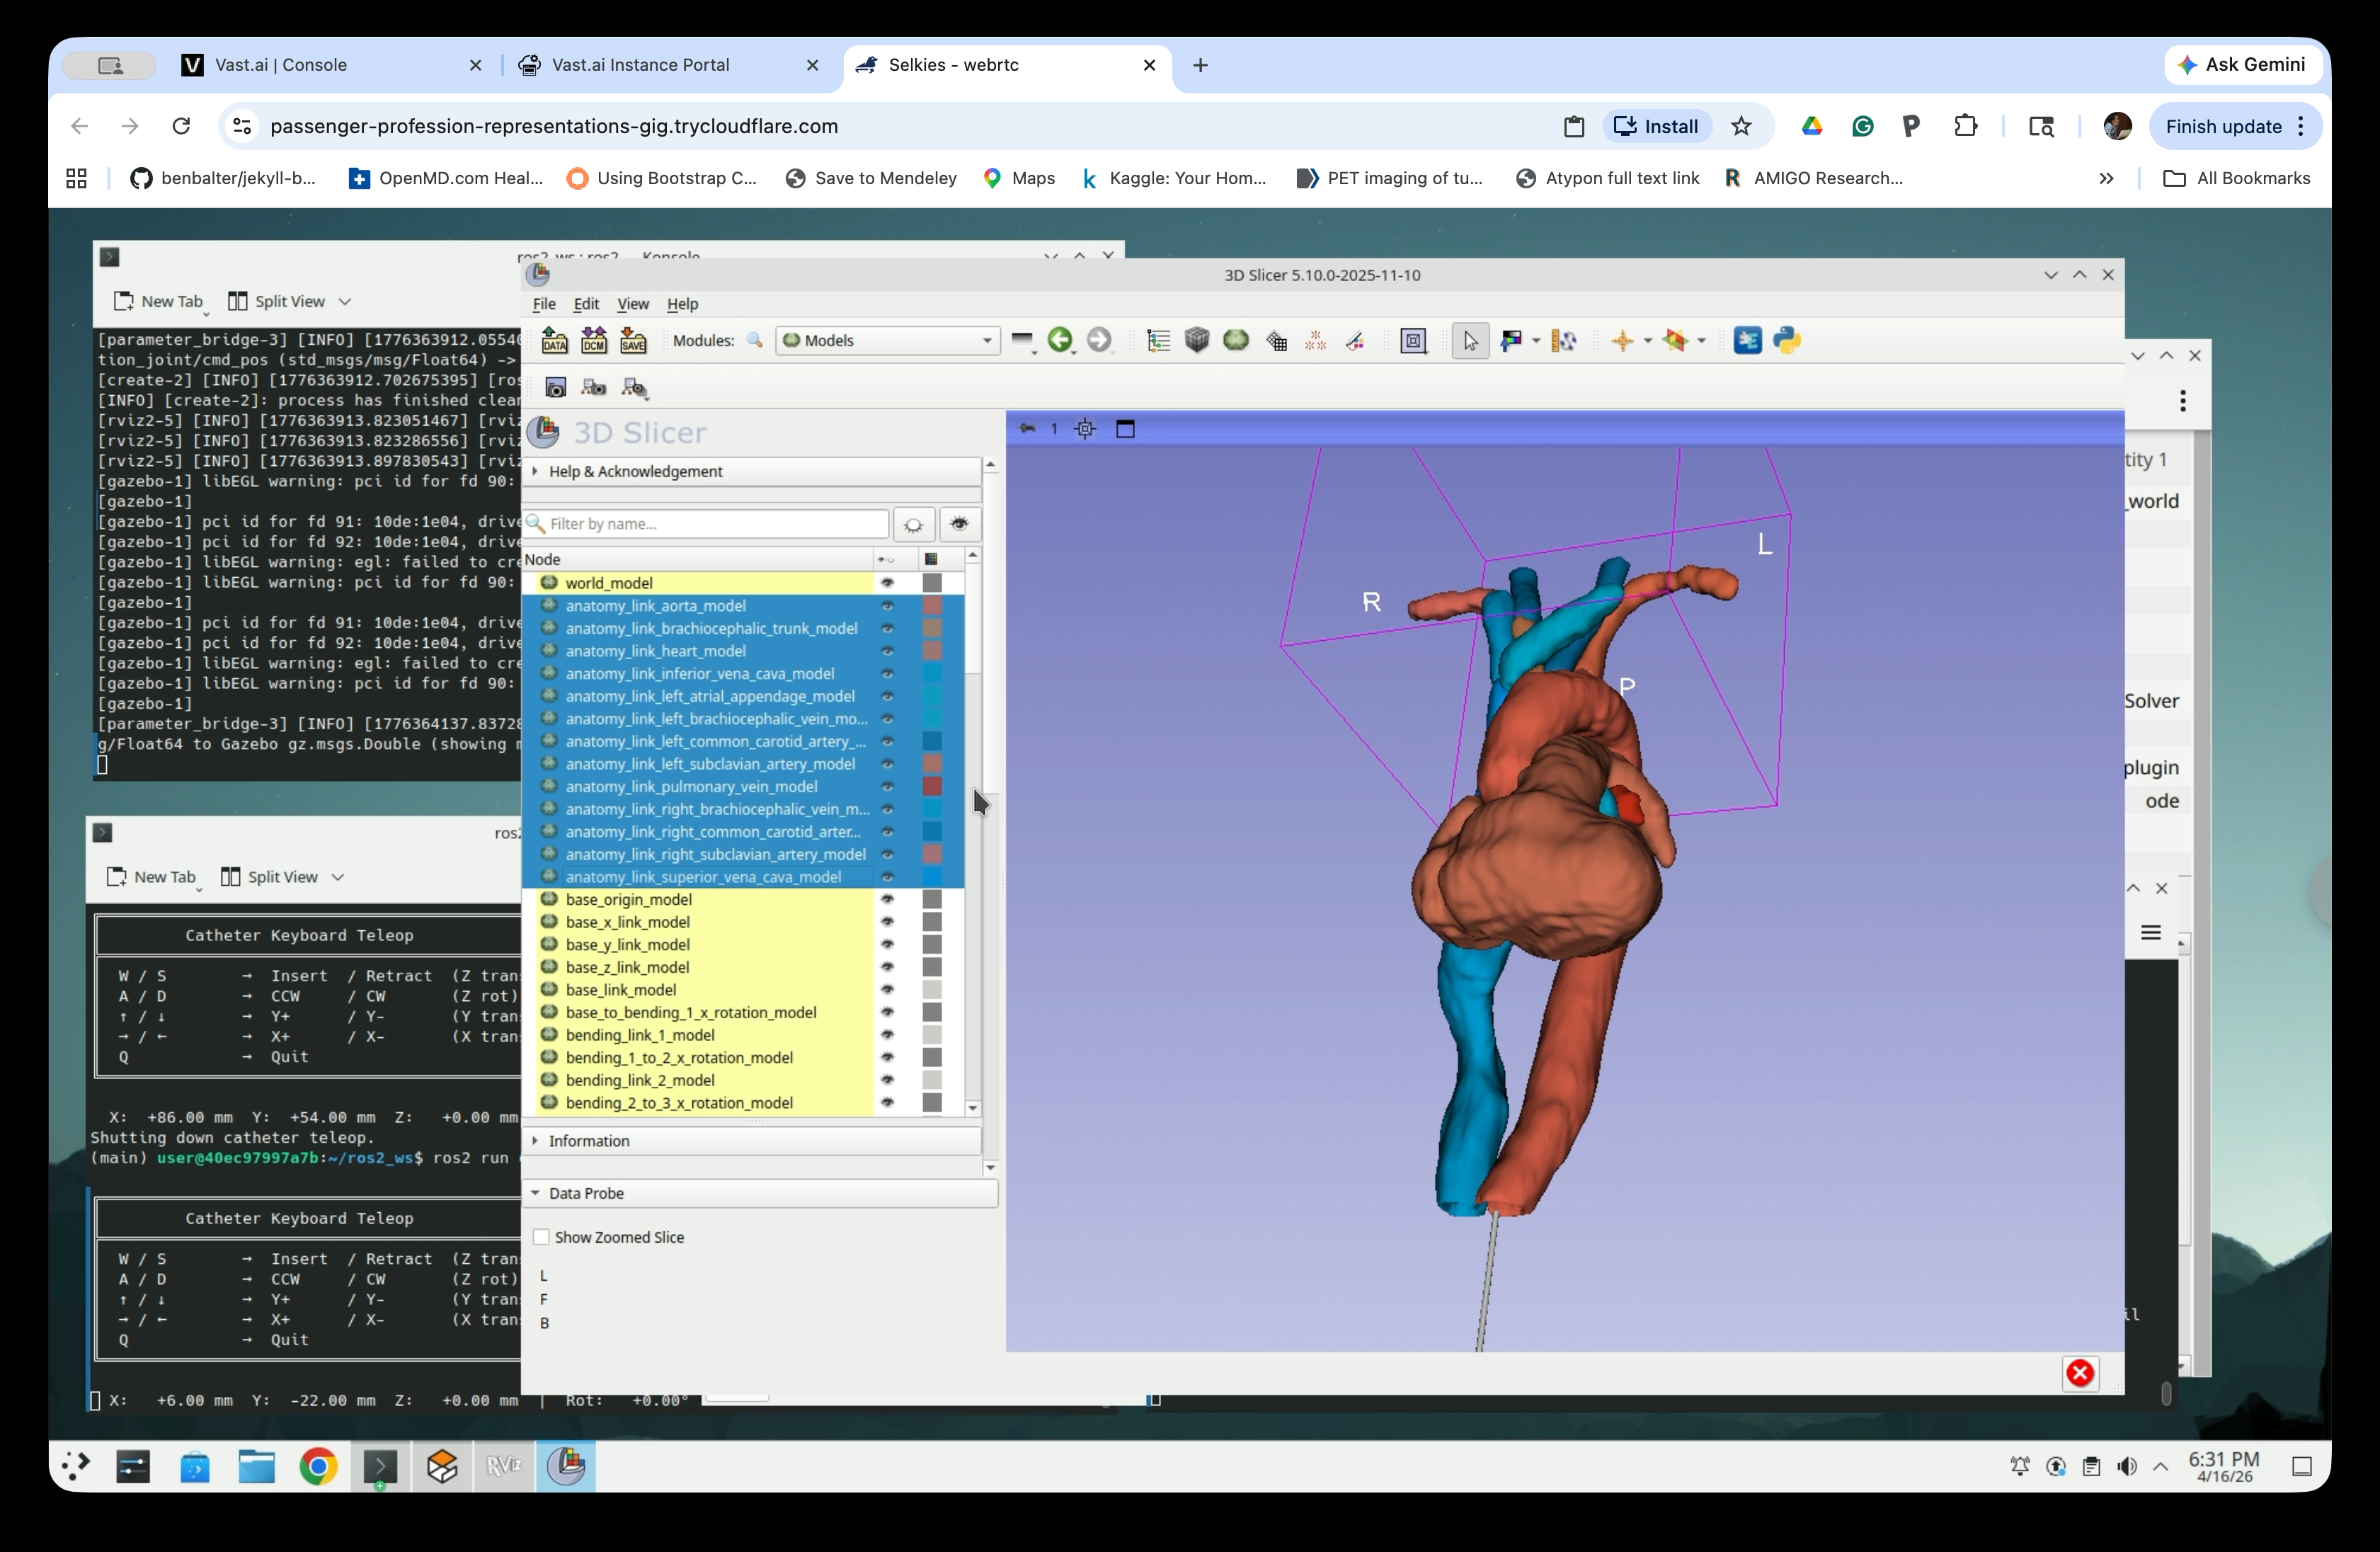
Go to Modules → Models to manage the visibility and opacity of individual anatomy and catheter model nodes.

The Models module lists all nodes in the scene, including:
anatomy_link_heart_model,anatomy_link_aorta_model,anatomy_link_pulmonary_vein_model, and other vessel modelsbase_origin_model,bending_link_*_modelnodes for each catheter segment
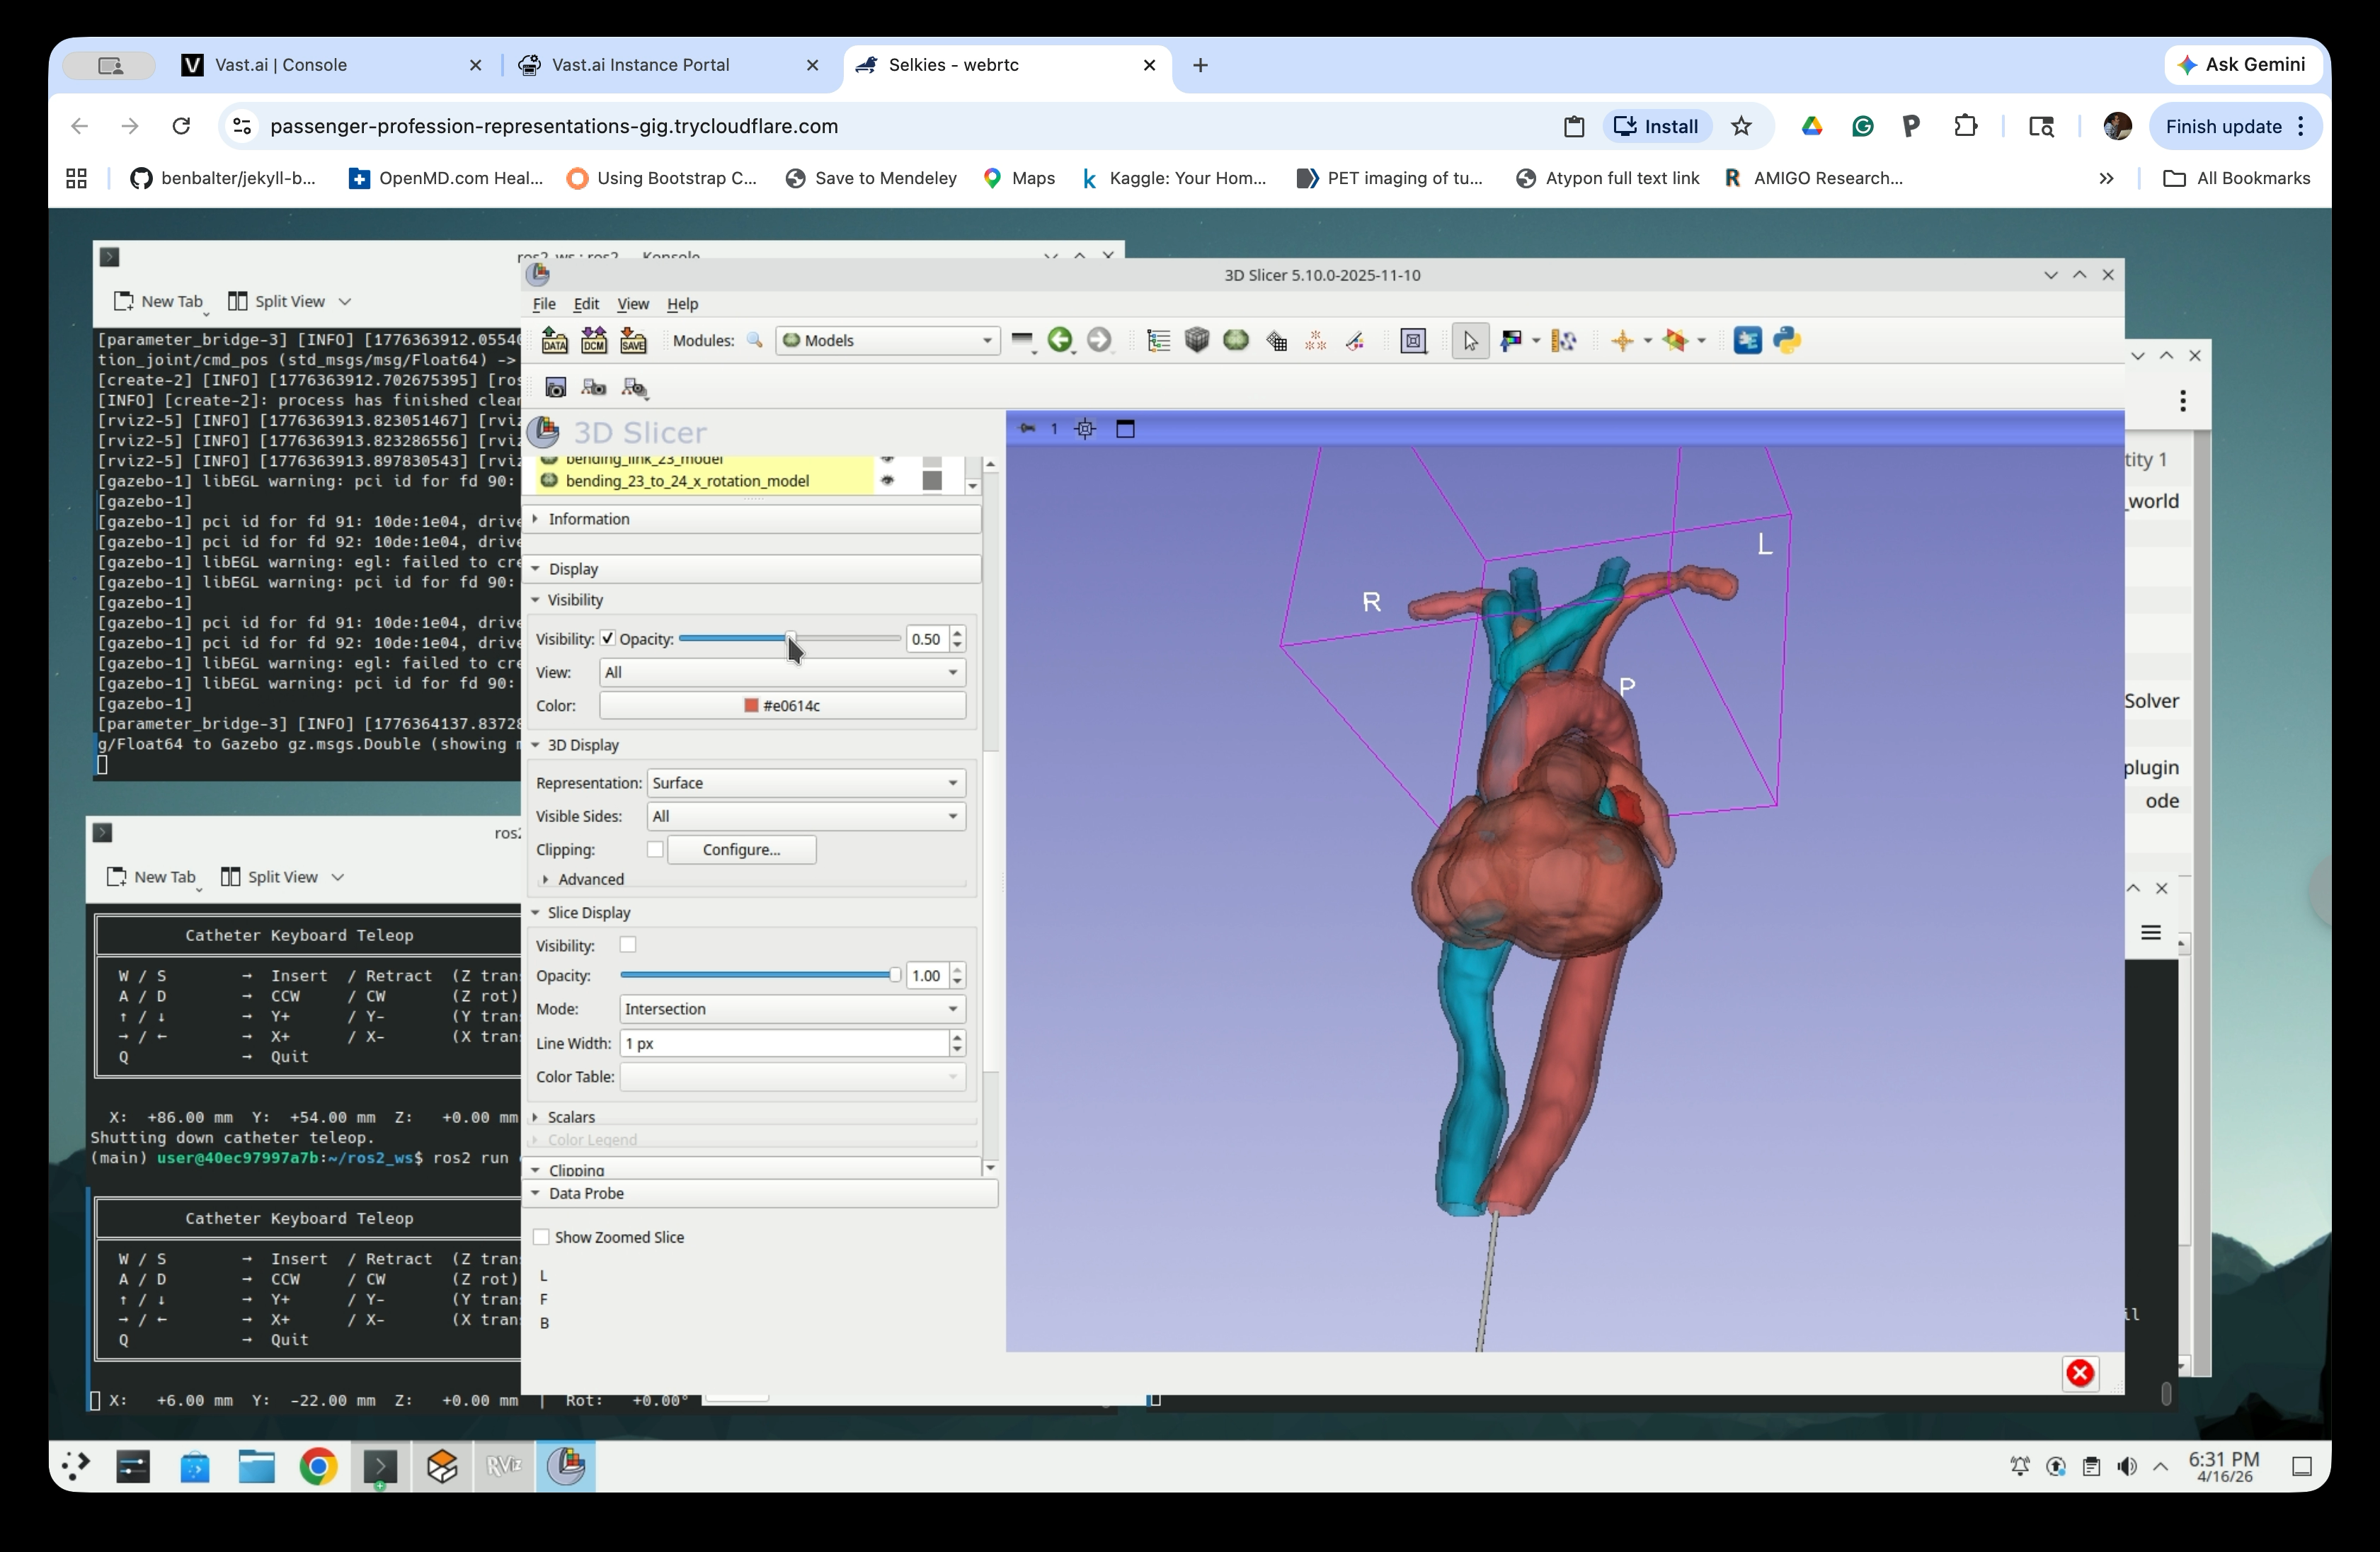
Step 13: Adjust Anatomy Opacity
Select an anatomy model node (i.e., anatomy_link_*_model) and adjust the Opacity slider in the Display panel to 0.5. The Display panel is below the node list, and may need to be scrolled down to be visible. Reducing the opacity of the anatomy models makes the catheter path visible through the vessel walls.
Part 6: Teleoperate Catheter Insertion in Slicer
Step 14: Insert the Catheter
With Slicer open and the robot loaded, return to the teleop terminal and use the keyboard to advance the catheter. The 3D Slicer view updates in real time as the catheter moves, showing the insertion path through the anatomy.
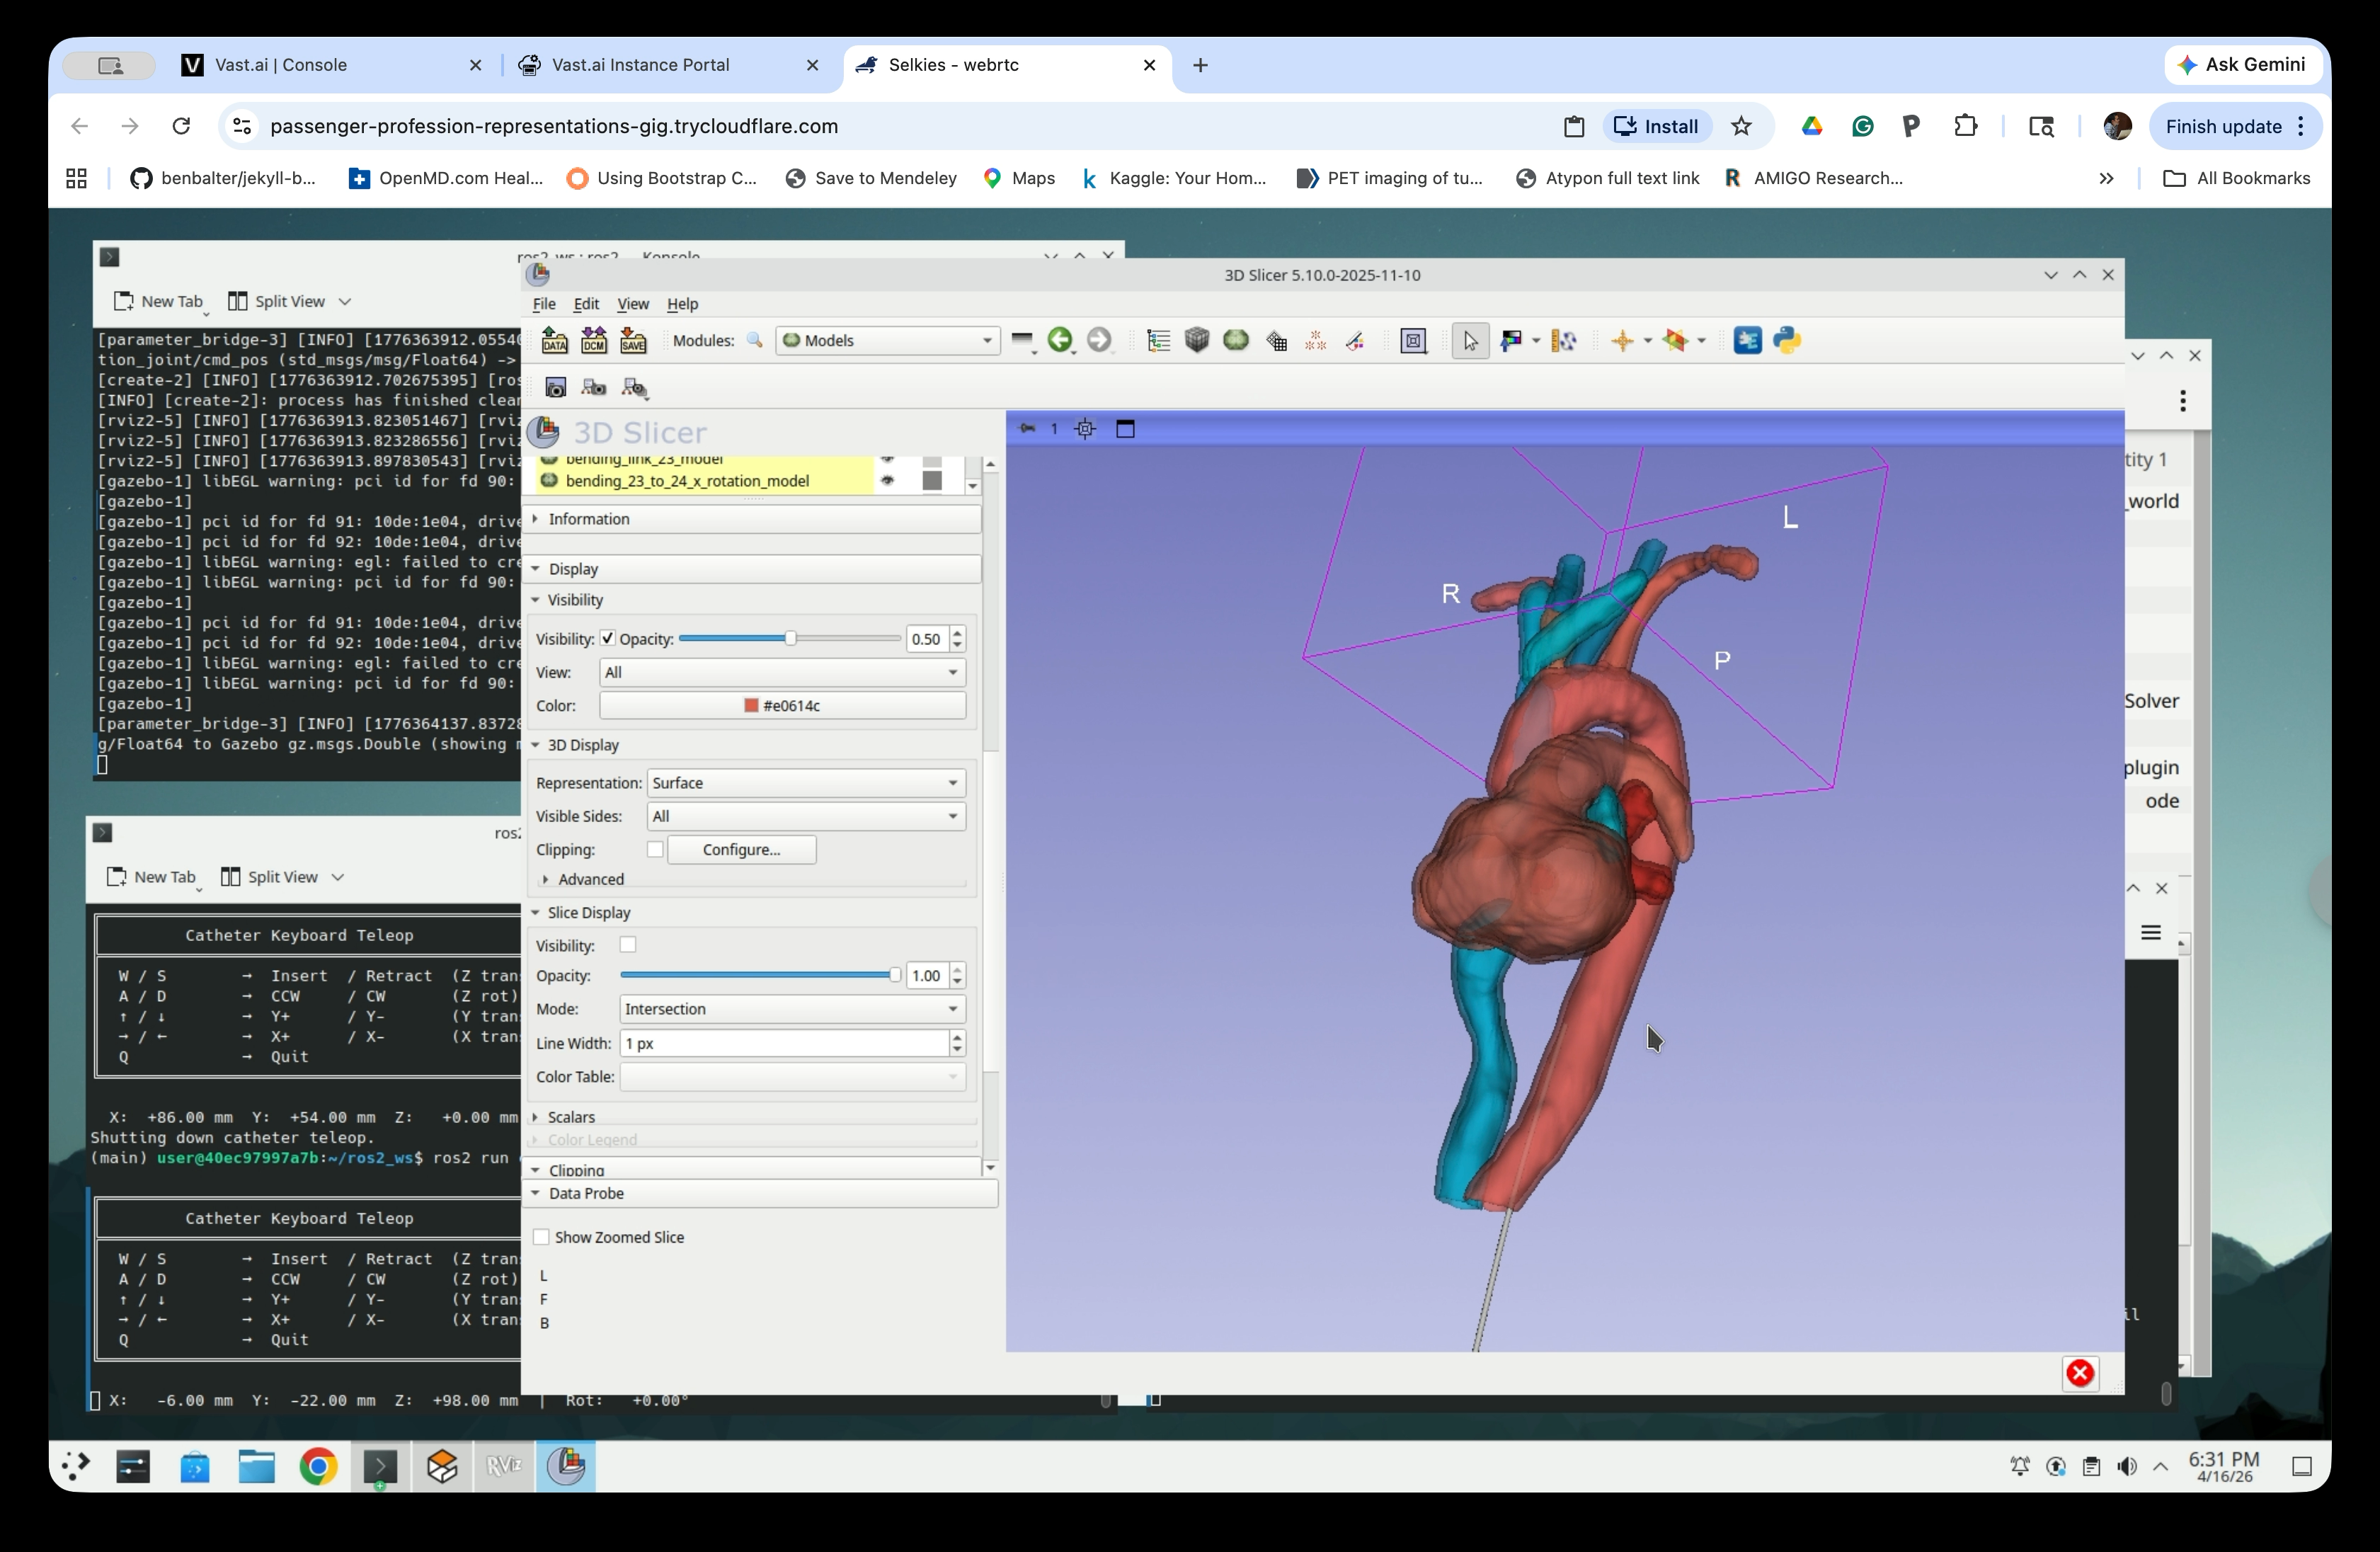
Continue inserting to navigate deeper into the anatomy. The catheter segments bend dynamically as it collide with the vessel wall.

Summary
In this tutorial, you:
- Used
--slicer-sceneto embed patient anatomy into the Gazebo simulation - Launched a combined catheter + anatomy simulation in Gazebo and RViz
- Used
initial_zto position the catheter entry point below the anatomy - Connected 3D Slicer to the simulation via SlicerROS2
- Navigated the catheter through the anatomical models using keyboard teleop, visualized simultaneously across Gazebo, RViz, and Slicer