Follow-along: Motion planning with SlicerROS2 and MoveIt
Tutorial Part 3: Motion planning with SlicerROS2 and MoveIt
Overview
In this portion of the workshop, users will get to try the new “Motion Control” module in SlicerROS2 to define trajectories relative to patient images. You will launch a simulated Universal Robot, load it into 3D Slicer, add a patient spine model and a custom end-effector, and use the Motion Control module to plan a trajectory around the patient anatomy.
Prerequisites: Complete the environment setup in the Prerequisites page and launch a vast.ai container as described in Launching a Container on Vast.ai. All commands below are run inside Konsole terminals in the vast.ai desktop environment.
Part 6: Launch the Universal Robot Simulation
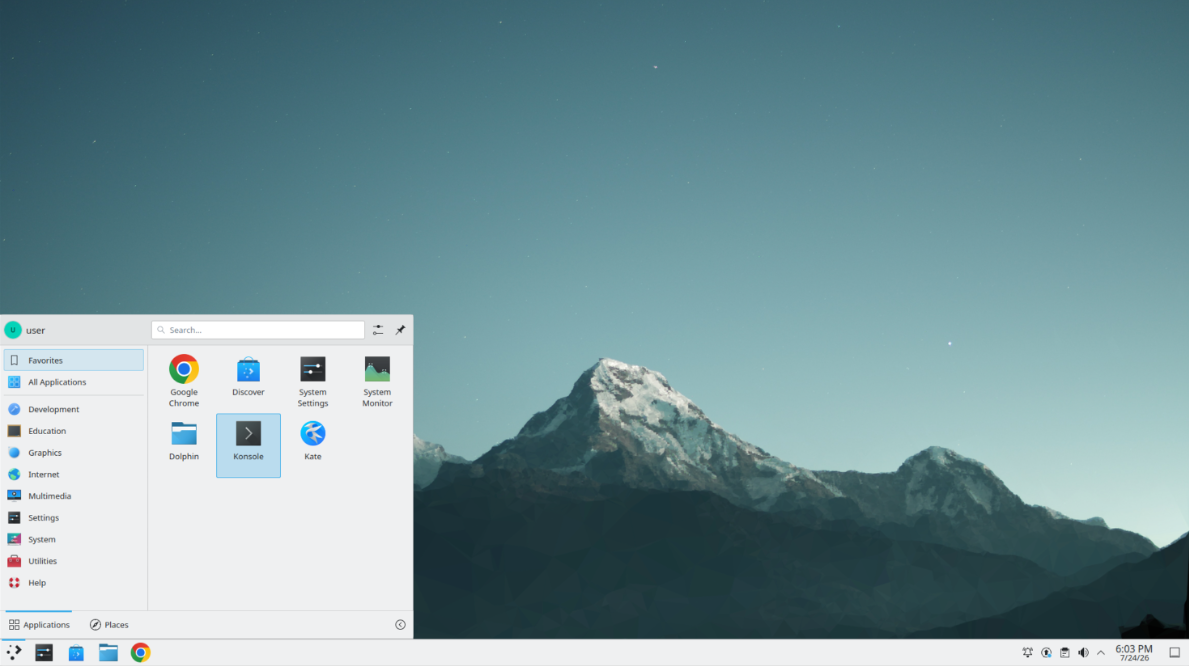
Step 56: Open a Konsole Terminal
From the vast.ai desktop, open the applications menu and launch Konsole.
Step 57: Launch the Universal Robot Example
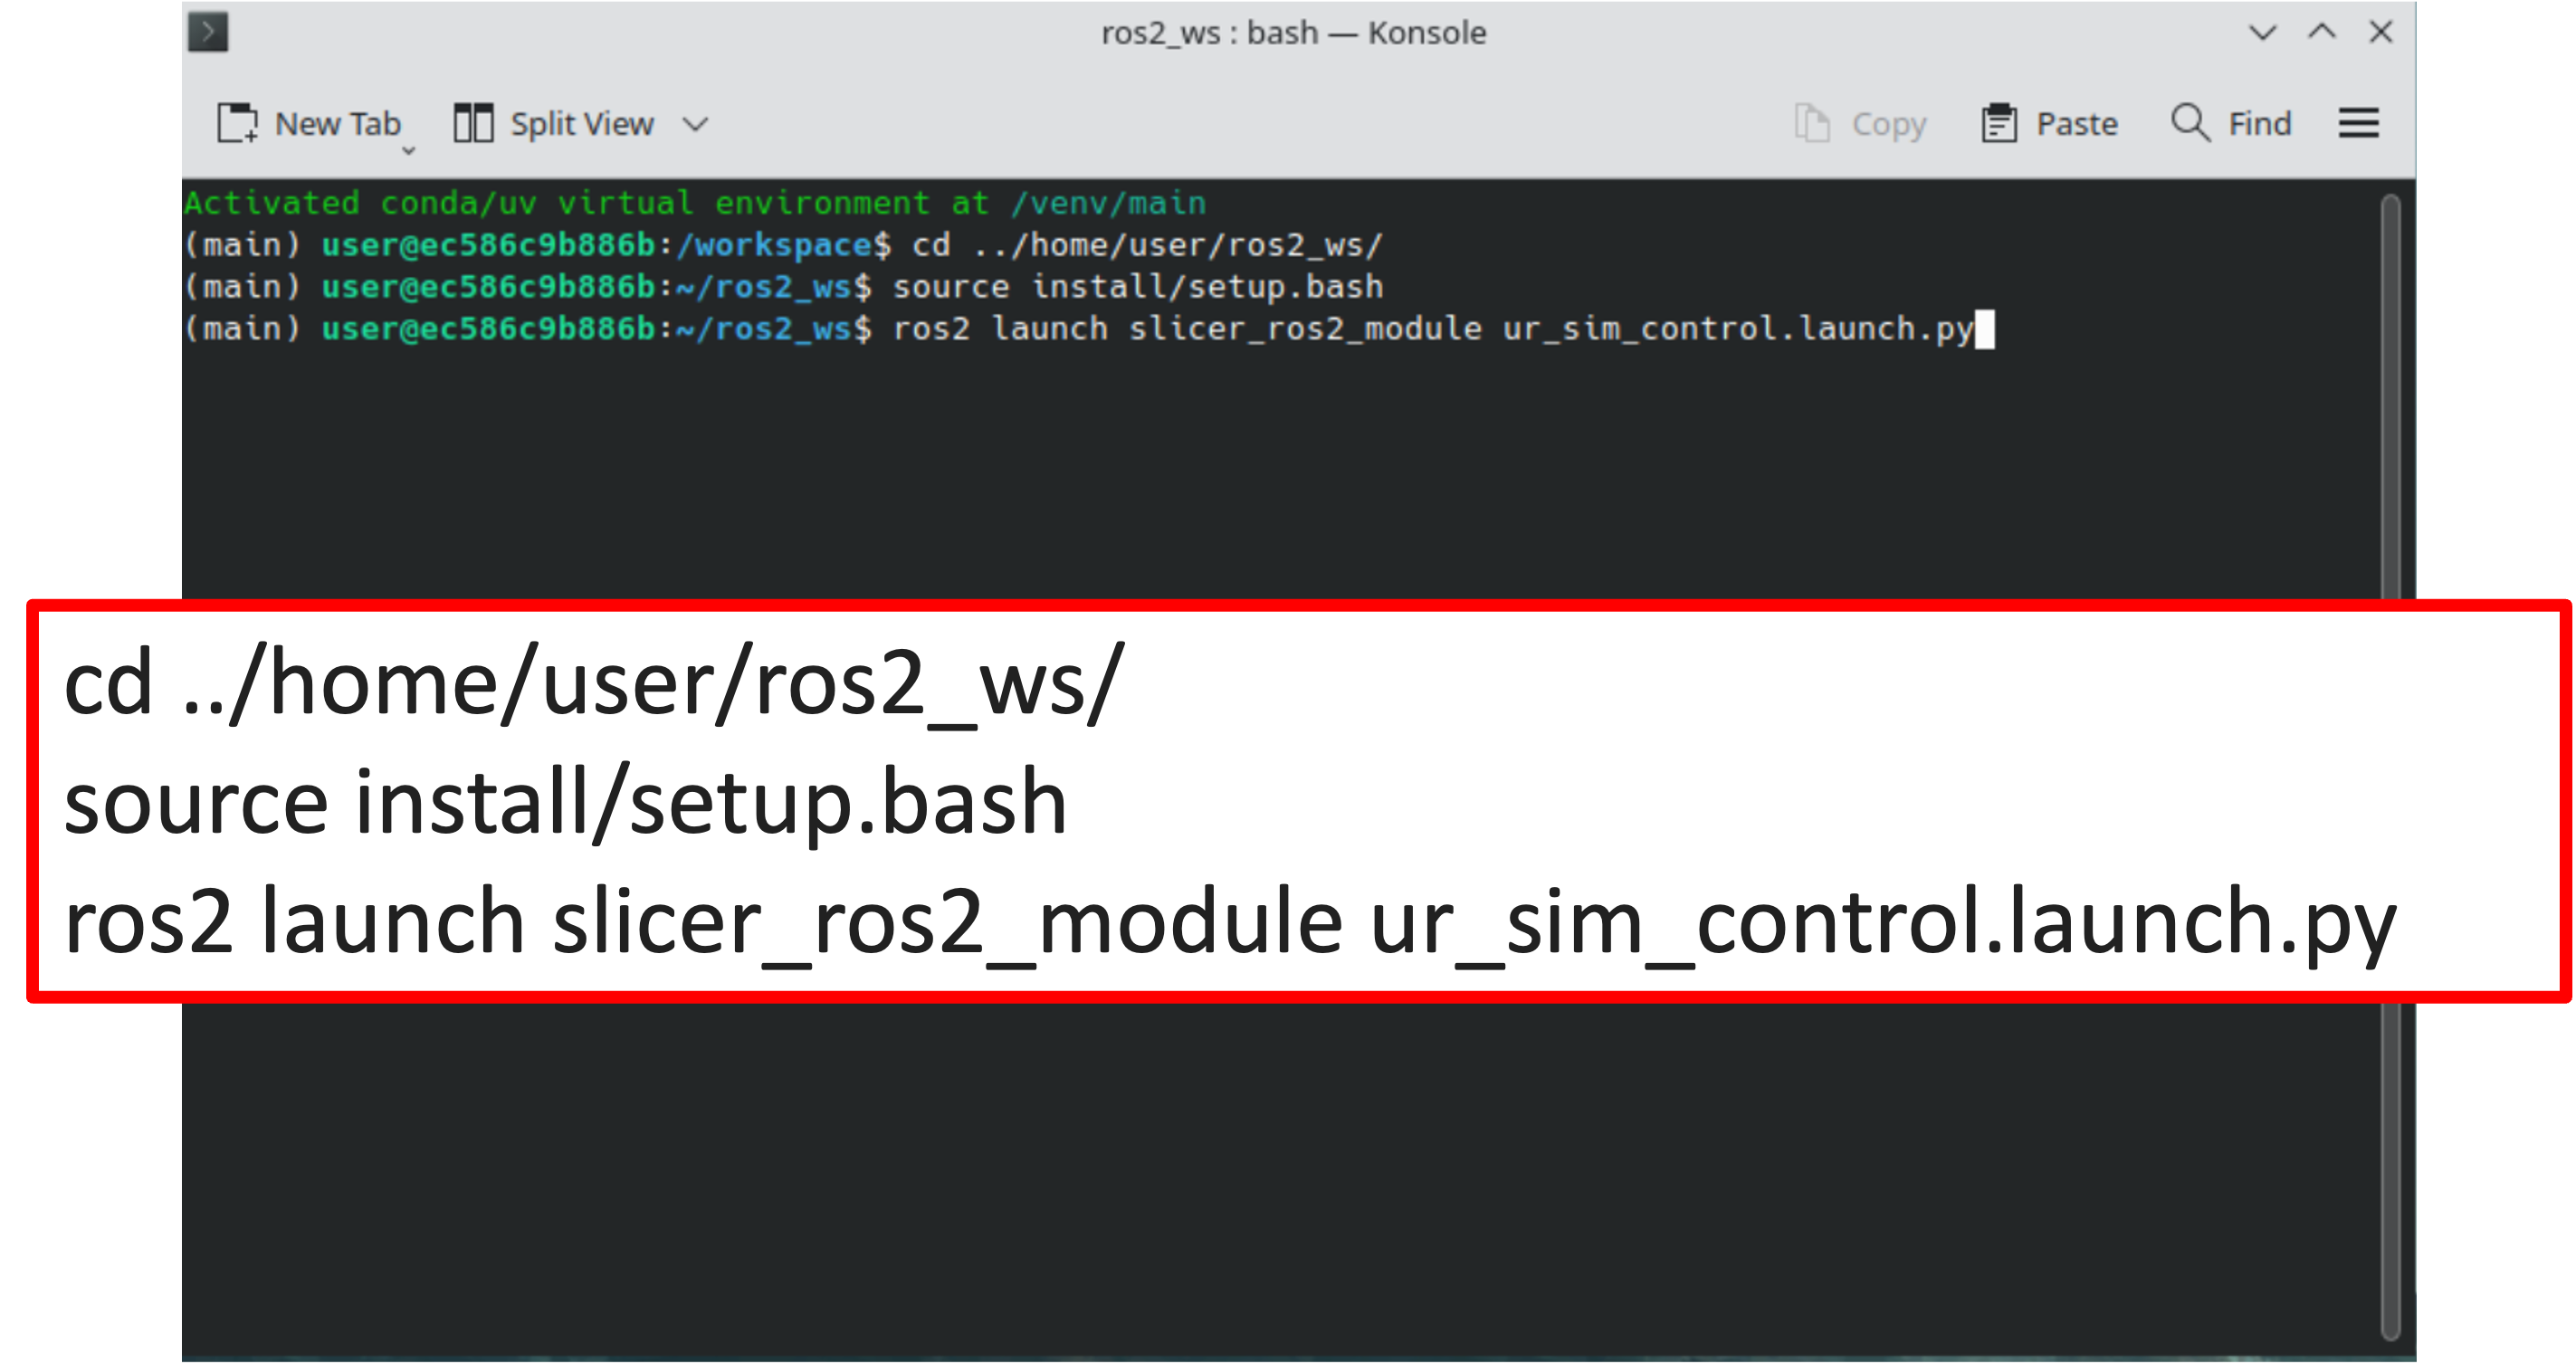
In the terminal, navigate to the ROS 2 workspace, source the workspace overlay, and launch the Universal Robot simulation:
cd ../home/user/ros2_ws/
source install/setup.bash
ros2 launch slicer_ros2_module ur_sim_control.launch.py
Step 58: Confirm the Simulation Starts
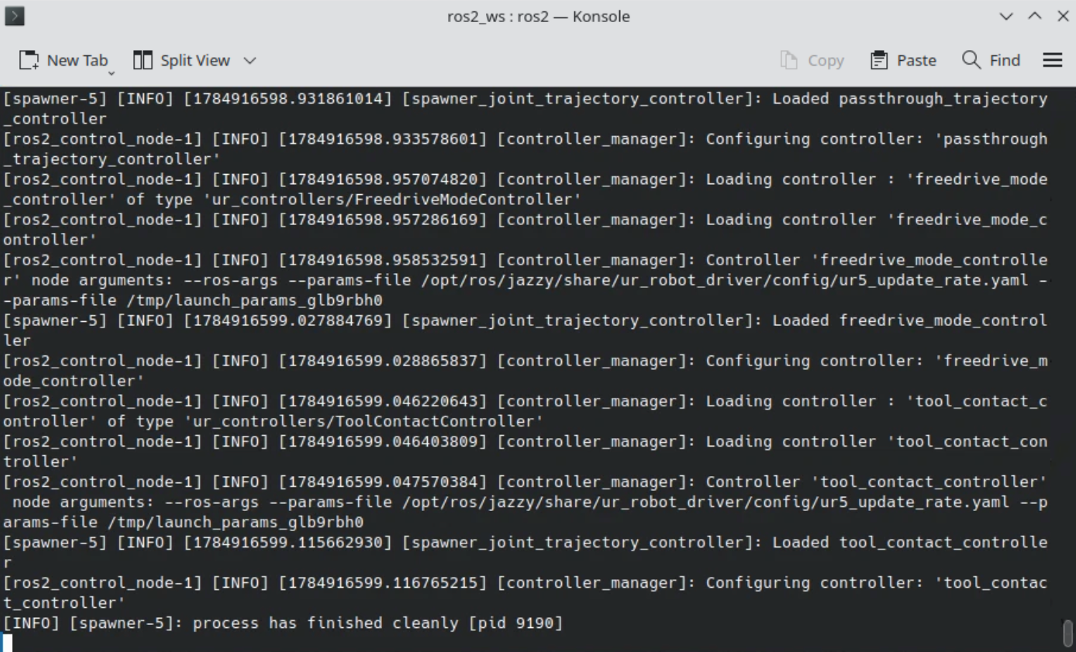
Wait for the launch output to settle. You should see the controller manager load the joint trajectory, freedrive mode, and tool contact controllers, finishing with a message that the spawner process completed cleanly.
Part 7: Launch SlicerROS2 and Load the Robot
Step 59: Launch SlicerROS2
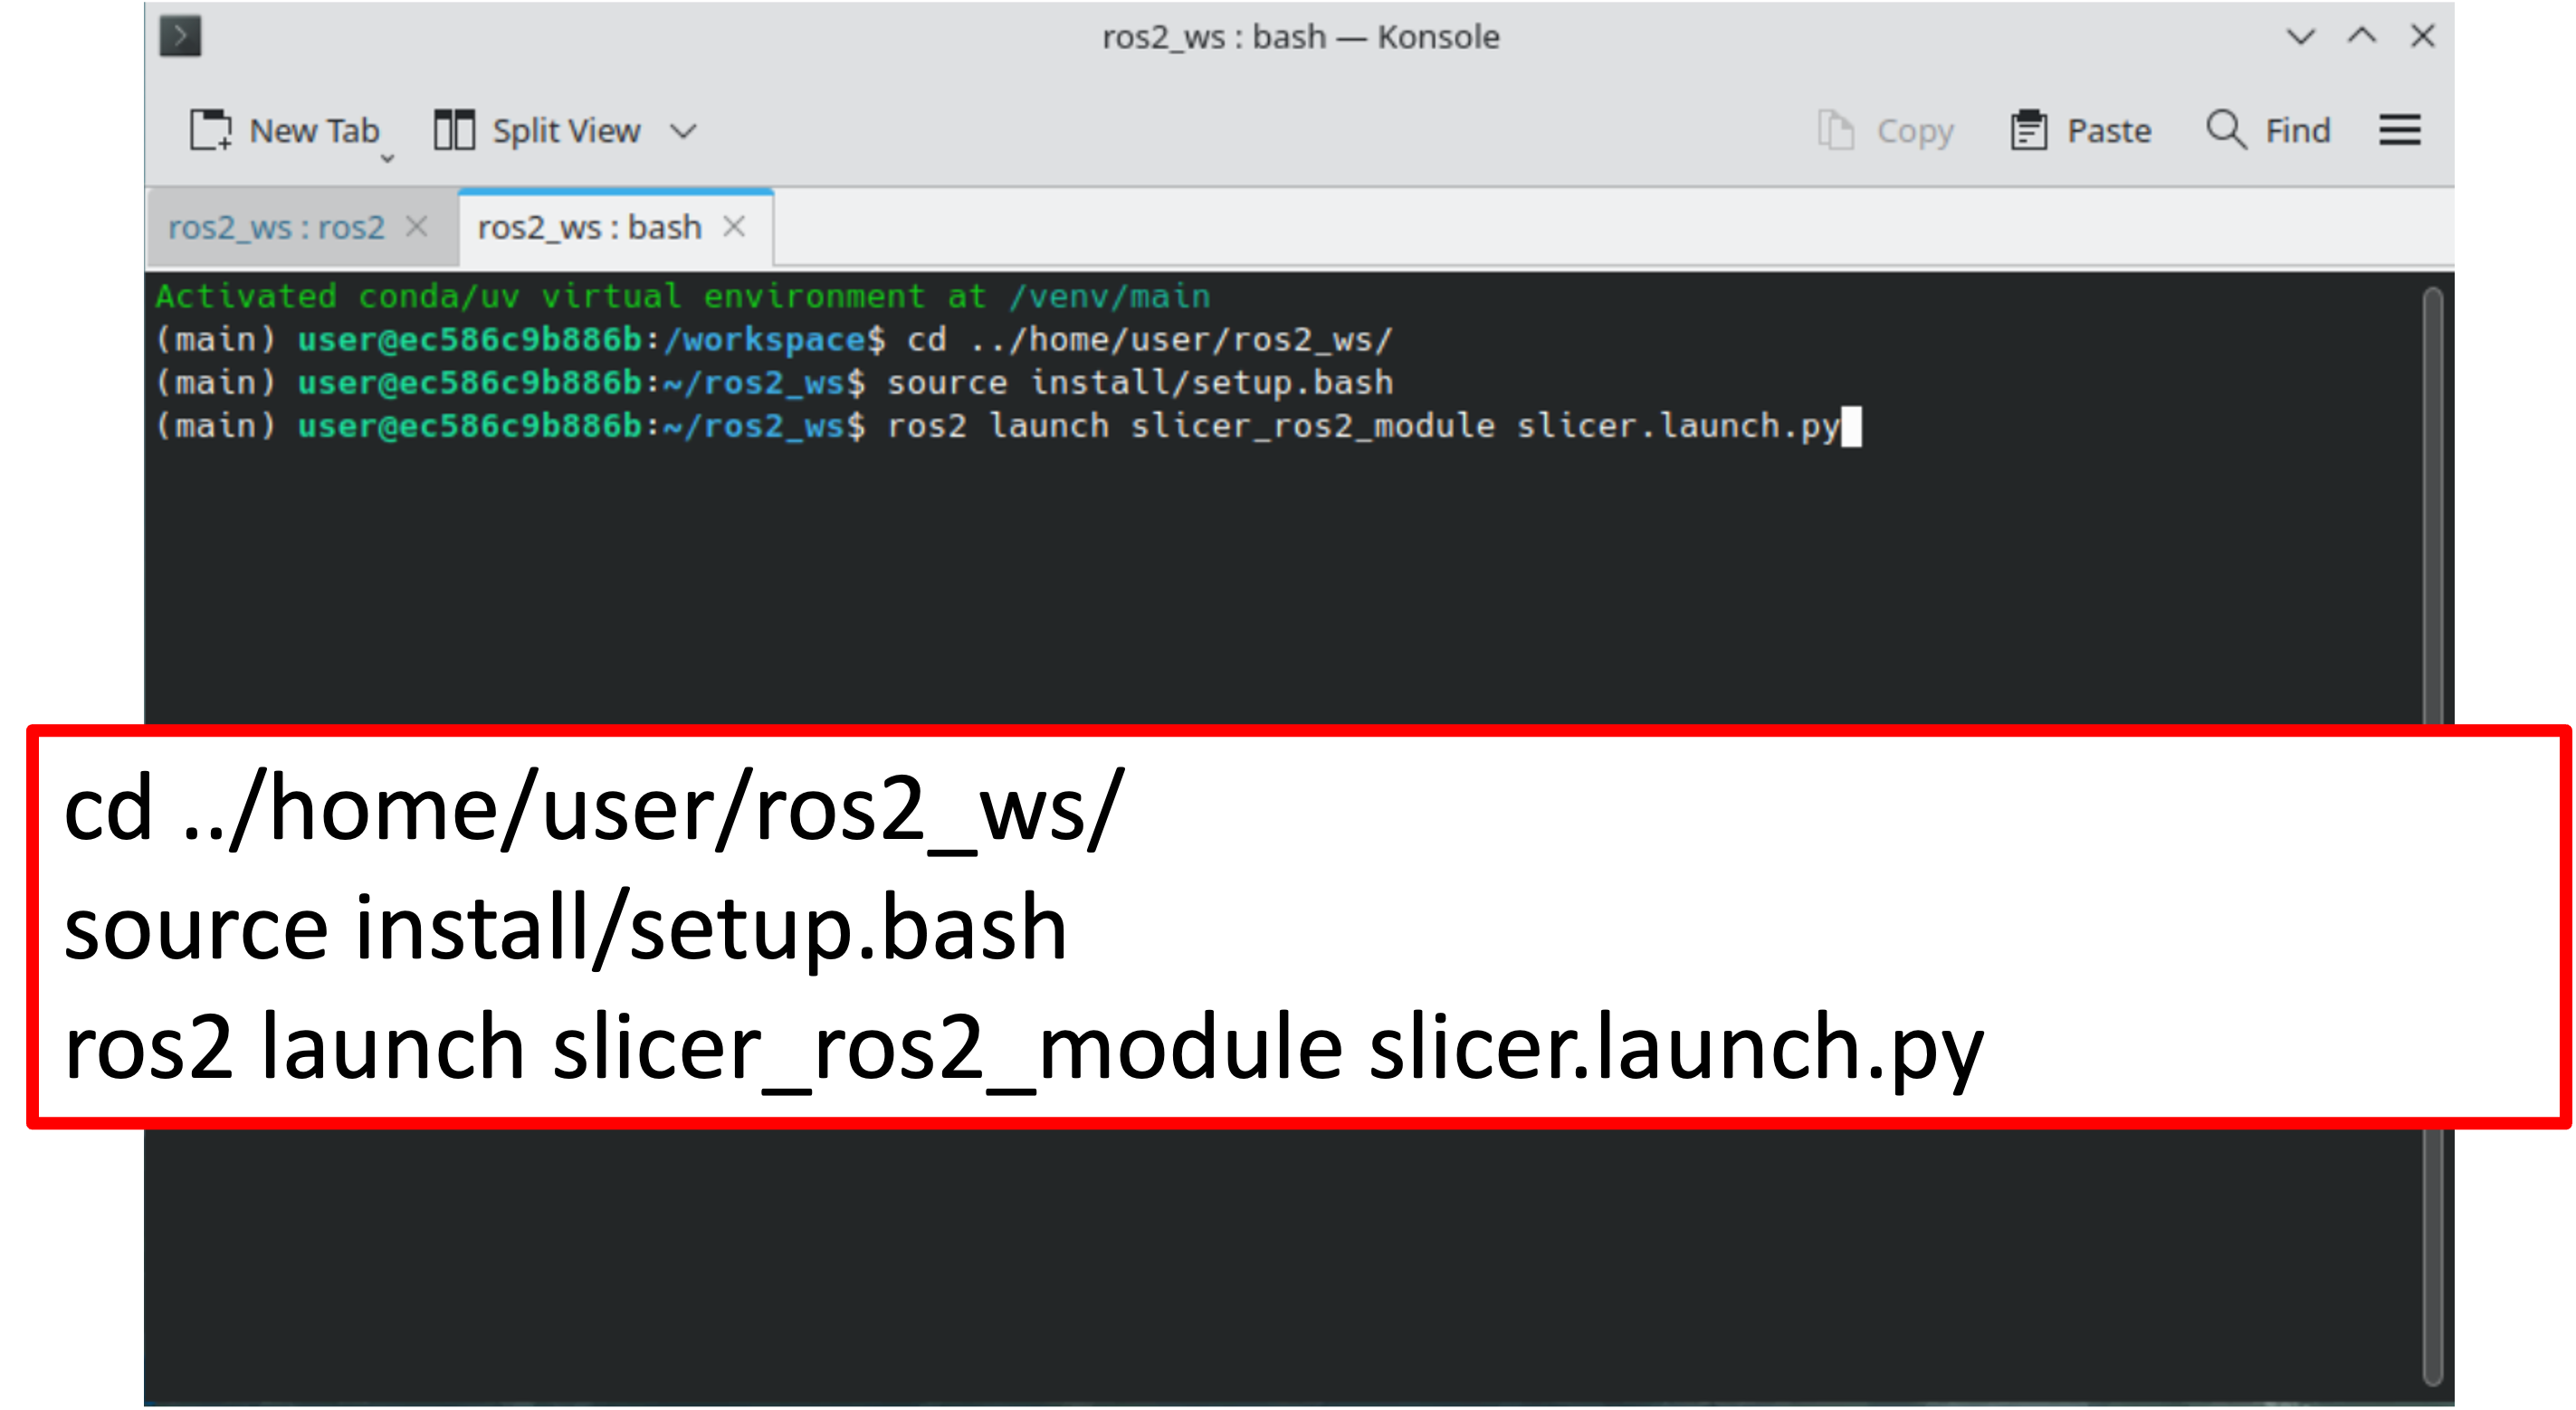
Open a new Konsole tab, source the workspace again, and launch 3D Slicer with the SlicerROS2 module:
cd ../home/user/ros2_ws/
source install/setup.bash
ros2 launch slicer_ros2_module slicer.launch.py
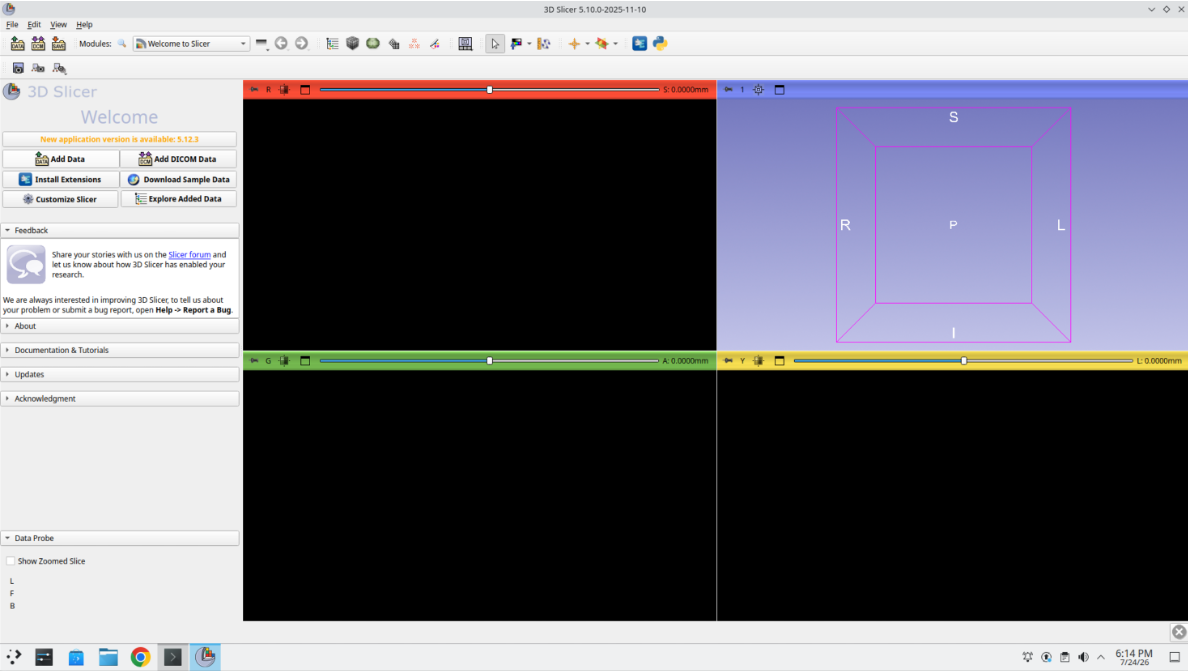
Step 60: Confirm Slicer Opens
3D Slicer should open to the default Welcome module with an empty Four-Up layout.
Step 61: Open the Module Finder
Press Ctrl+F to open the Module Finder and search for ros2.
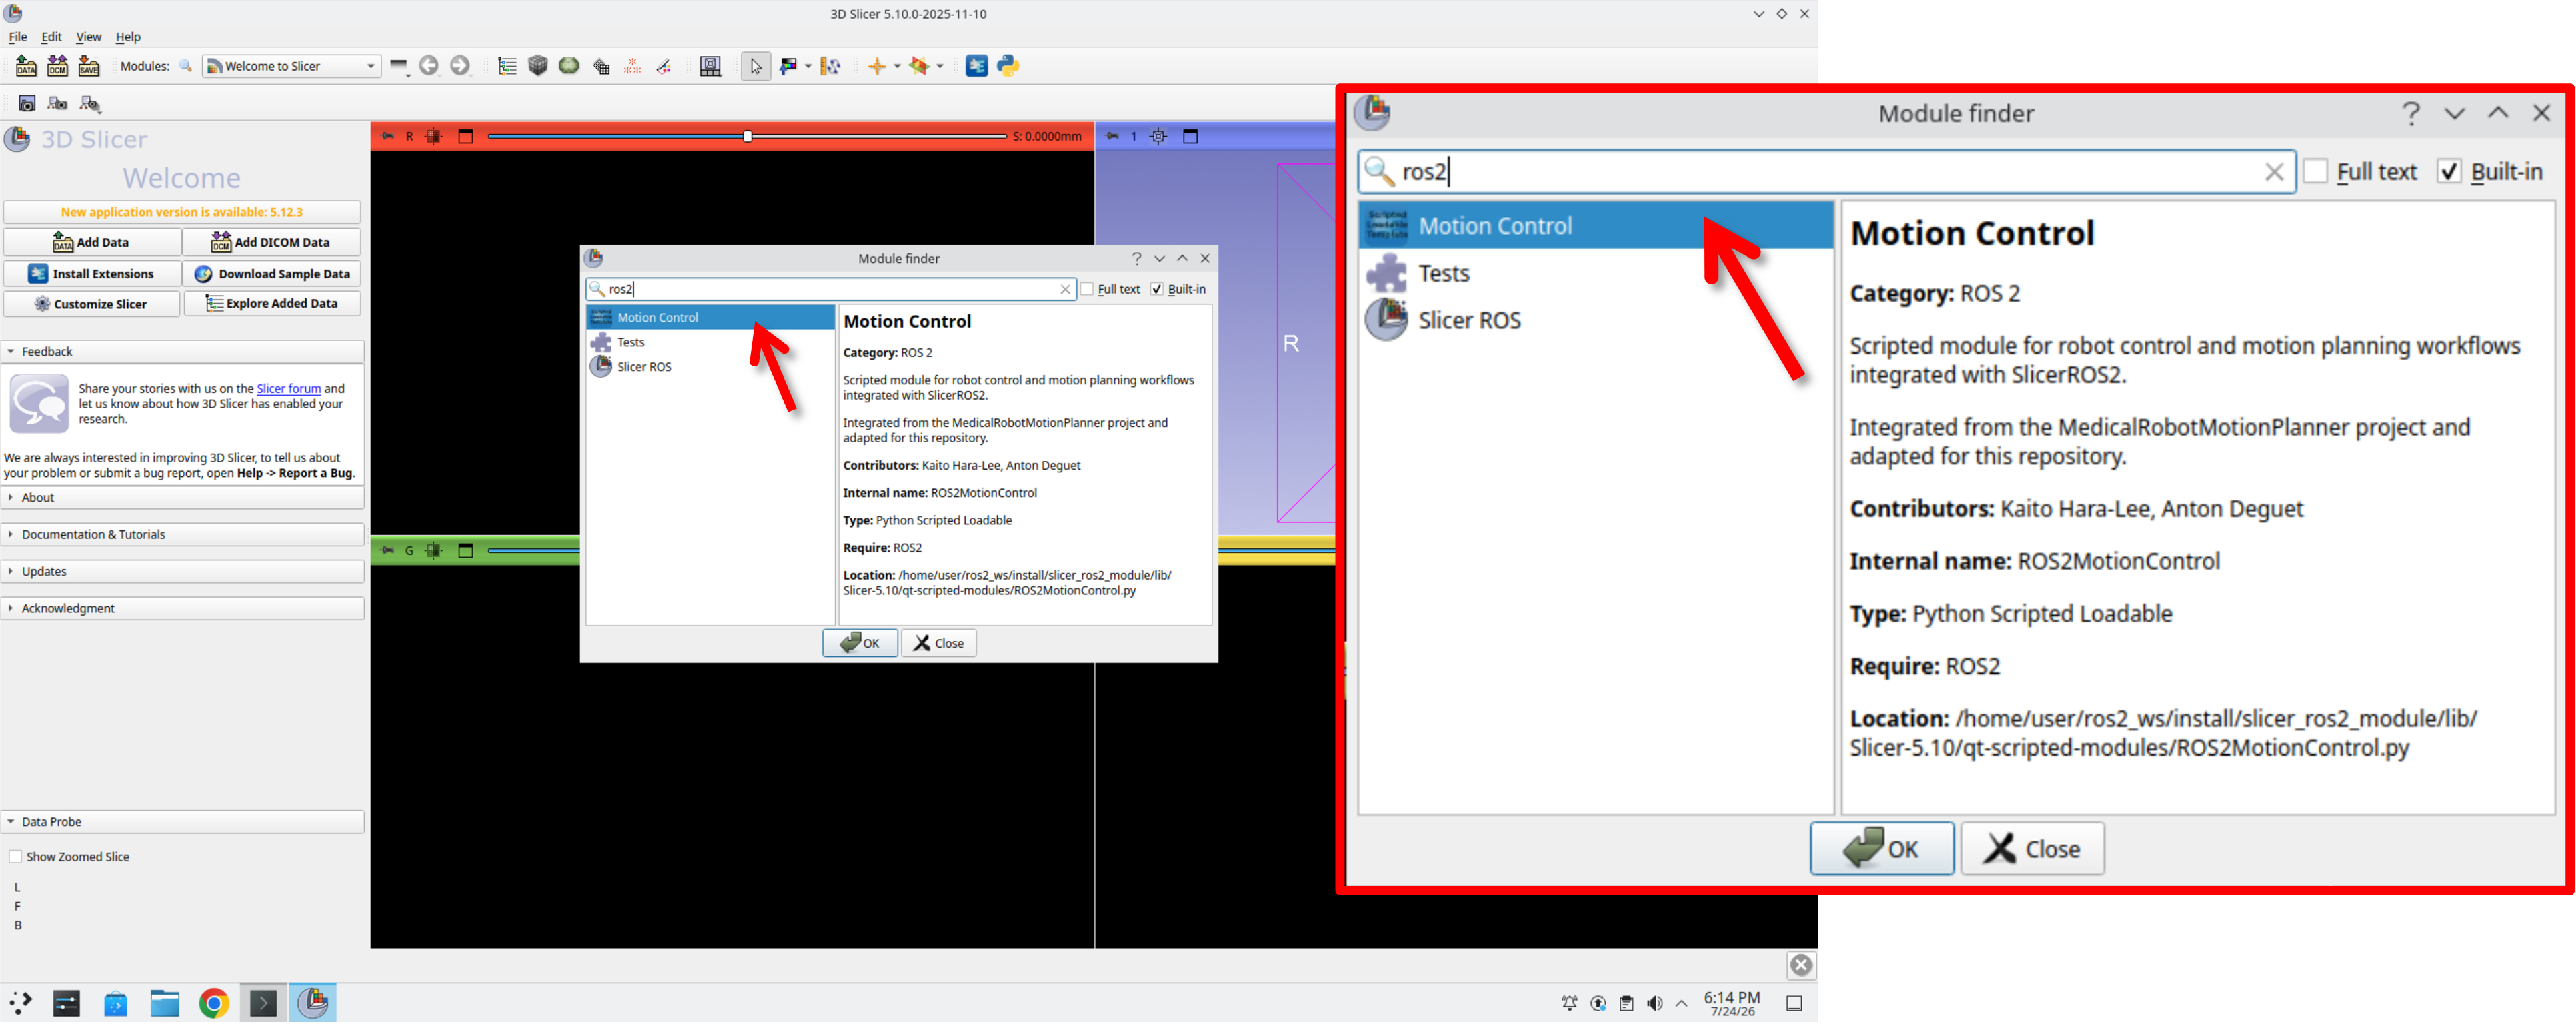
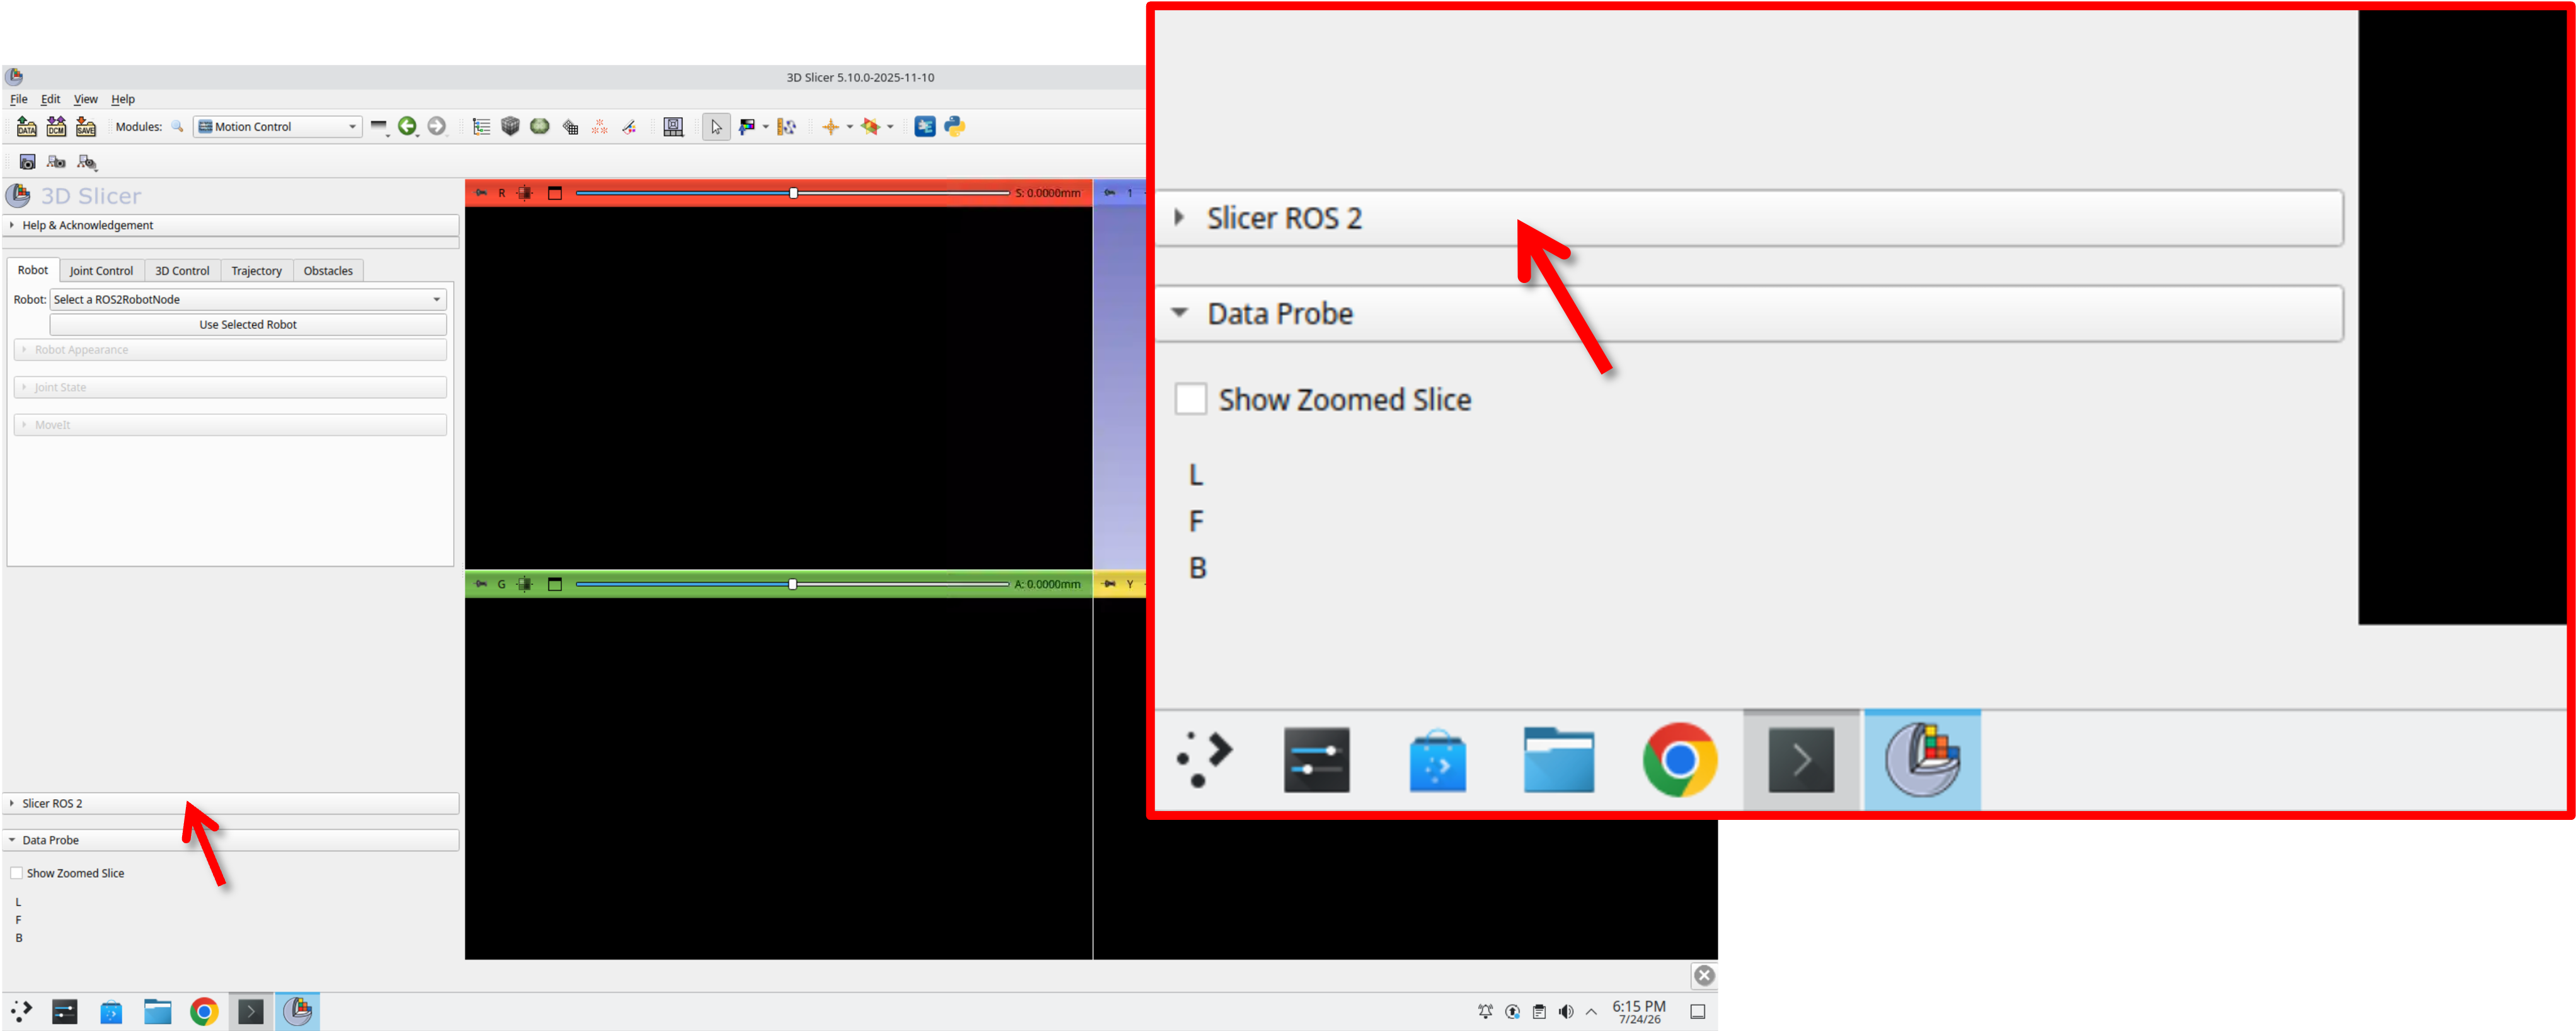
Step 62: Open the Slicer ROS 2 Panel
Select Motion Control to load the module, then open the Slicer ROS 2 collapsible section near the bottom of the panel.
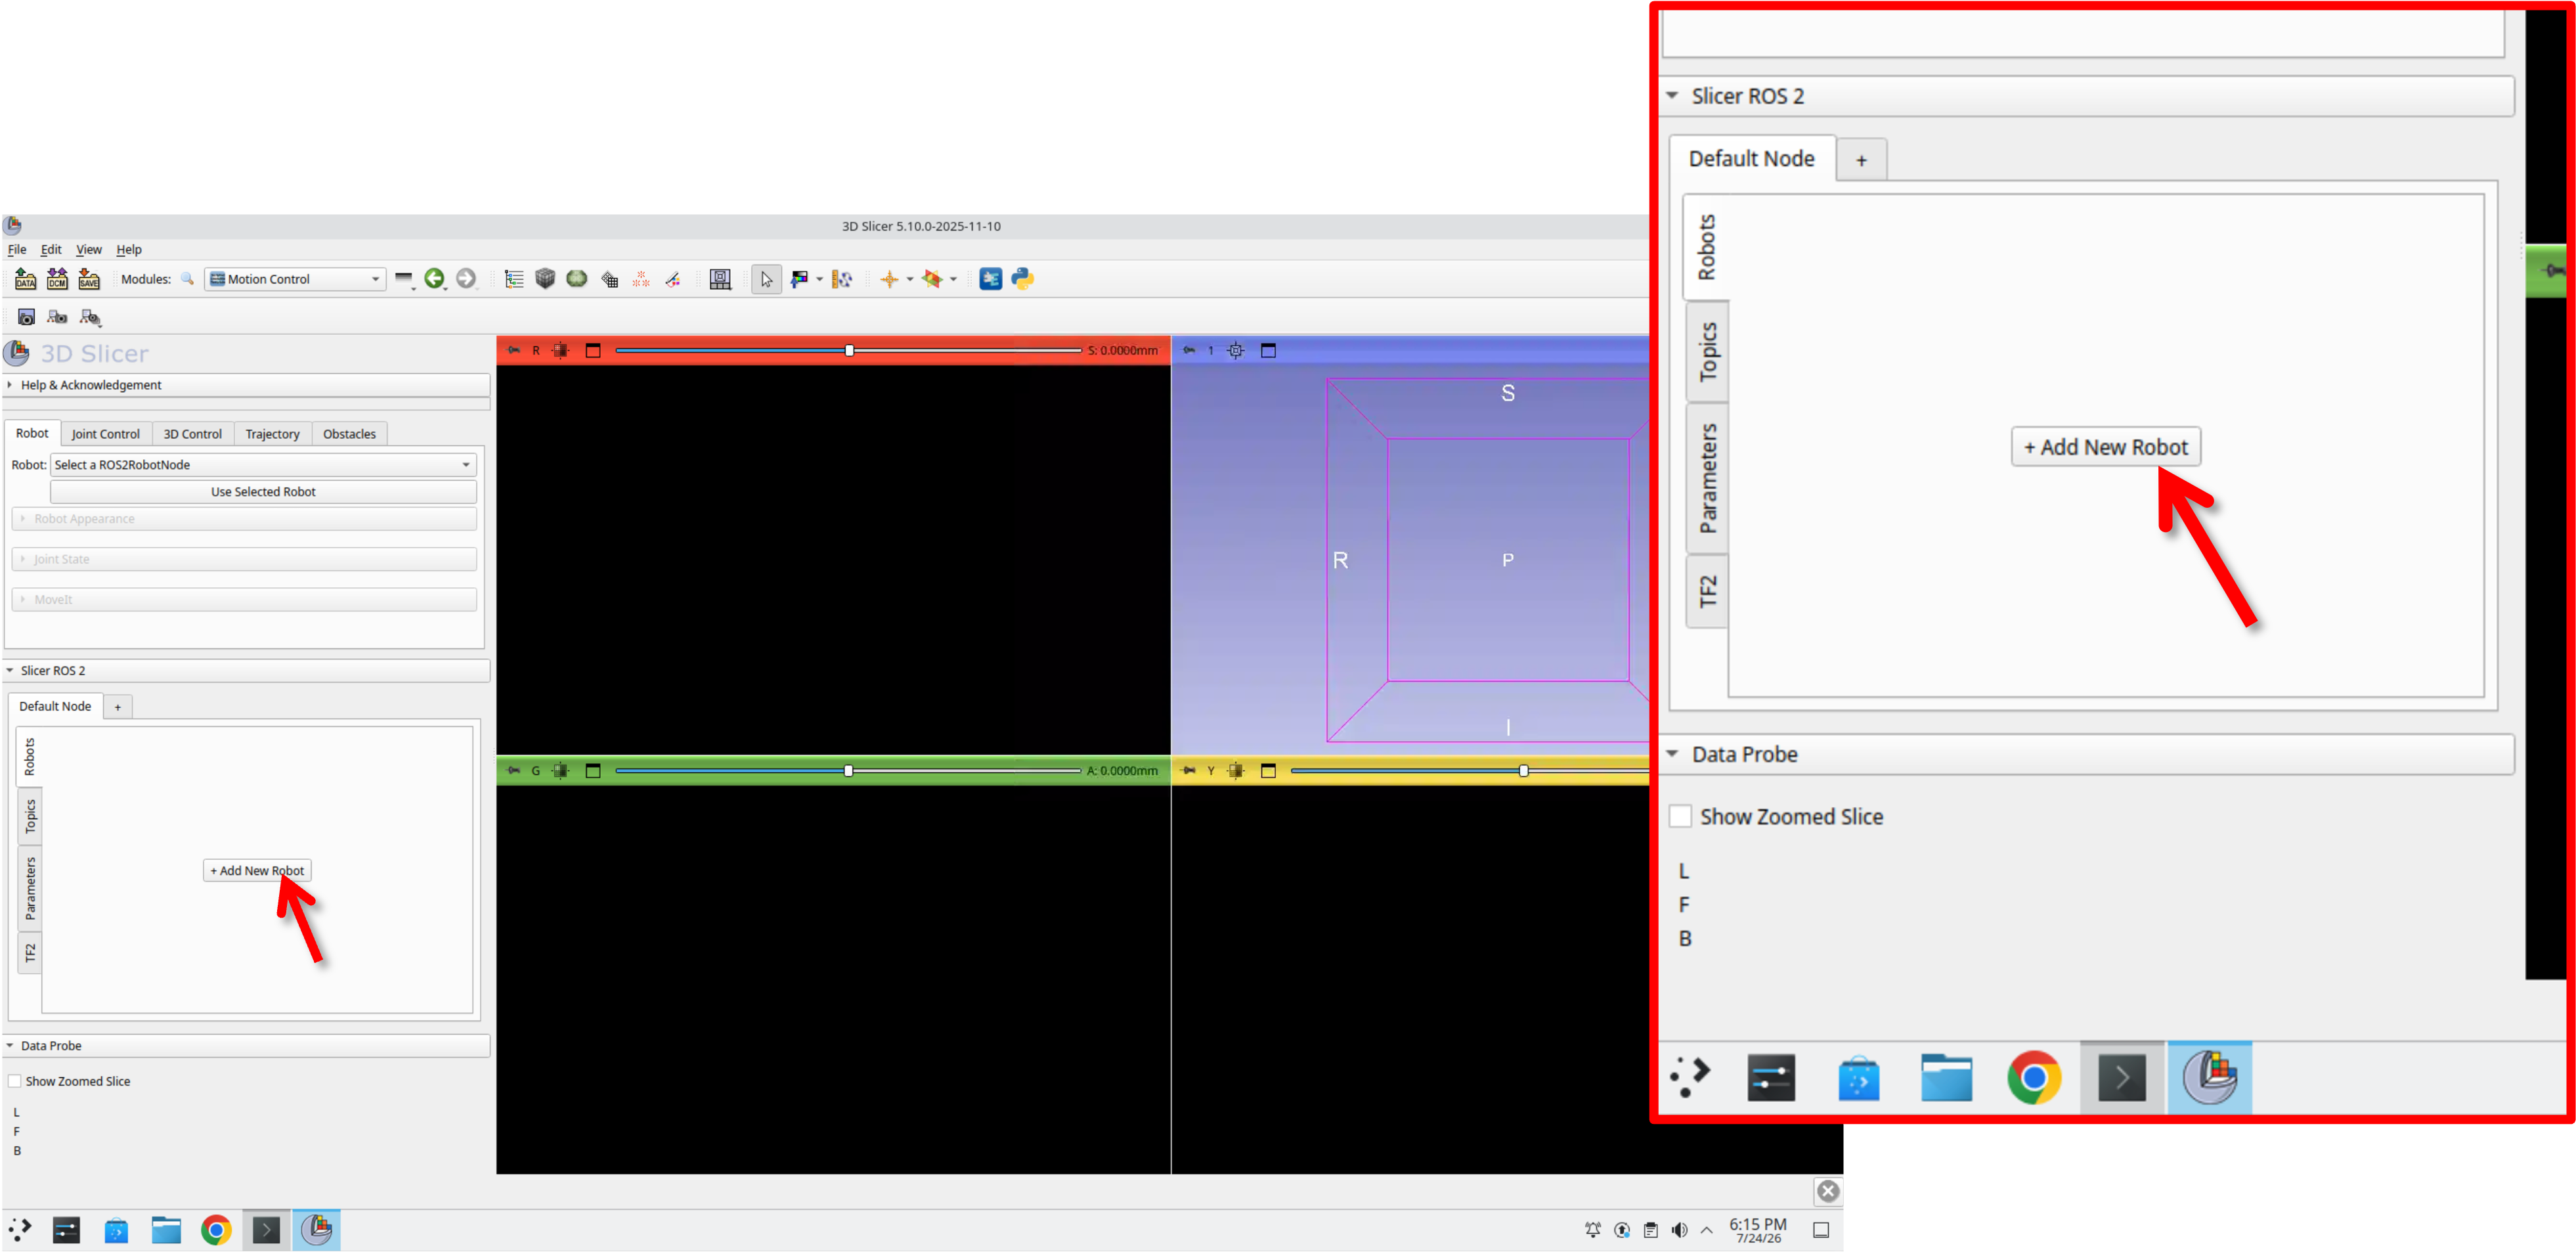
Step 63: Add a New Robot
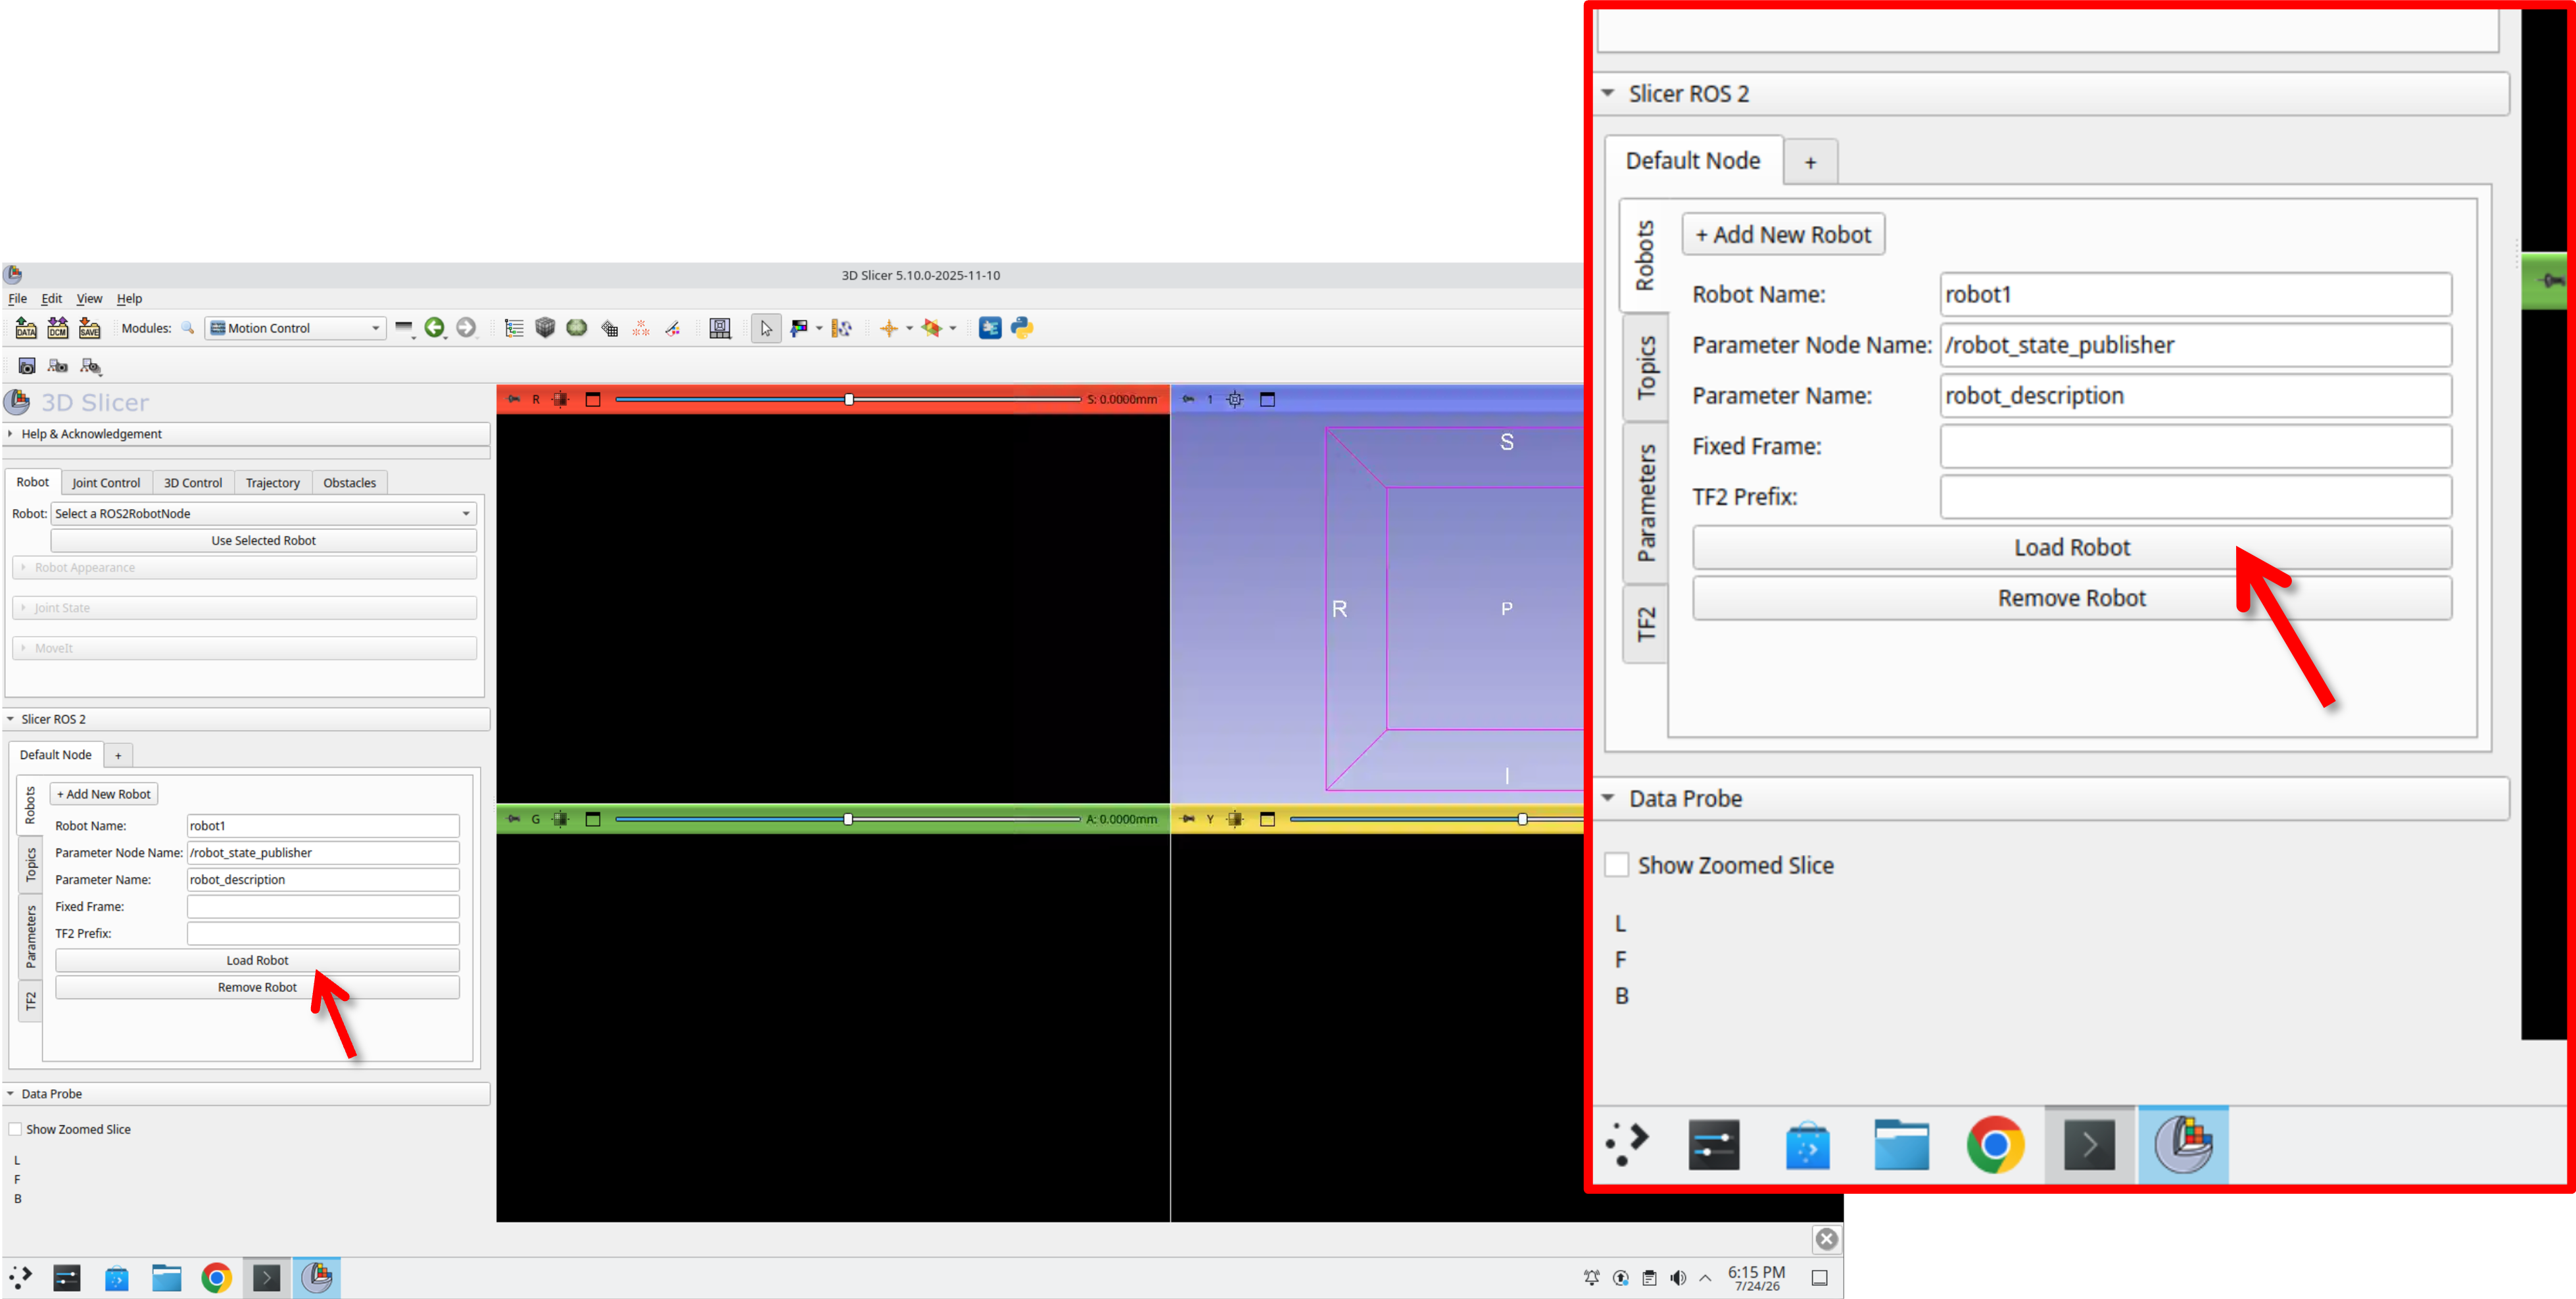
With the Robots tab selected, press + Add New Robot.
Step 64: Load the Robot
Leave the default Robot Name (robot1), Parameter Node Name, and Parameter Name fields as they are, and press Load Robot.
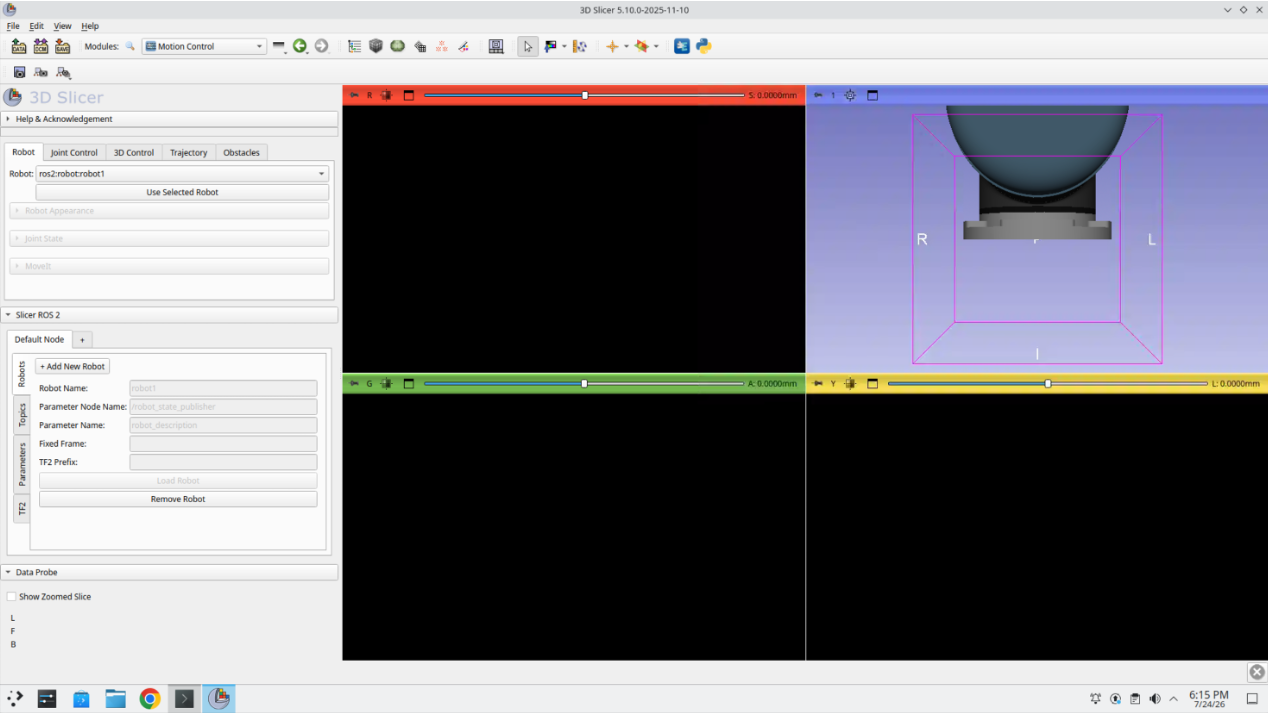
Step 65: Confirm the Robot Loads
The Robot dropdown at the top of the module now shows ros2:robot:robot1, and the robot model appears in the 3D view.
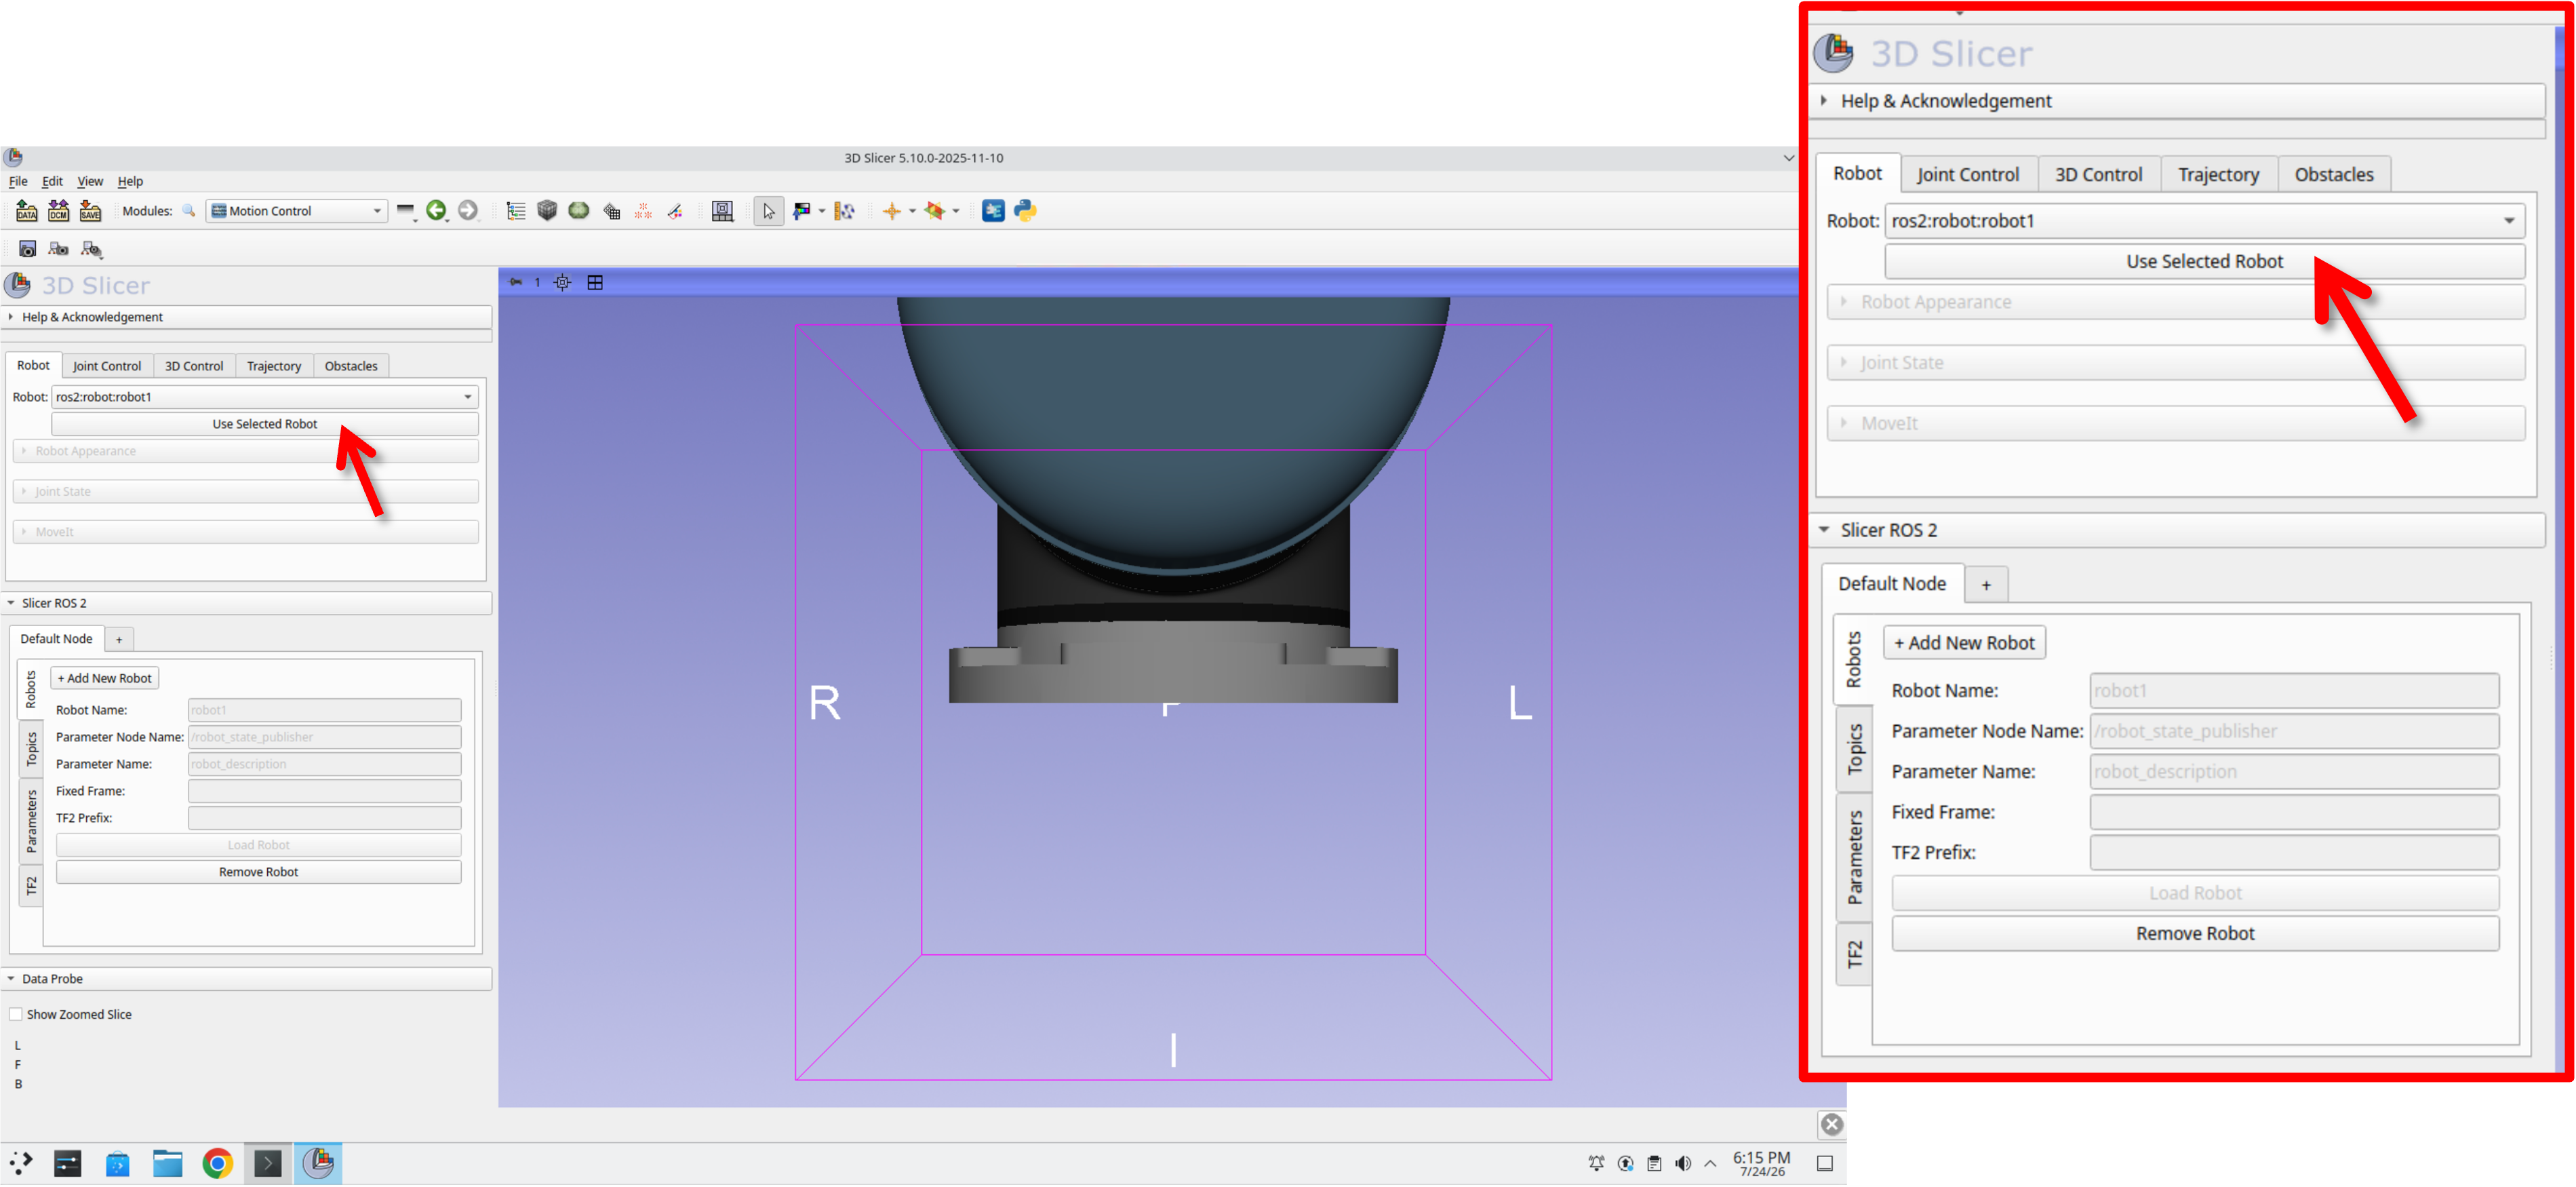
Step 66: Use the Selected Robot
Make sure ros2:robot:robot1 is selected in the Robot dropdown, then press Use Selected Robot.
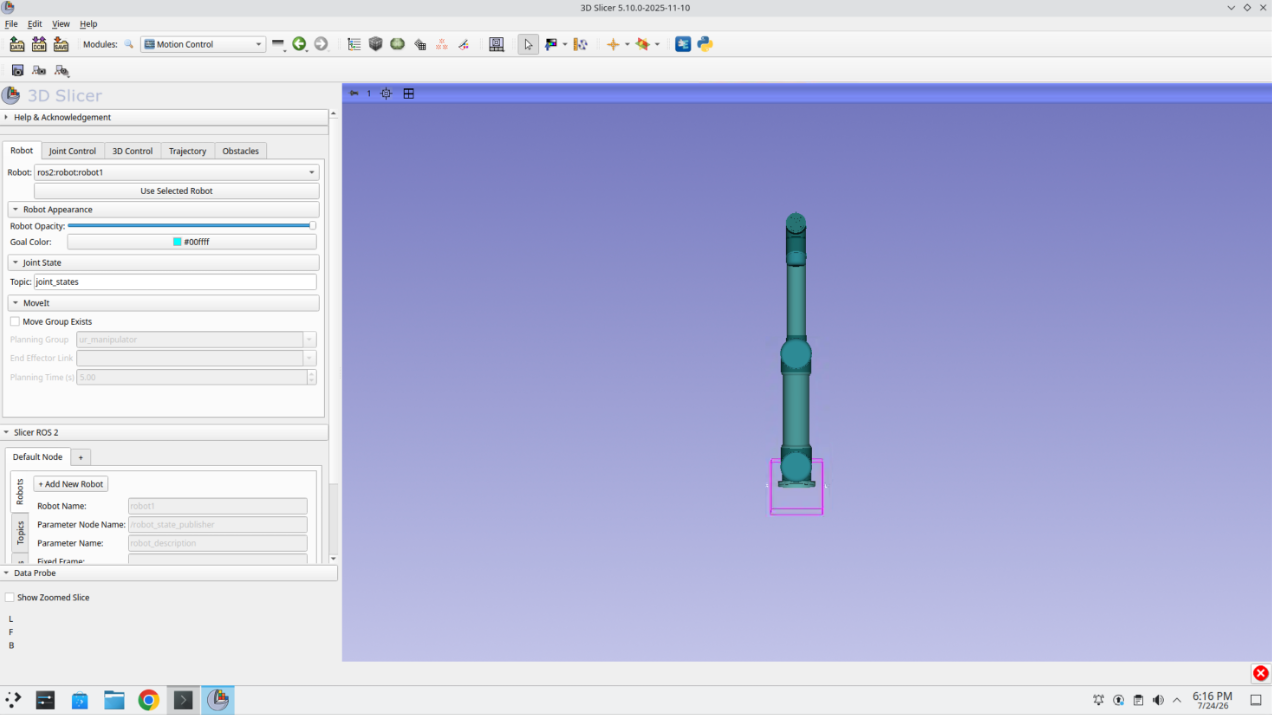
Step 67: Confirm the Robot Controls Appear
The Robot Appearance, Joint State, and MoveIt sections expand, and the robot is now fully visible in the 3D view.
Part 8: Explore the Motion Control Module
Step 68: Explore Each of the Tabs
Take a moment to click through the Robot, Joint Control, 3D Control, Trajectory, and Obstacles tabs to see what each one offers.
Part 9: Add Patient Models and a Custom End-Effector
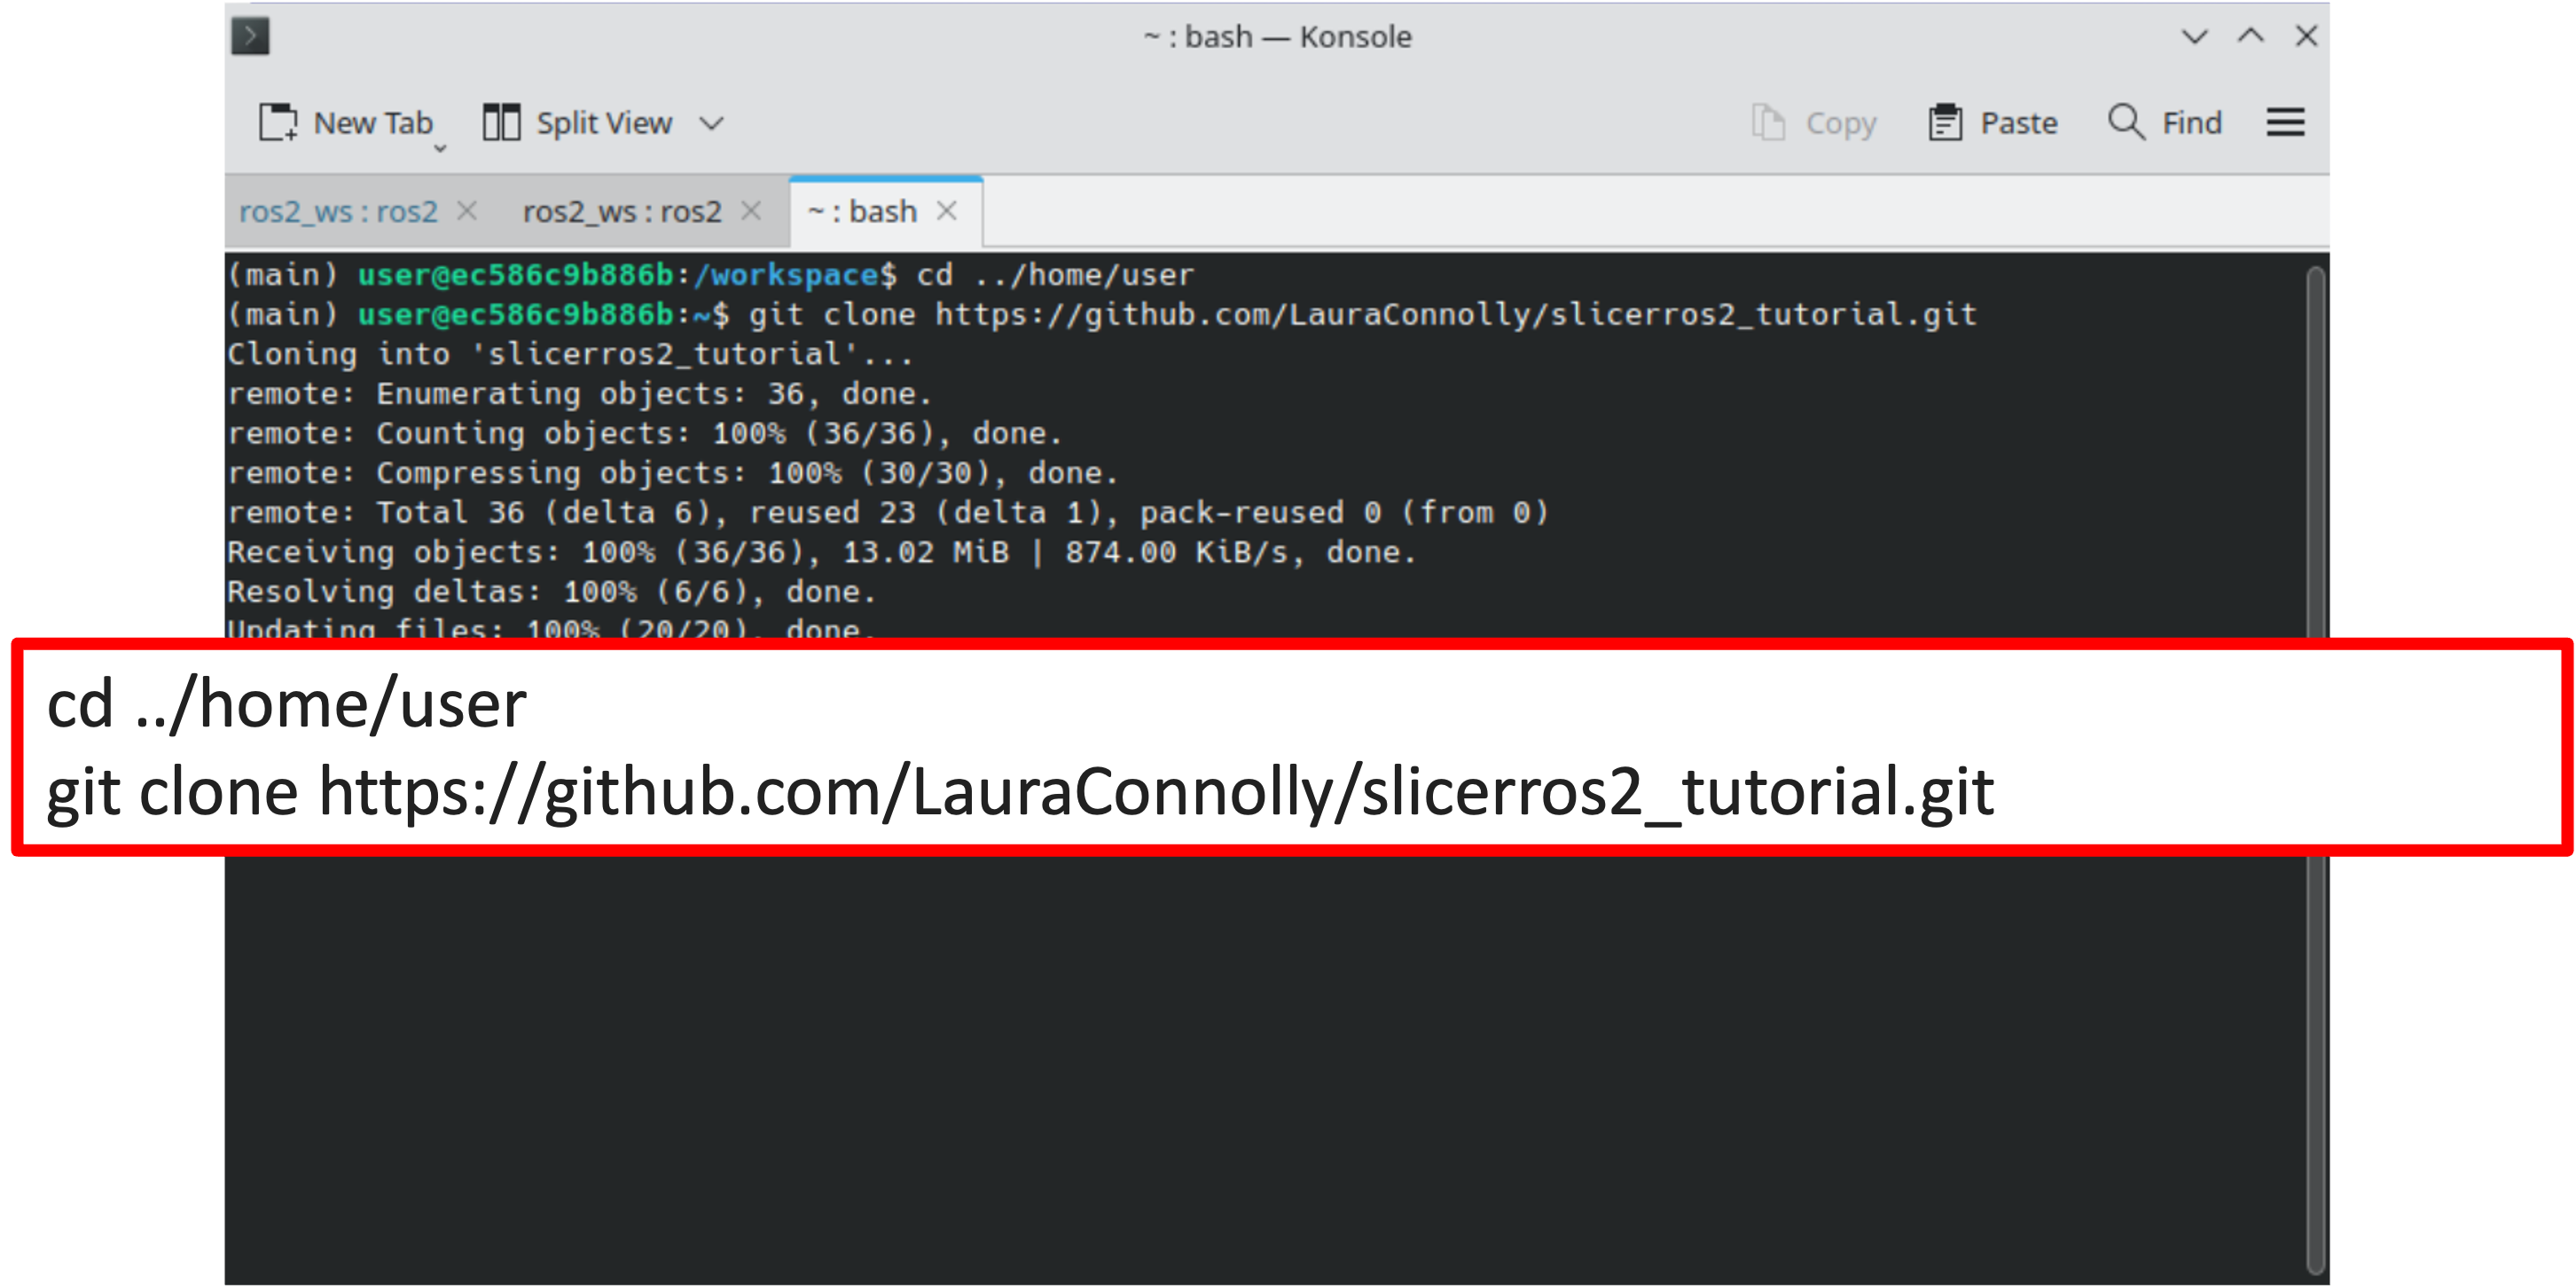
Step 69: Clone the Tutorial Data
Open a new Konsole terminal and clone the repository containing the patient model and end-effector data:
cd ../home/user
git clone https://github.com/LauraConnolly/slicerros2_tutorial.git
Step 70: Load the Data
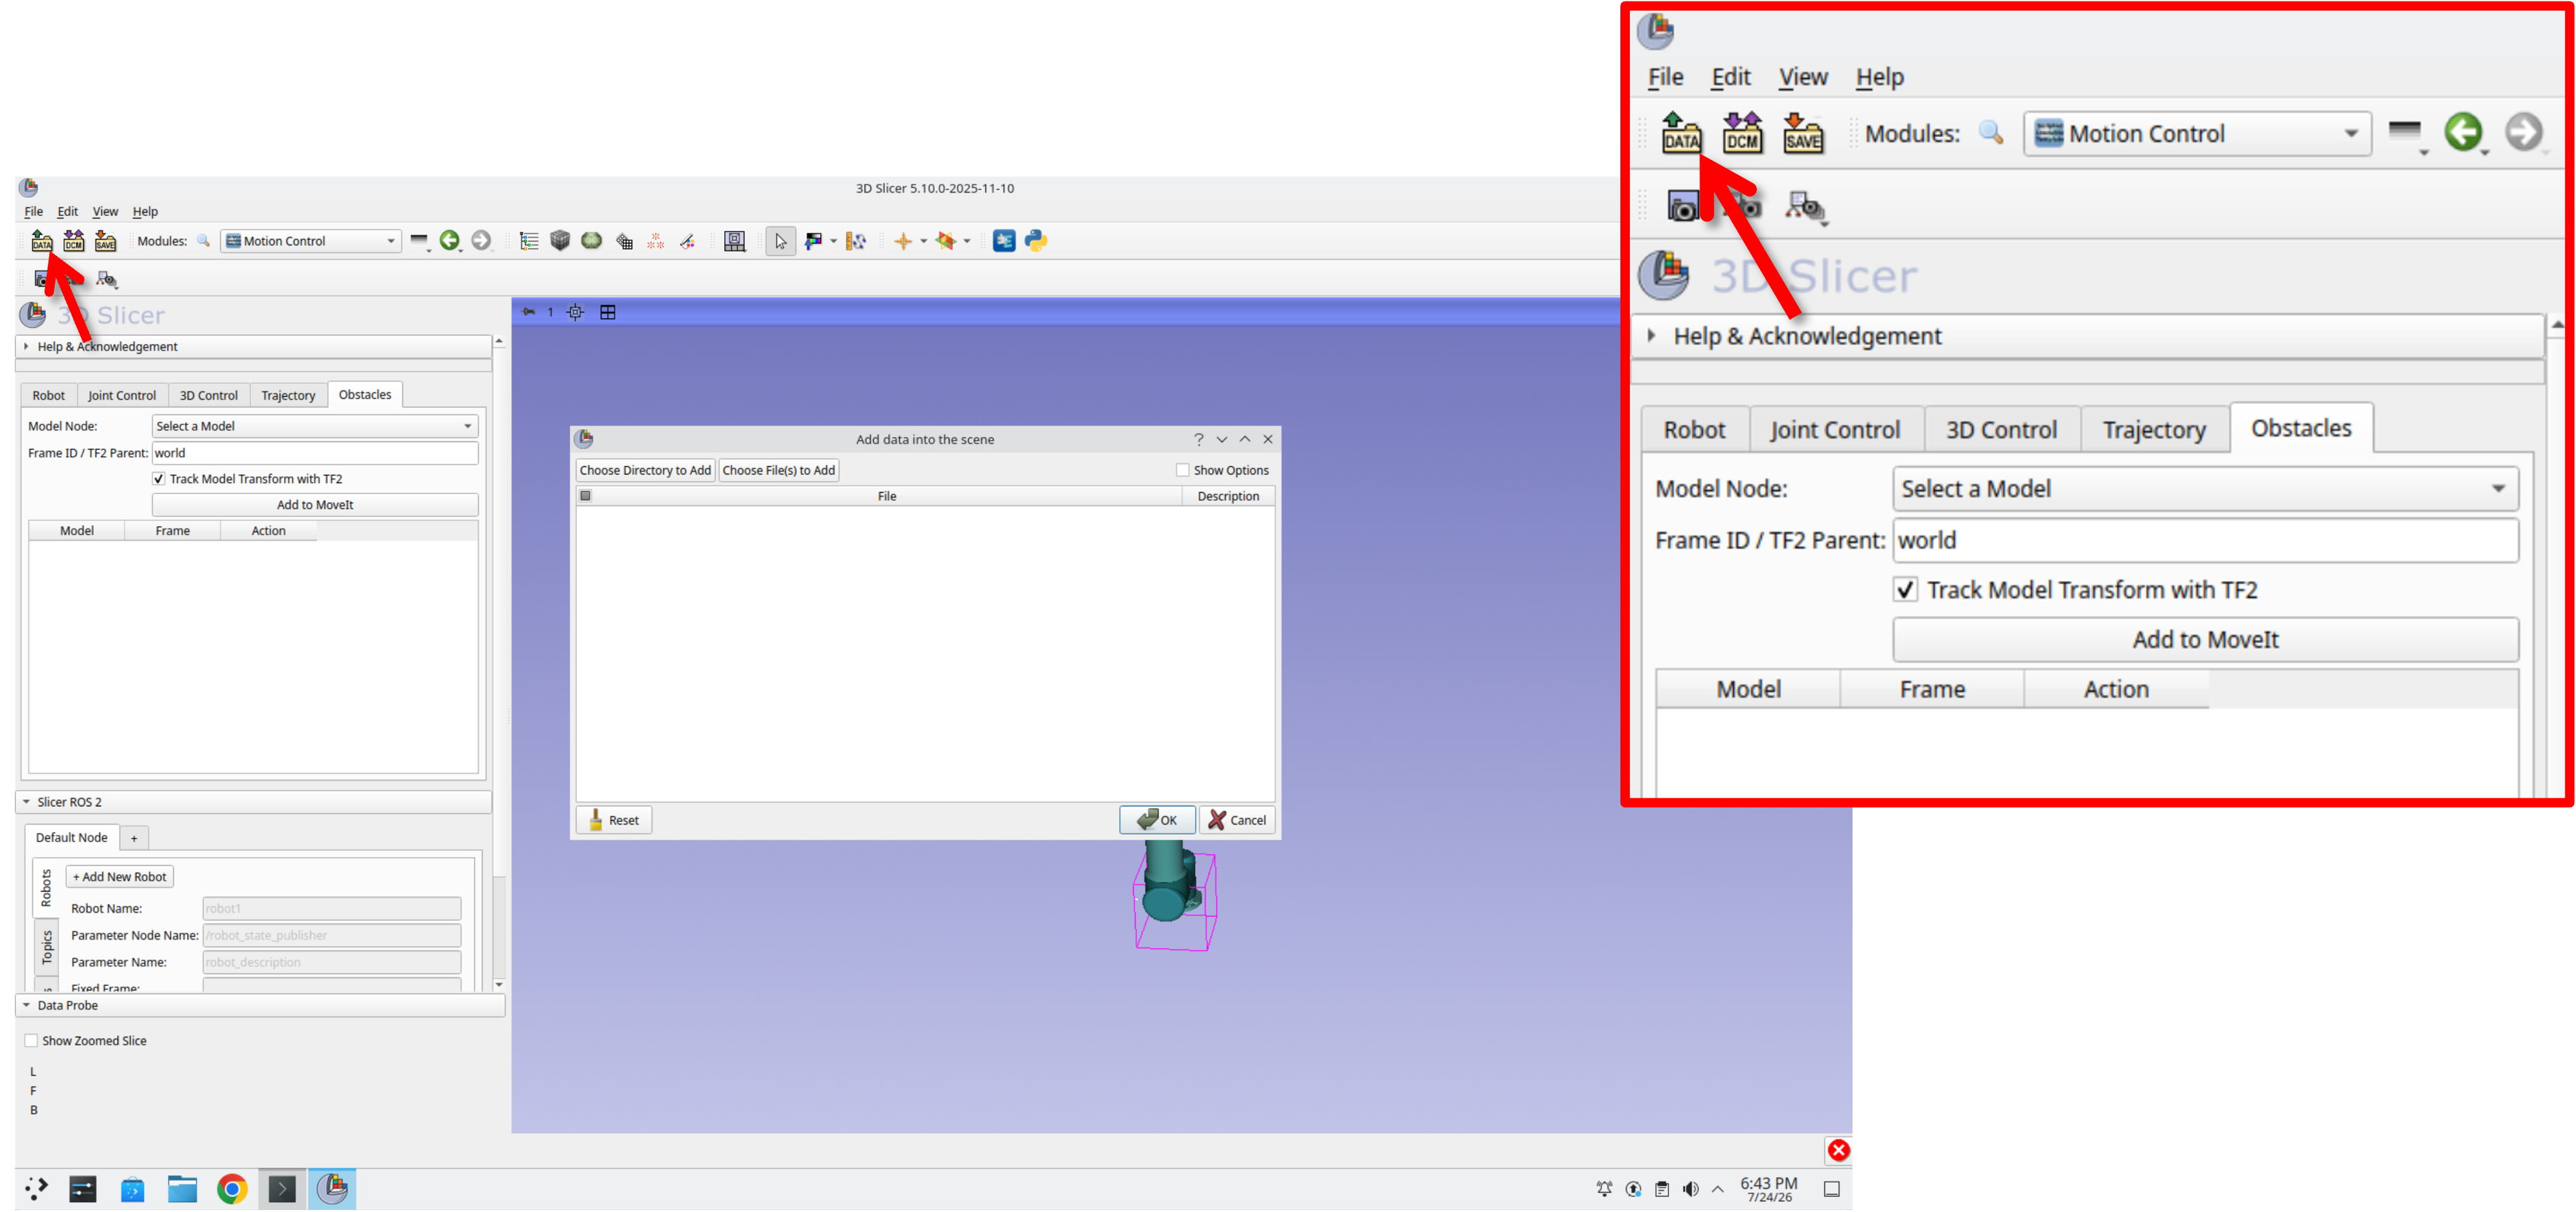
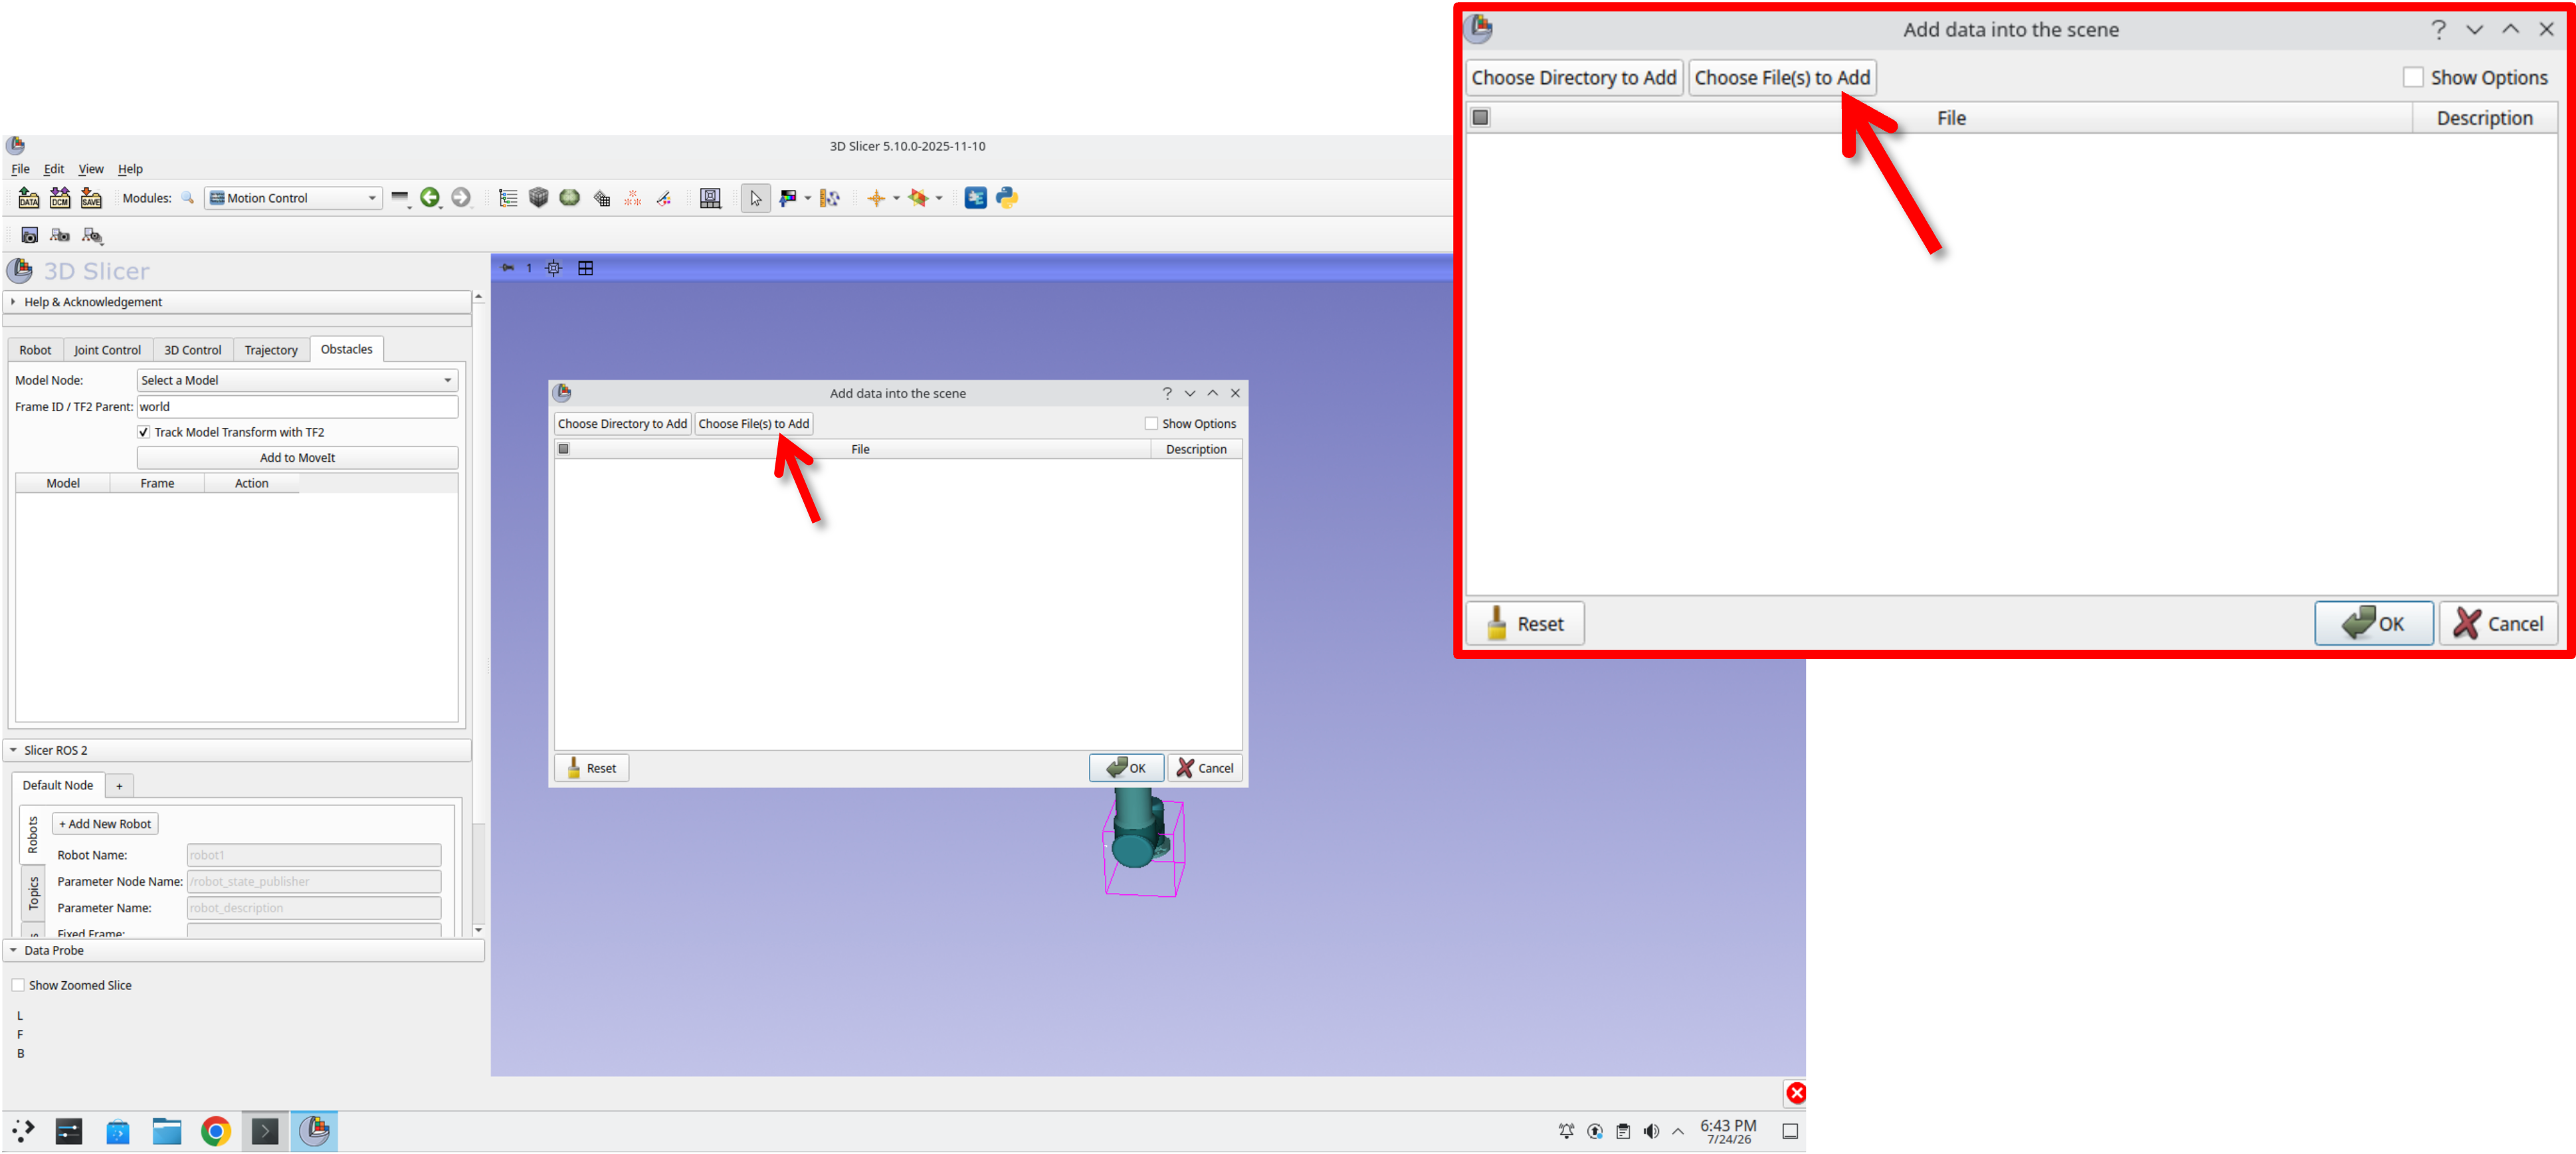
Back in Slicer, click the Add Data button, then select Choose File(s) to Add in the dialog that appears.
Step 71: Select the Data Files
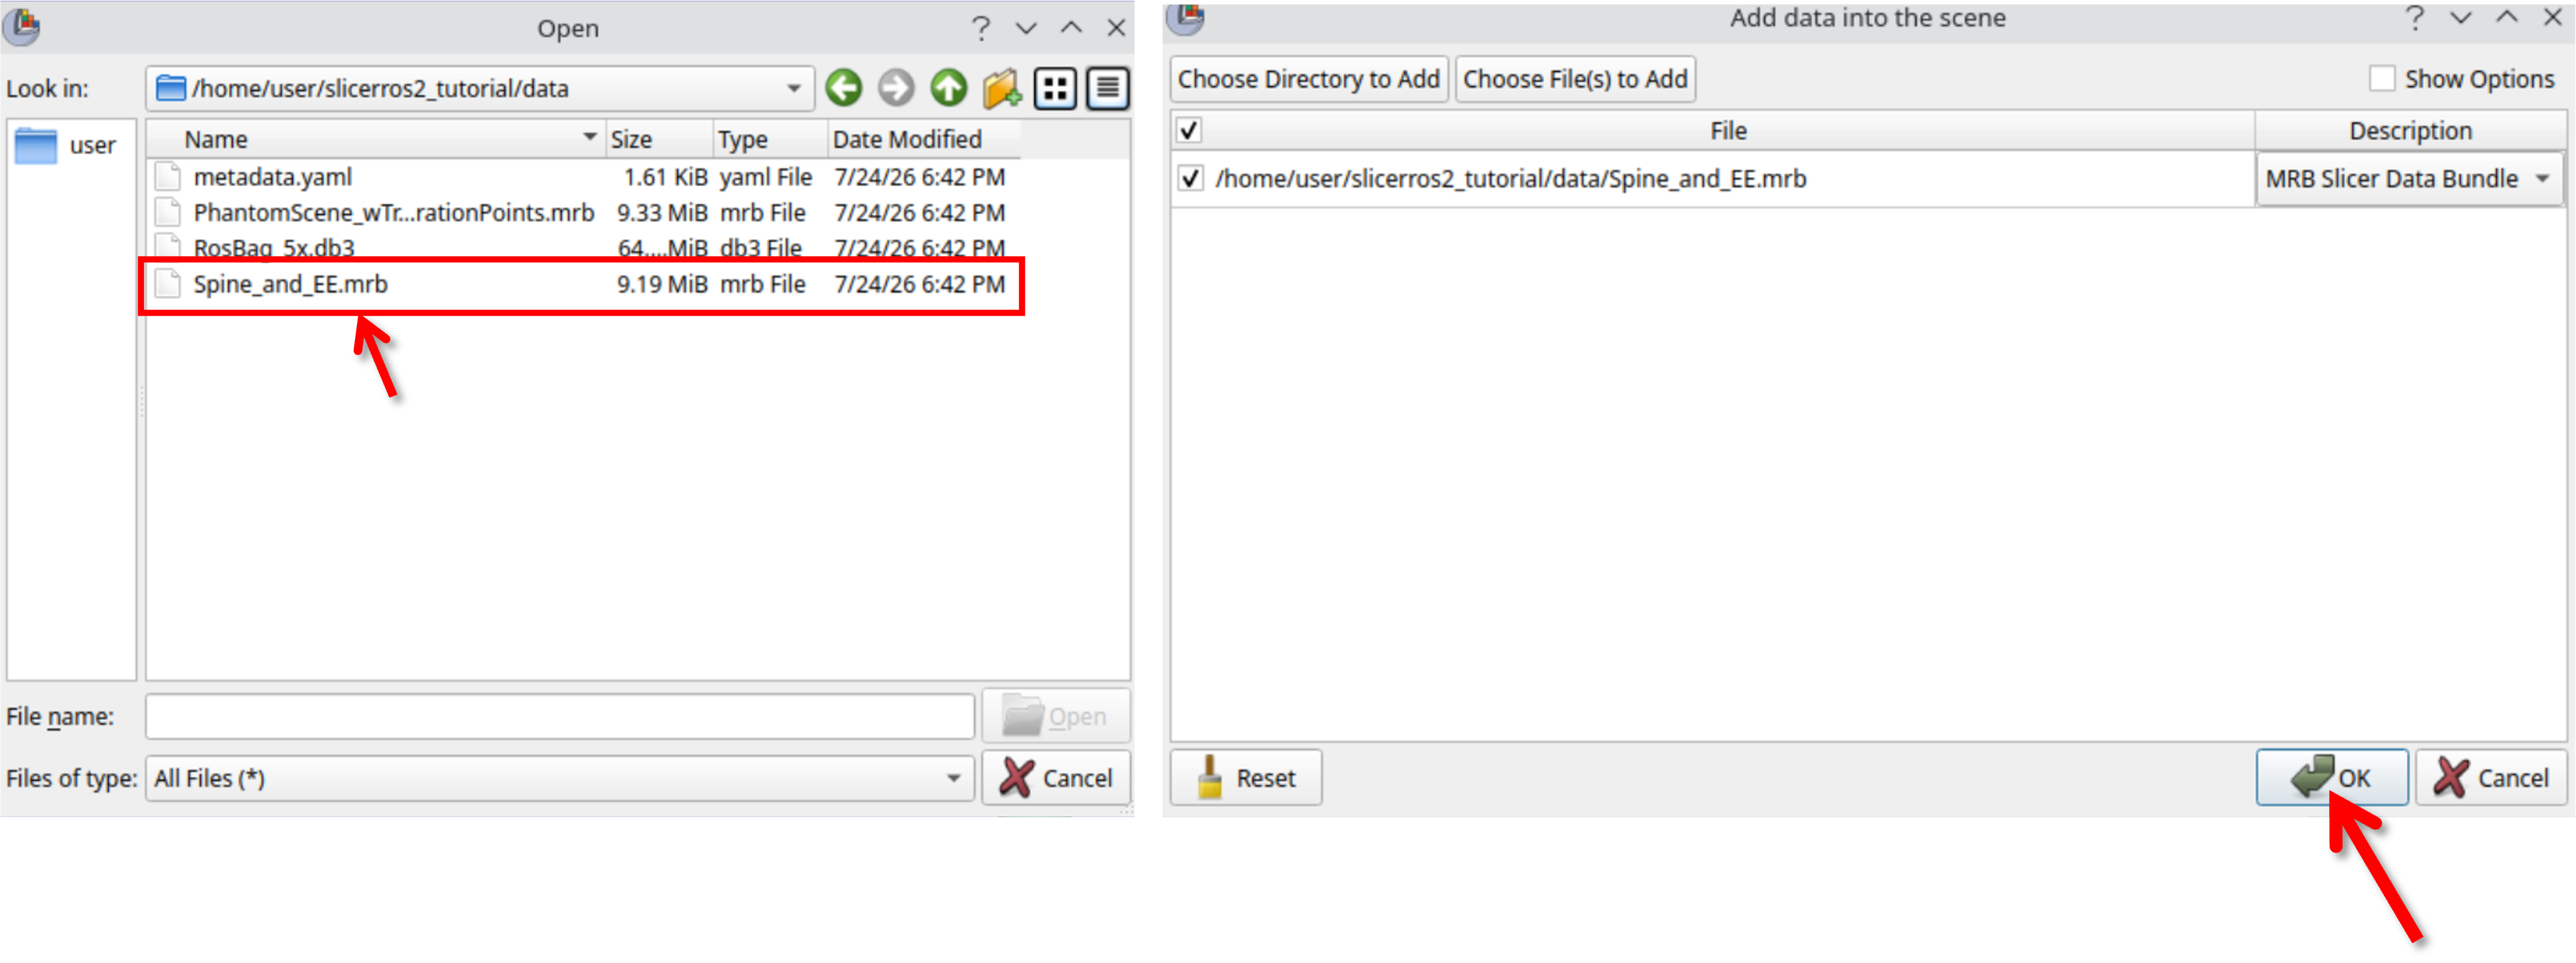
Navigate to the data folder inside the repository you just cloned (/home/user/slicerros2_tutorial/data) and select Spine_and_EE.mrb.
Step 72: Confirm the Load
The MRB bundle is listed in the Add Data dialog. Press OK to load it into the scene.
Step 73: Confirm the Data Appears
The spine model and the custom end-effector model are now loaded into the scene, though not yet attached to the robot.
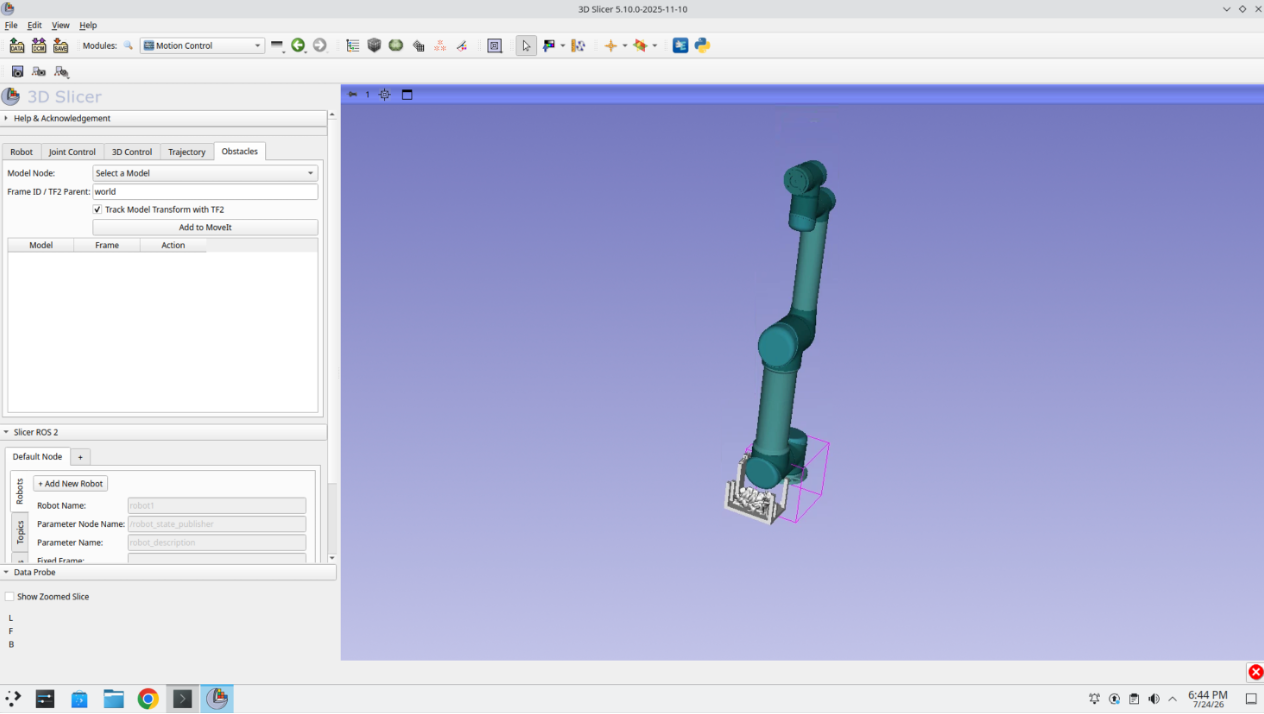
Step 74: Open the Data Module
Press Ctrl+F again and search for the Data module.
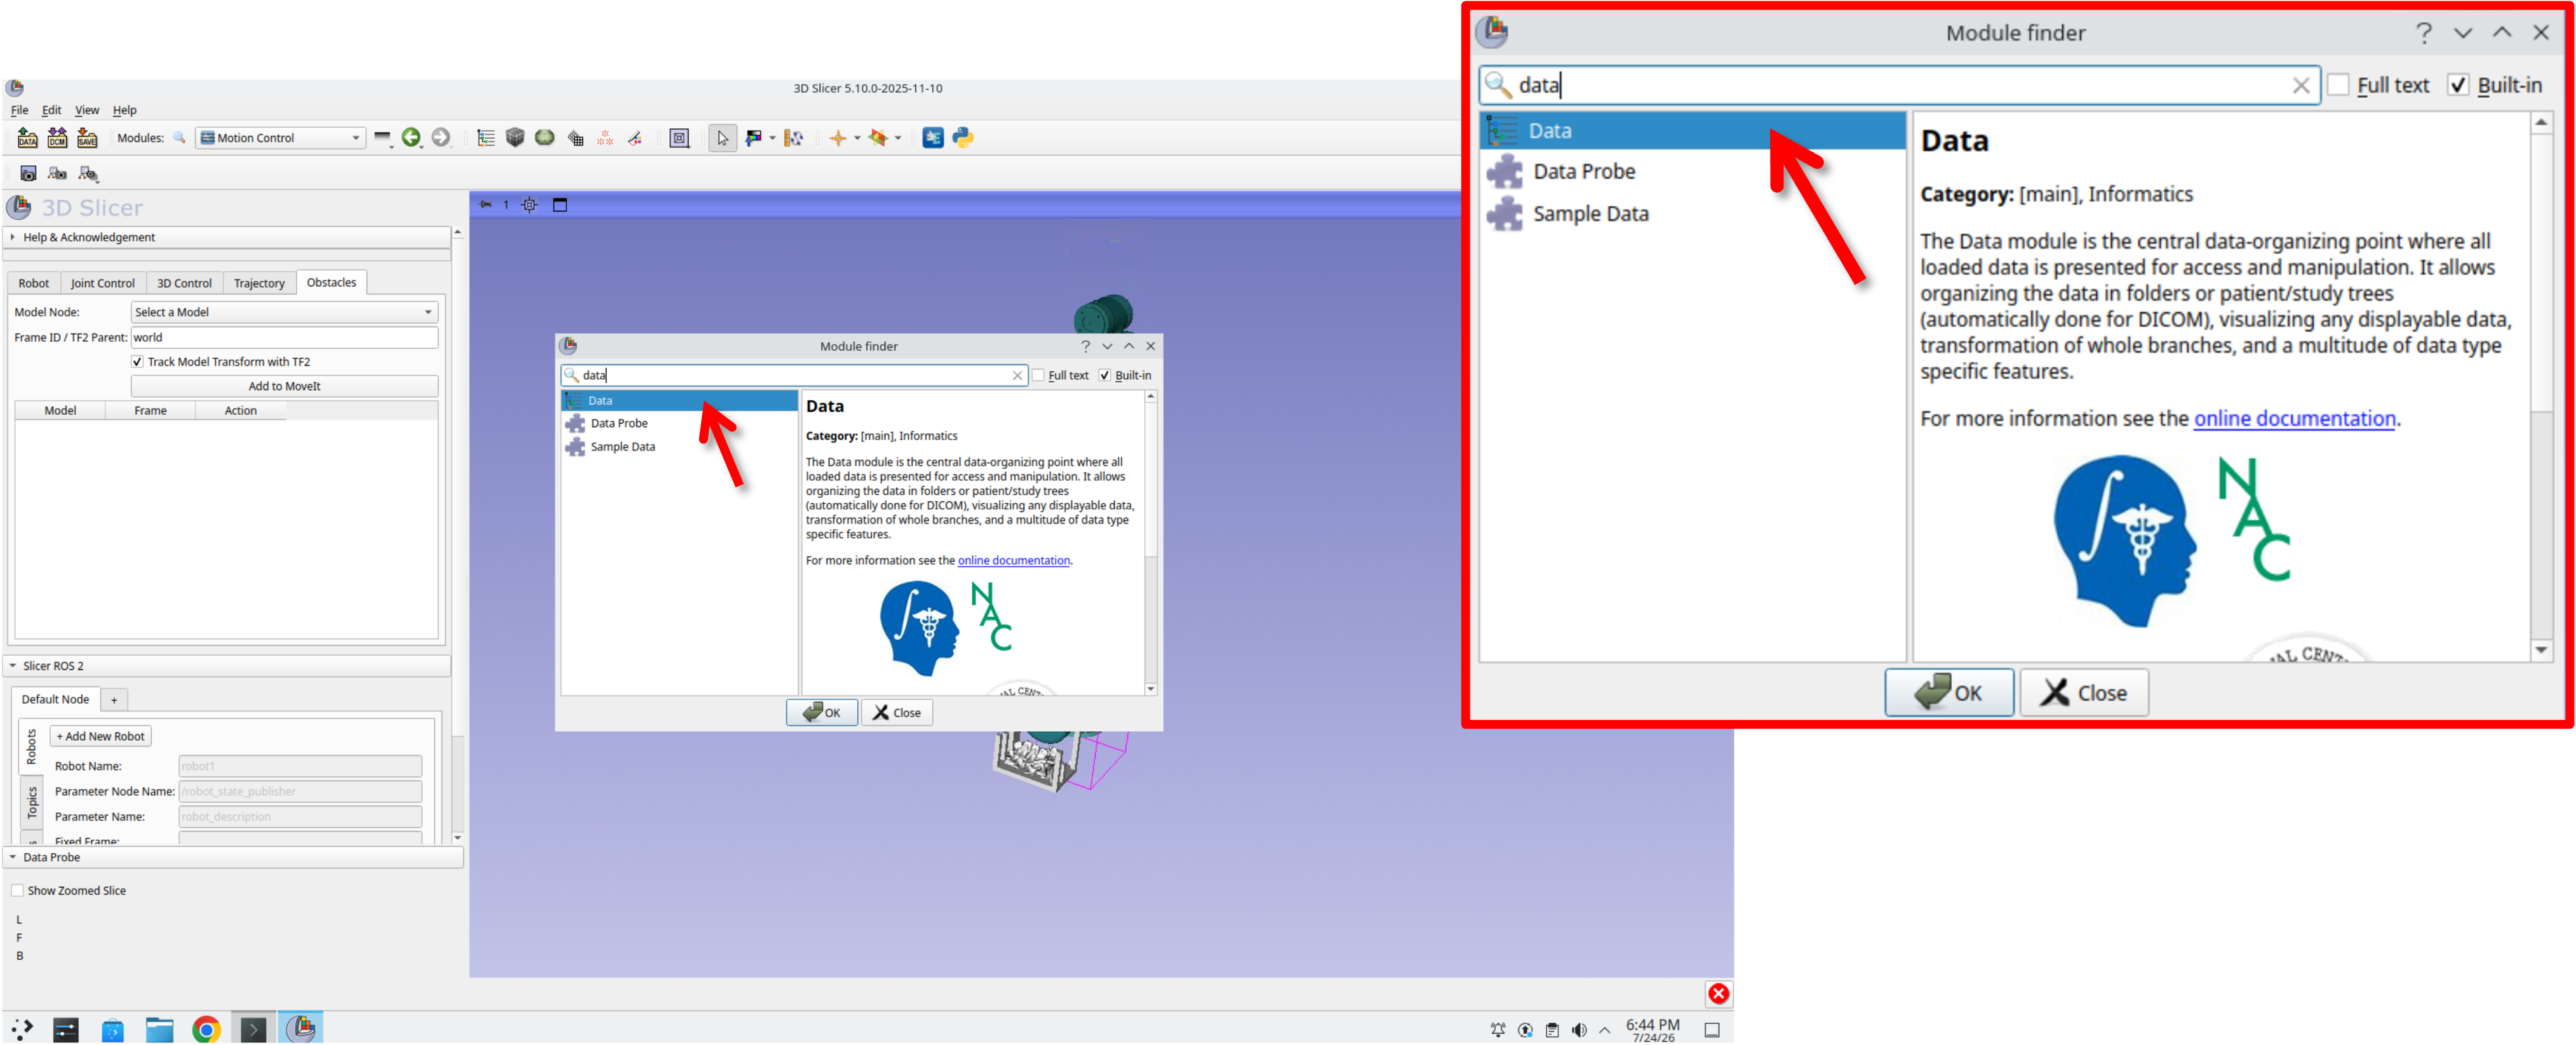
Step 75: Open the Transform Hierarchy Tab
In the Data module, press the Transform hierarchy tab.
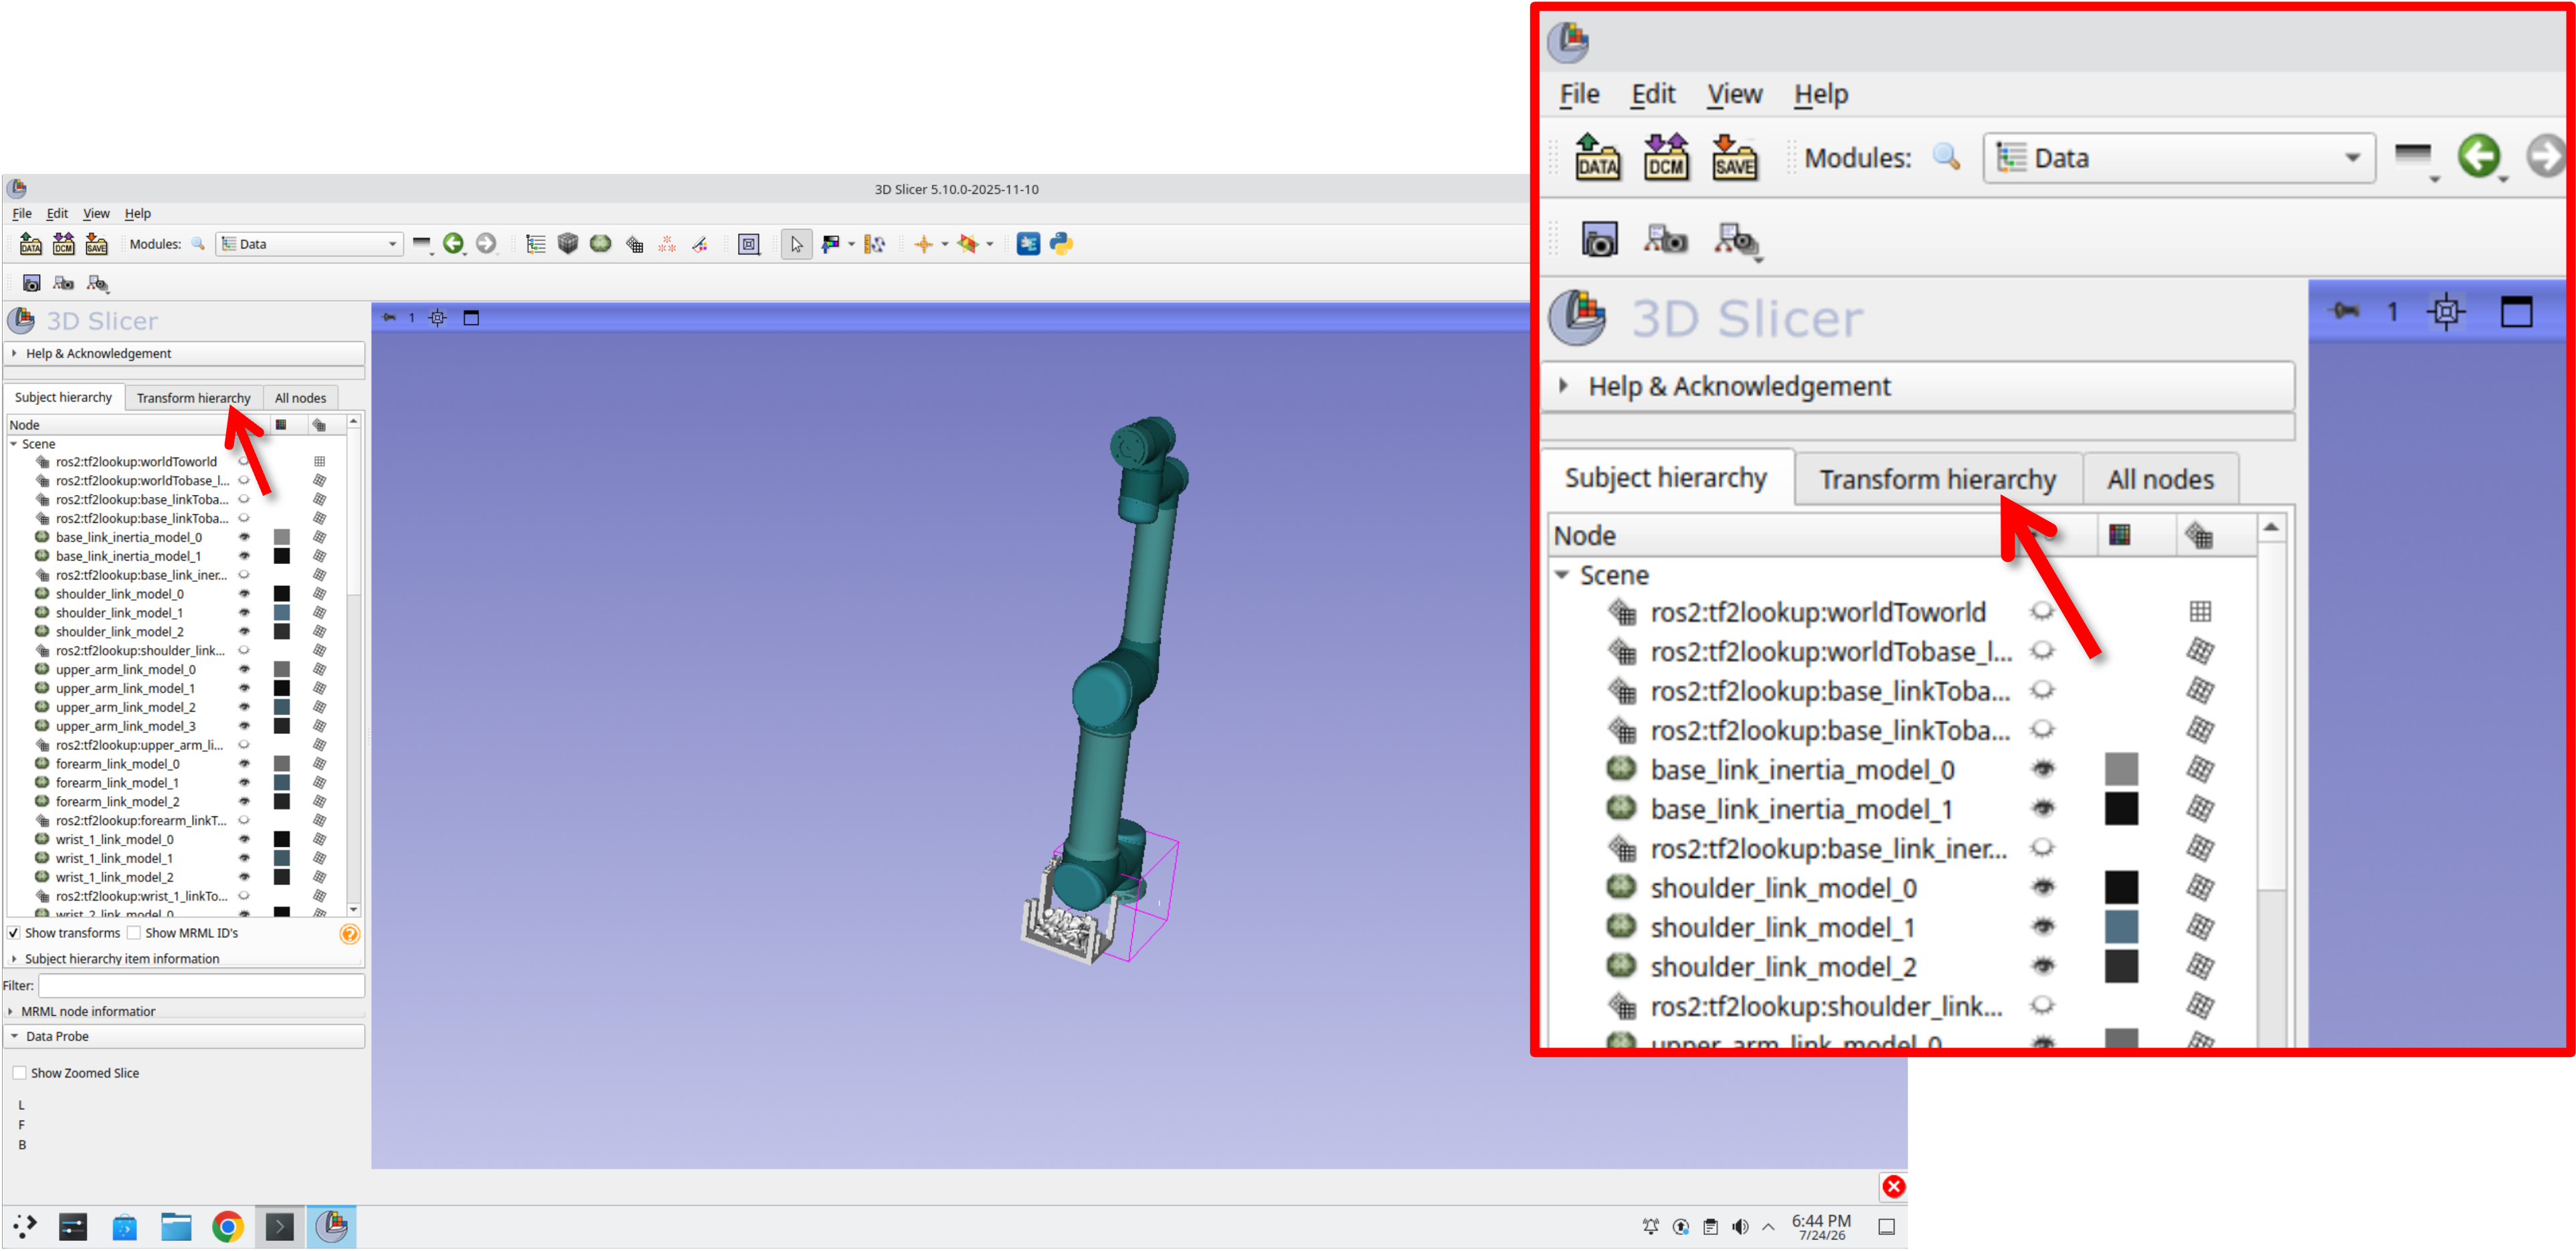
Step 76: Expand the Transform Trees
Expand the robot’s transform tree so you can see the individual link transforms, along with the loose spine and end-effector (Transform) nodes at the bottom of the list.
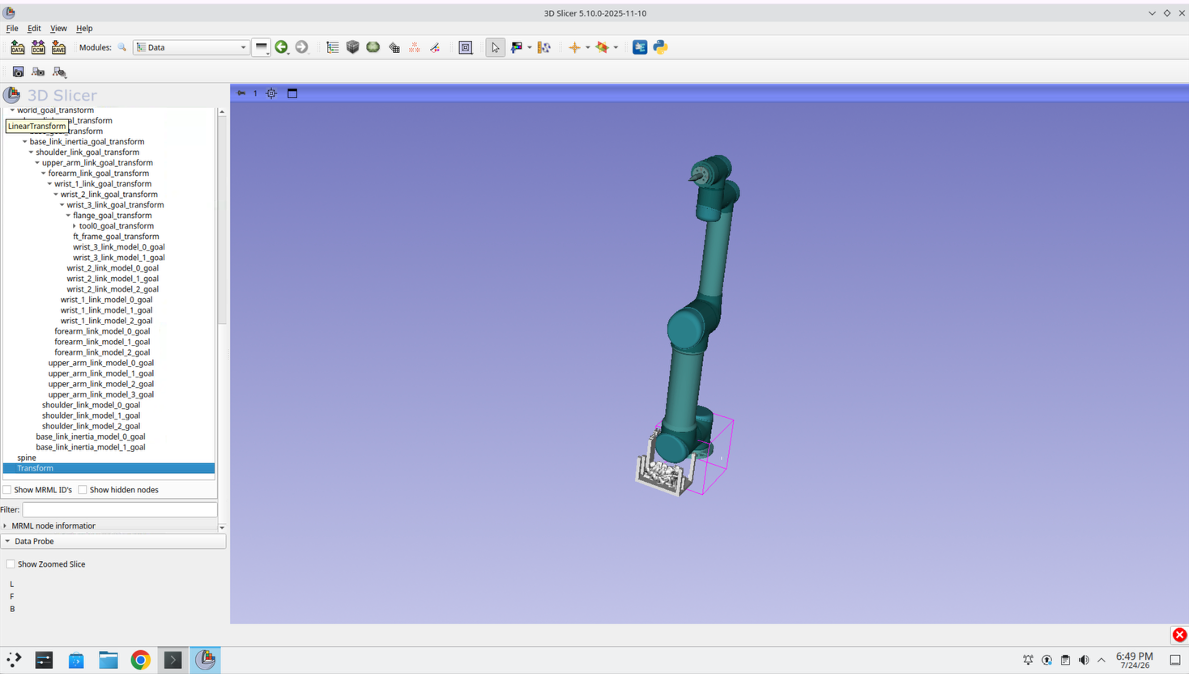
Step 77: Drag Each Model to Its Location
Drag the spine node onto the appropriate frame in the transform tree, and drag the end-effector transform onto the robot’s tool flange. Each model now moves and tracks with its assigned link.
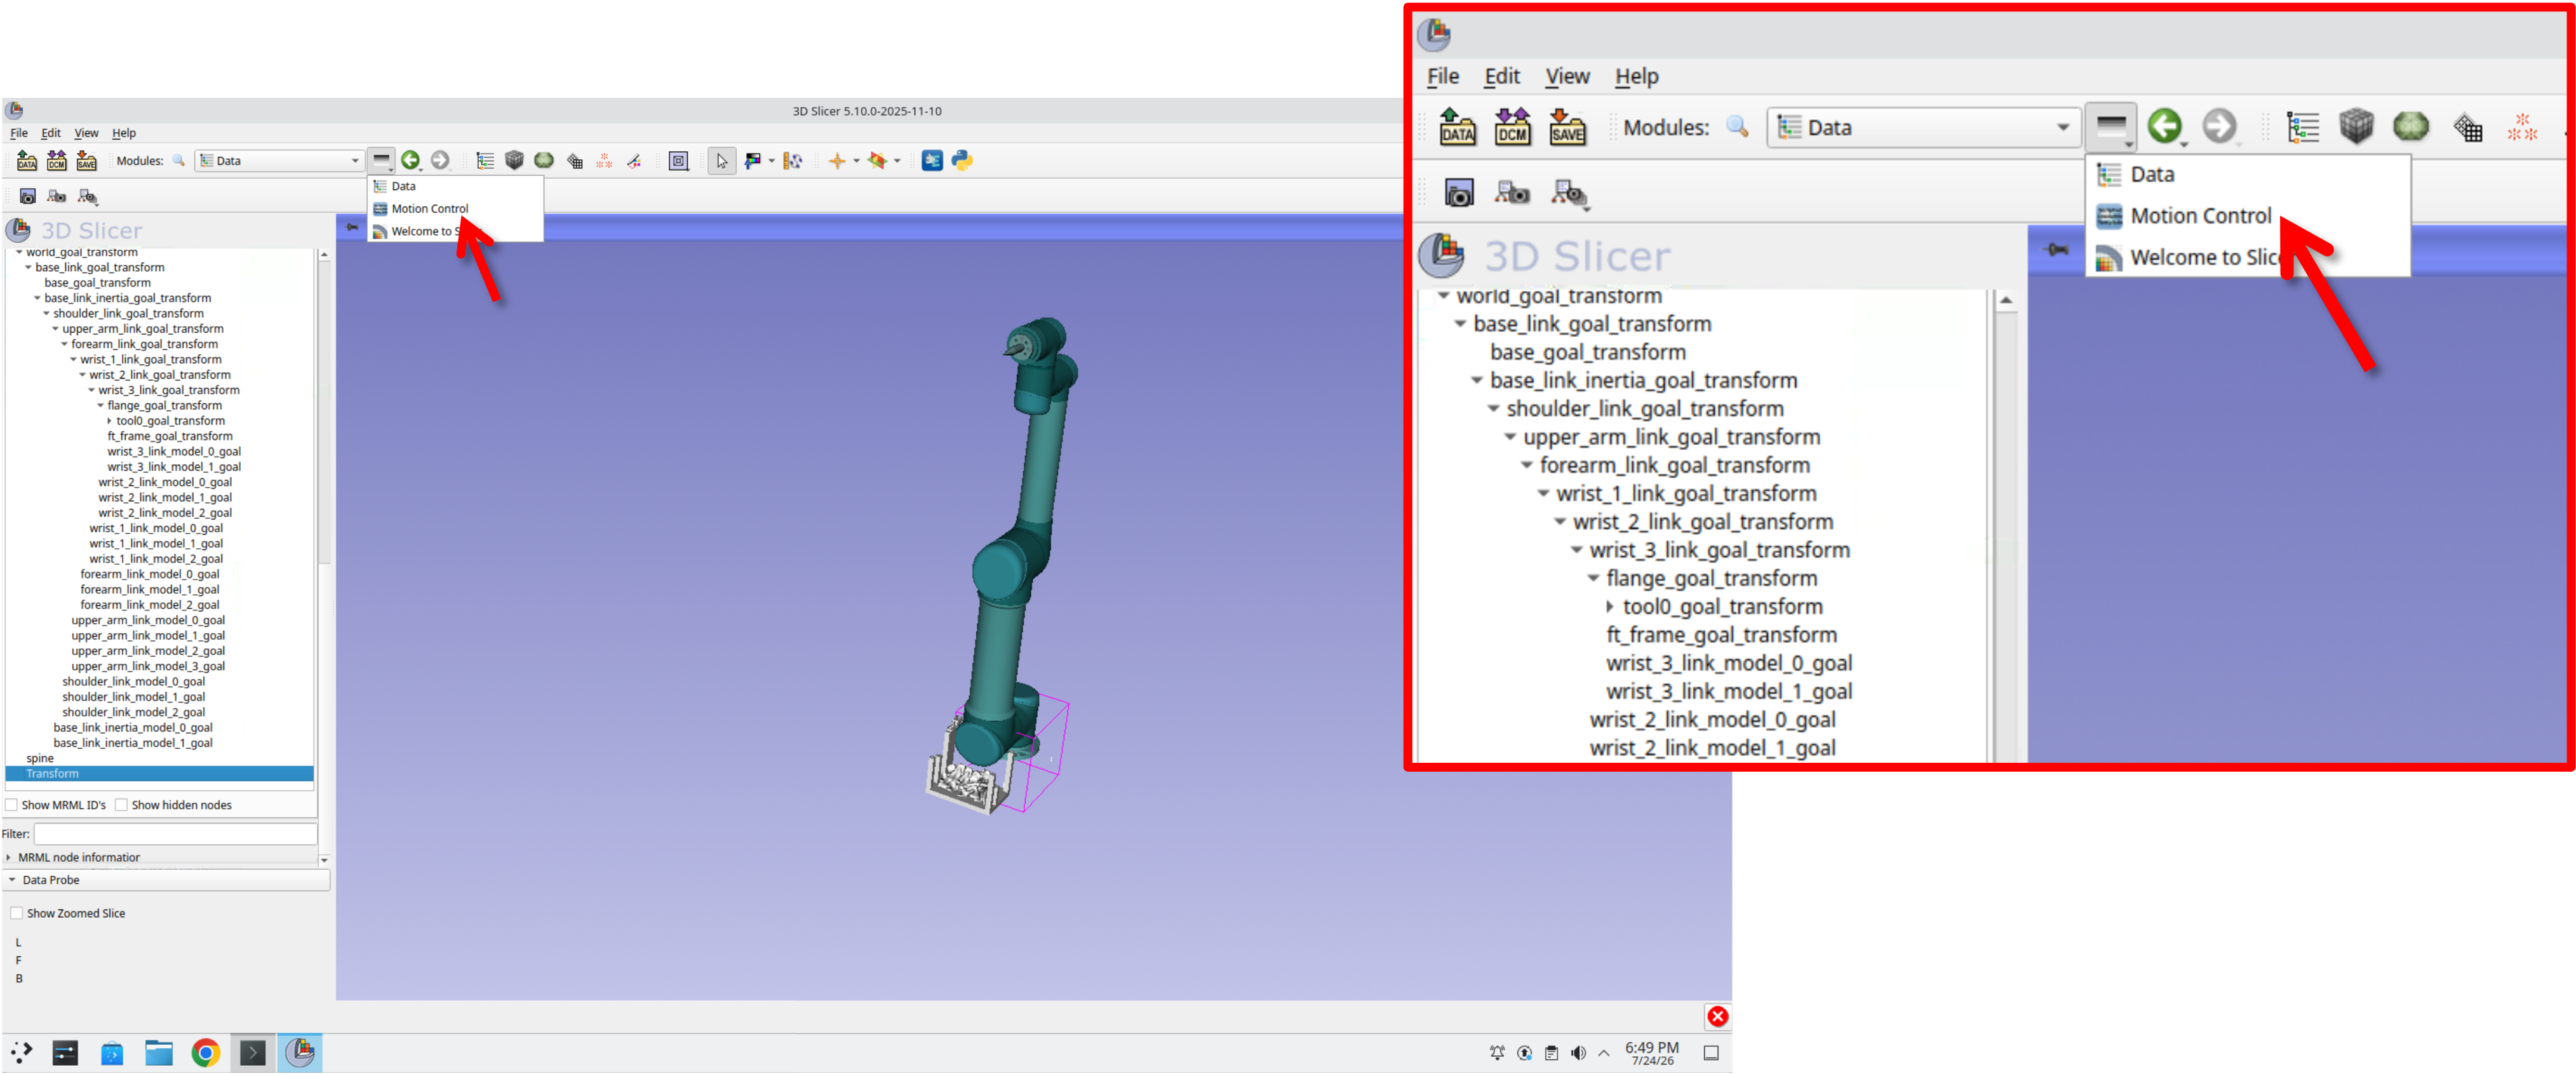
Step 78: Return to the Motion Control Module
Press the recent modules button in the toolbar and select Motion Control to switch back.
Part 10: Motion Planning Around Patient Models
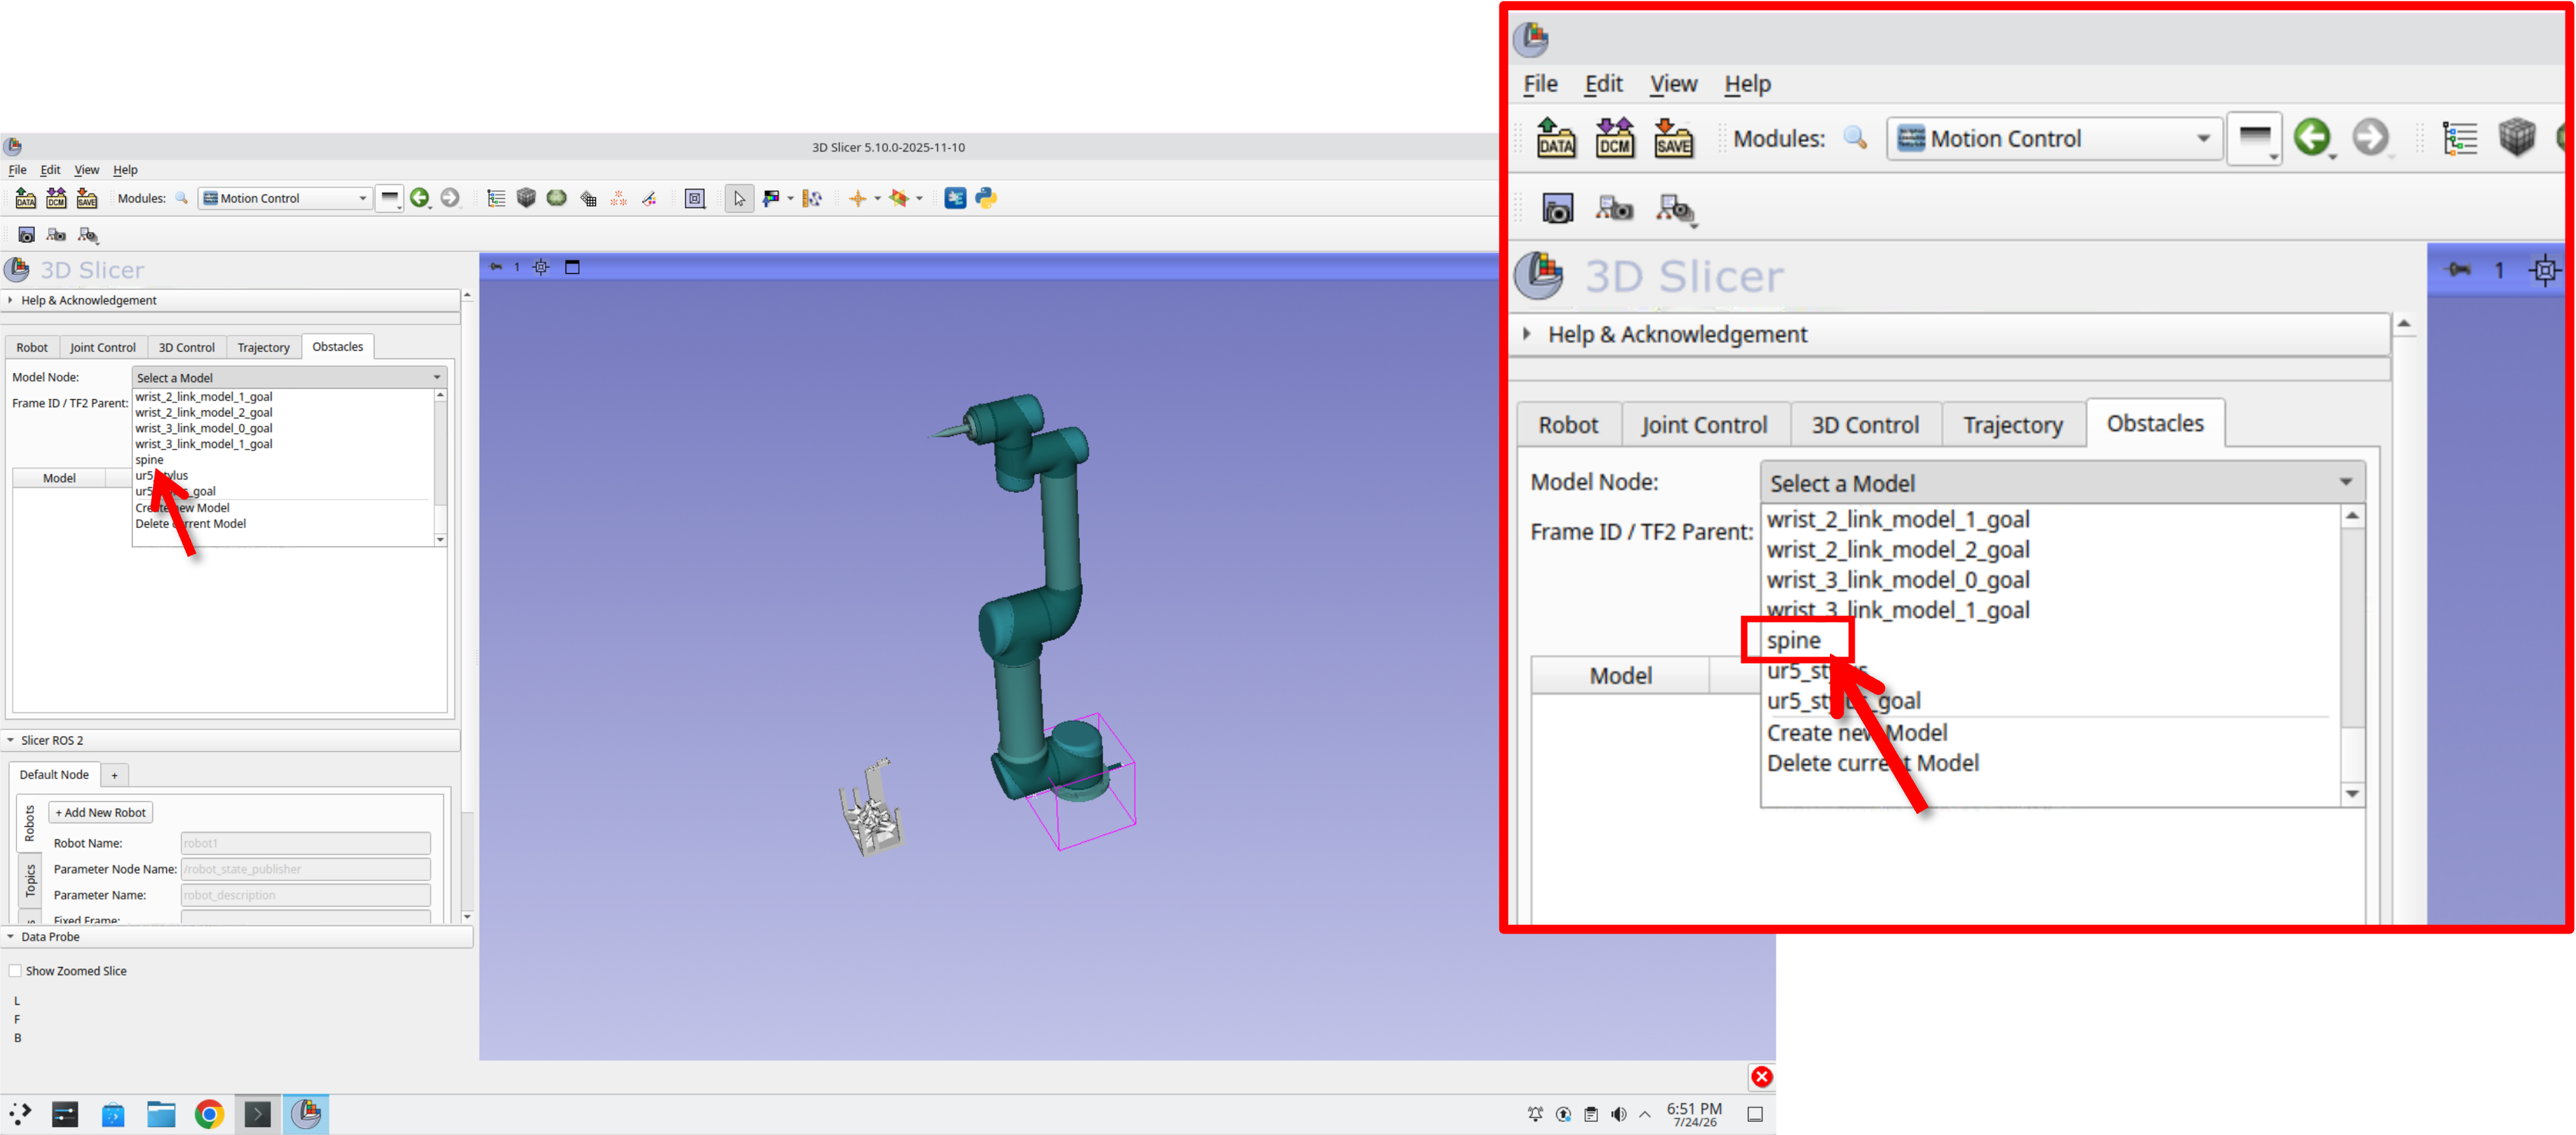
Step 79: Add the Spine as an Obstacle
Select the Obstacles tab, then choose spine from the Model Node dropdown.
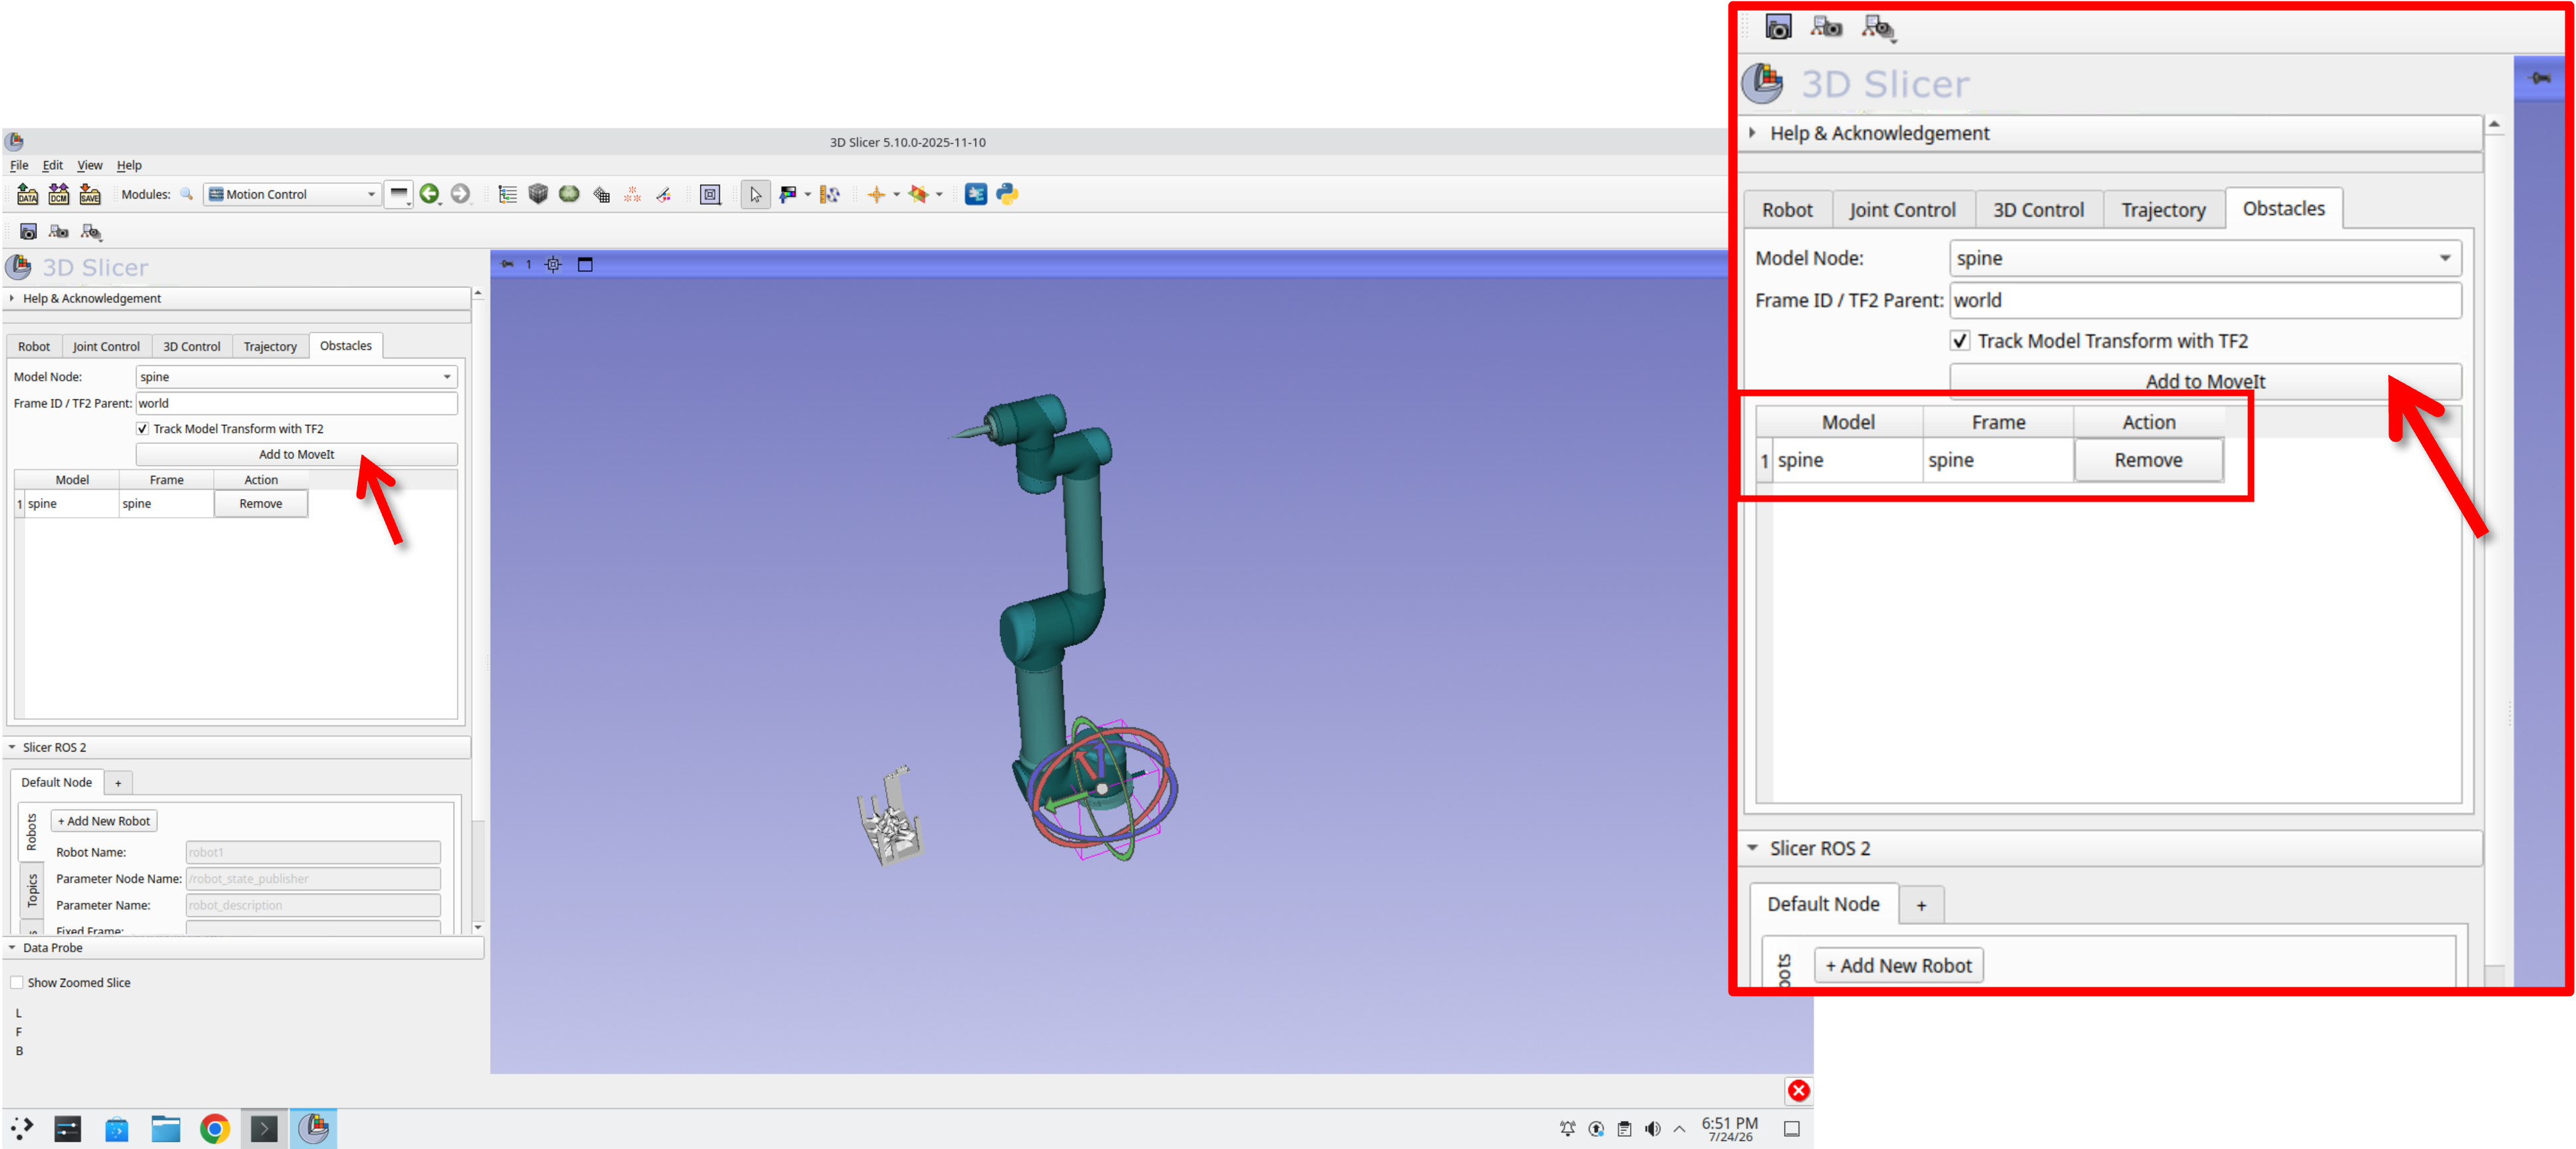
Step 80: Confirm the Obstacle Is Added
Press Add to MoveIt. The spine model now appears in the obstacle table, and MoveIt begins planning around it.
Step 81: Plan a Trajectory
With the spine registered as an obstacle, use the interactive handles to plan a trajectory that touches key points on the spine model while avoiding collisions.
Summary
In this session, you:
- Launched a simulated Universal Robot and connected it to 3D Slicer through SlicerROS2
- Loaded the robot into the Motion Control module and confirmed its controls
- Explored the Robot, Joint Control, 3D Control, Trajectory, and Obstacles tabs
- Loaded a patient spine model and a custom end-effector, and attached them to the robot’s transform tree
- Registered the spine model as an obstacle in MoveIt
- Planned a robot trajectory that touches key points on the patient anatomy while avoiding collisions